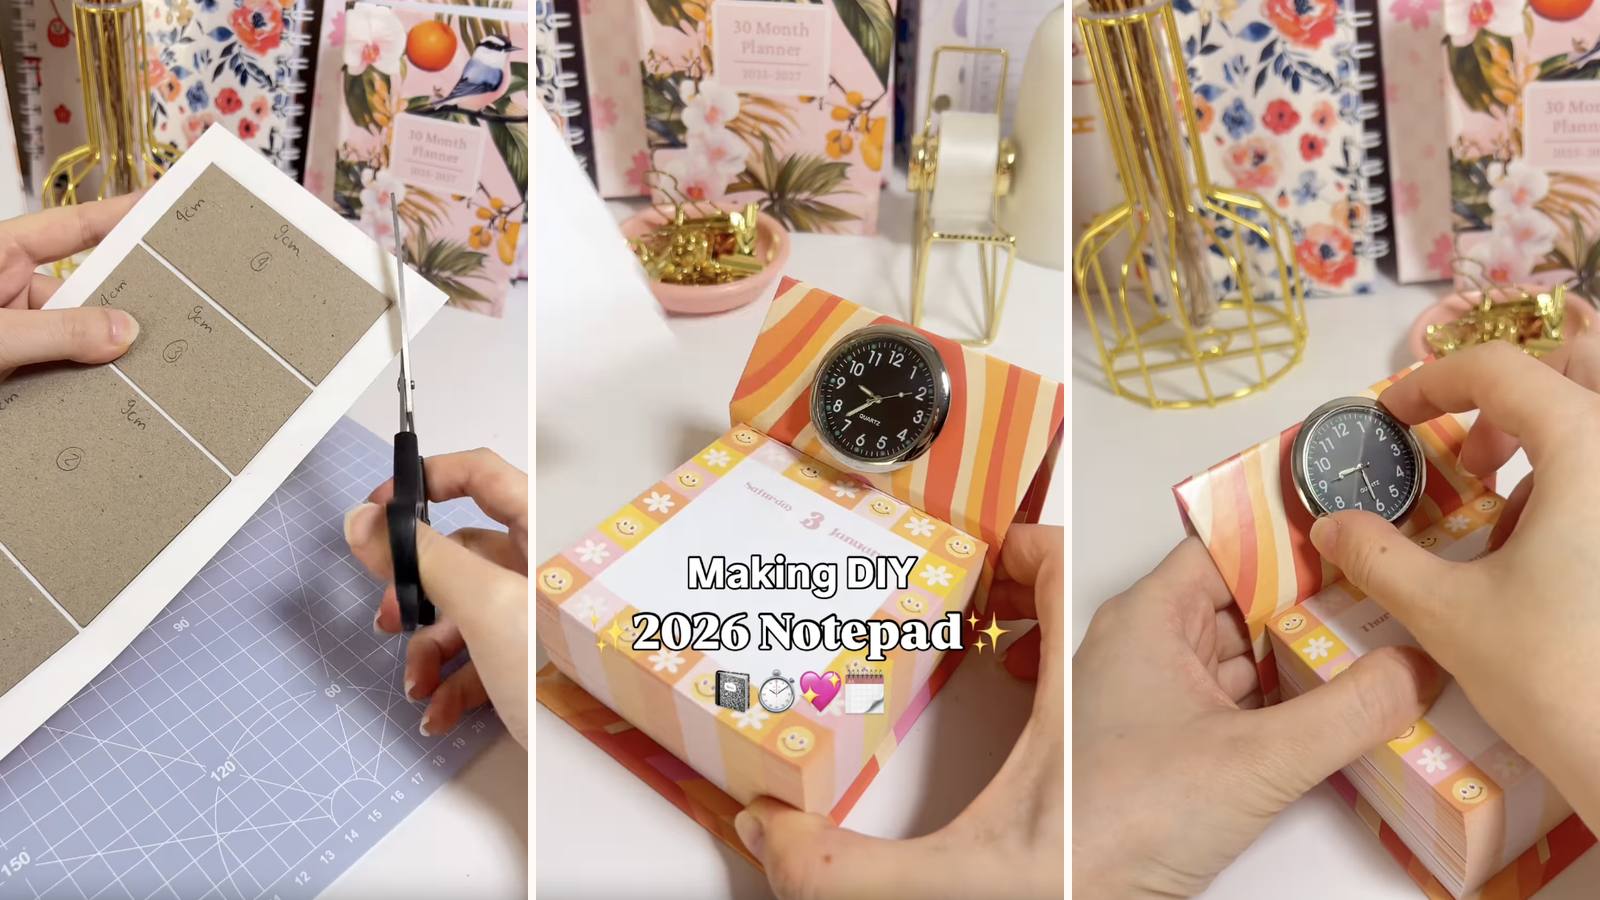
A glue-bound notepad inside a case made from four chipboard panels joined by nothing but the sticker paper between them. The gaps become hinges, so the whole cover folds around the pad and protects it in a bag. There's an optional small clock on the headboard, which is the kind of detail that makes people pick it up.
These tutorials use Planify Pro, a drag-and-drop tool for designing printable planners and stationery. Building and editing is free — exporting a PDF needs a plan, from $9.99/month.
Get the template
Open it in Planify Pro to change the size, colours or artwork before printing — or print it exactly as it is.
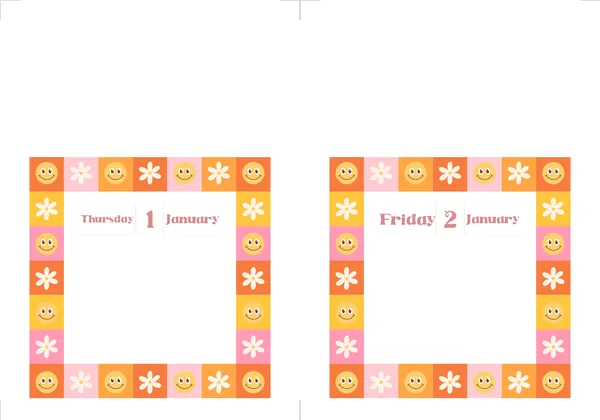
Export and print
Inserts: Save/Export → All Pages → Paper → A4 → Batch Generate PDF. With 183 pages in the template, batch generate is the setting that saves you doing this one page at a time.
Print on 80gsm paper at 100% from Adobe Acrobat Reader, and print the cover design on white glossy sticker paper.
What You'll Need
 Paper 80gsm Paper 80gsm |
 Chipboard Chipboard |
 Glossy Sticker Paper Glossy Sticker Paper |
 PVA Glue PVA Glue |
 Guillotine Paper Cutter Guillotine Paper Cutter |
 Binder Clips Binder Clips |
You'll also need double-sided tape, a book press (clips work too), and — if you want it — a small stick-on car clock for the headboard.
Instructions
1. Cut the pages to size. Guillotine, even batches. The pad's top edge is the one that gets glued, so that's the edge worth getting straight.  |
2. Press the stack. A book press holds it flatter than clips do, which matters on a stack this deep — any splay at the bottom becomes a wedge-shaped pad.  |
3. Glue the top edge and dry 15 minutes. Thin, even, worked into the edge rather than laid across it.  |
4. Cut four chipboard pieces. 1) 9 × 12 cm · 2) 9 × 7 cm · 3) 9 × 4 cm · 4) 9 × 4 cm. Different heights, same width — that's what lets the case fold around itself rather than just in half.  |
5. Print the cover on sticker paper. One sheet carries all four panels.  |
6. Lay the panels down with 2 mm gaps. Measure these — 2 mm is tight, and an uneven gap is a hinge that binds.  |
7. Cut off the excess sticker paper — and keep it. That offcut becomes the inside lining in step 9, so don't bin it.  |
8. Fold the sides in. Corners trimmed first, then each margin pressed down firmly.  |
9. Line the inside with the offcut. Position it so the leftover length extends past the fourth panel — that overhang becomes the flap that tucks the case closed.  |
10. Fold the extension over. This finishes the flap edge so there's no raw adhesive showing.  |
11. Score the cover. A firm line at each 2 mm gap. Four panels means three hinges, and each one needs scoring or the board will crease wherever it likes.  |
12. Fold it into shape. Work each hinge back and forth a few times, then fold the whole case up as shown to check it sits right before anything is stuck down.  |
13. Tape the back of the notepad. Double-sided tape across the whole back, so a page can be torn off without the pad lifting.  |
14. Mount the notepad on the cover. On the largest panel, clear of the hinges. Dry-fit and close the case once before you commit.  |
15. Peel the clock's backing. Optional, but it's the detail that gets noticed.  |
16. Stick it in the middle of the headboard. Centre it above the pad, where the glued edge is — that strip is otherwise wasted space.  |
Troubleshooting
The case won't fold closed. 2 mm gaps are tight for thick chipboard. Either use thinner board or widen the gaps slightly — and always dry-fold before peeling the sticker backing.
You've thrown away the offcut. Print a second cover sheet and use plain sticker paper for the lining. It only needs to be long enough to reach past the fourth panel.
The pad splays at the bottom. The stack wasn't held flat while gluing. A press beats clips on a deep stack.
The hinges crack after a few folds. Score lines too deep, or not scored at all. A firm line that compresses the board, not one that cuts it.
Selling these
The folding case is what makes this giftable rather than just useful. It closes, it protects, it looks considered — and none of that costs more than a bit more chipboard.
The clock is a genuinely good upsell trick: a cheap stick-on part that changes the product's category in a listing photo. Small additions like this raise the price you can ask far more than they raise the cost.
Undated versions sell all year. Save the dated cover for a seasonal run and keep a plain one in the shop permanently.
See DIY notepad design ideas and how to price bundles for more.
Try these next
- DIY ADHD Notepad — same cover method with magnets
- DIY Custom Notepad — the quick version, no cover
- DIY Folding Memo Notepad
- How to Make Notepads at Home
- Browse all DIY tutorials


