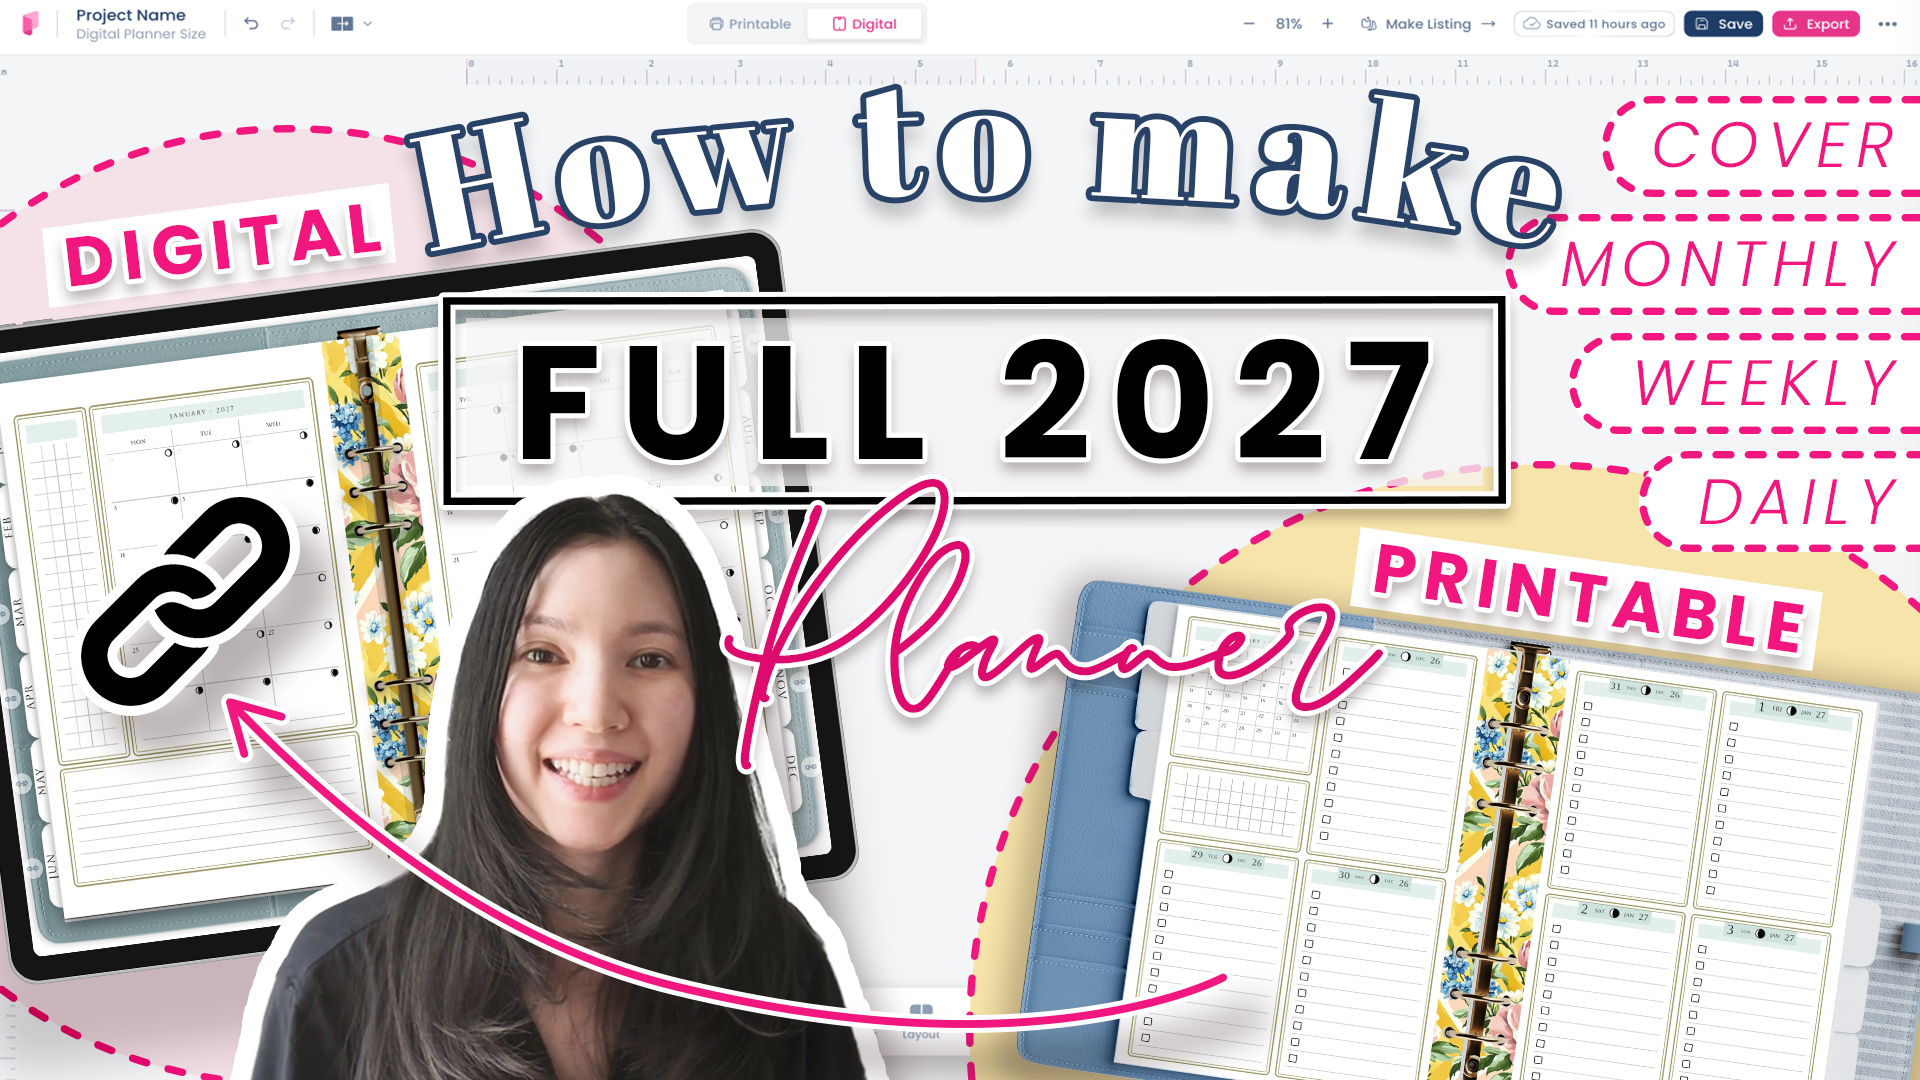
To make a 2027 planner you build four things — a cover, monthly spreads, weekly spreads and dated daily pages — then export the file, print it double-sided, trim it and bind it. The same file can also be converted into a hyperlinked digital planner in a few clicks, so you get both versions from one build.
Every date runs through 2027, and the printing settings are the exact ones that keep a 300-page planner in the right order.
Before you start: the interface has changed
If you've used Planify Pro before, the interface now looks different. Every button and function is still there — they've been reorganised so things are easier to find. Some menus that used to sit in a side panel now appear as a toolbar along the top. If a menu looks slightly different on your screen, the option is still there, just in a new place.
Step 1: Open a new project and set your size
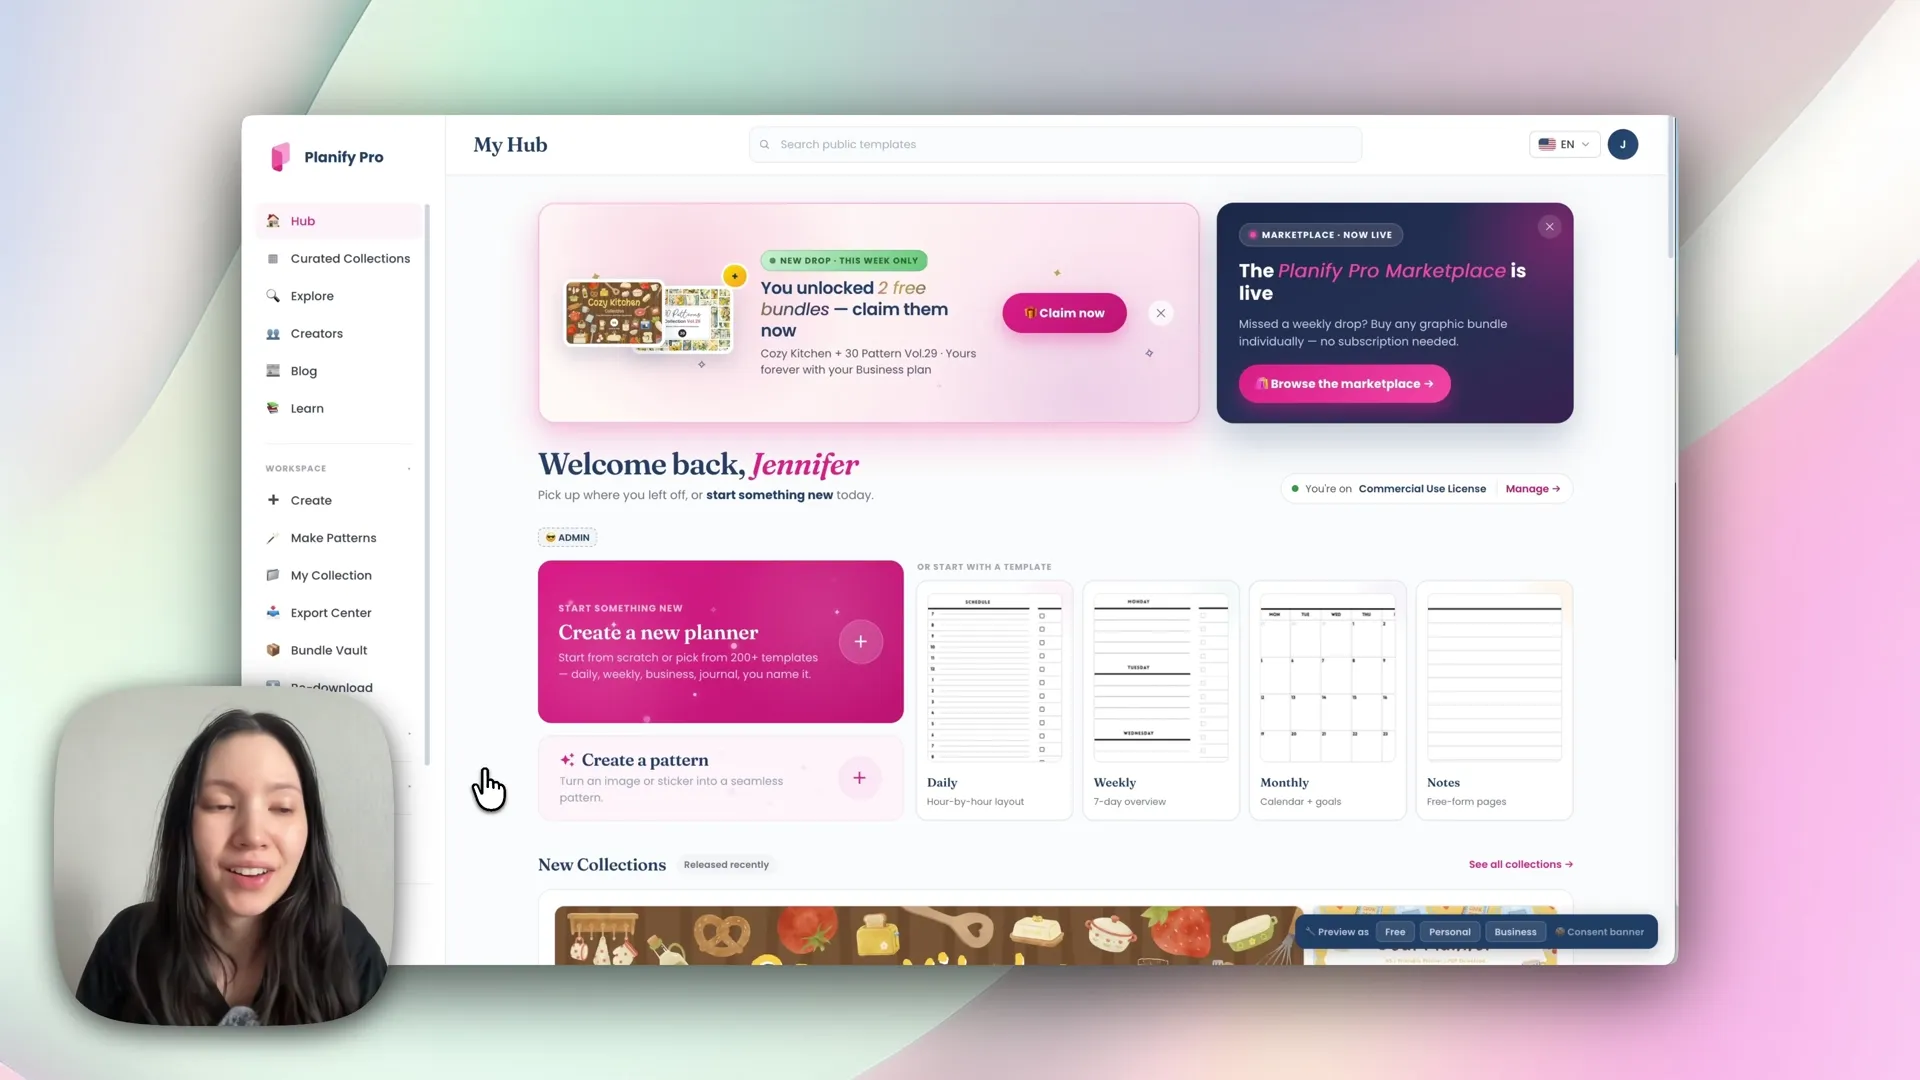
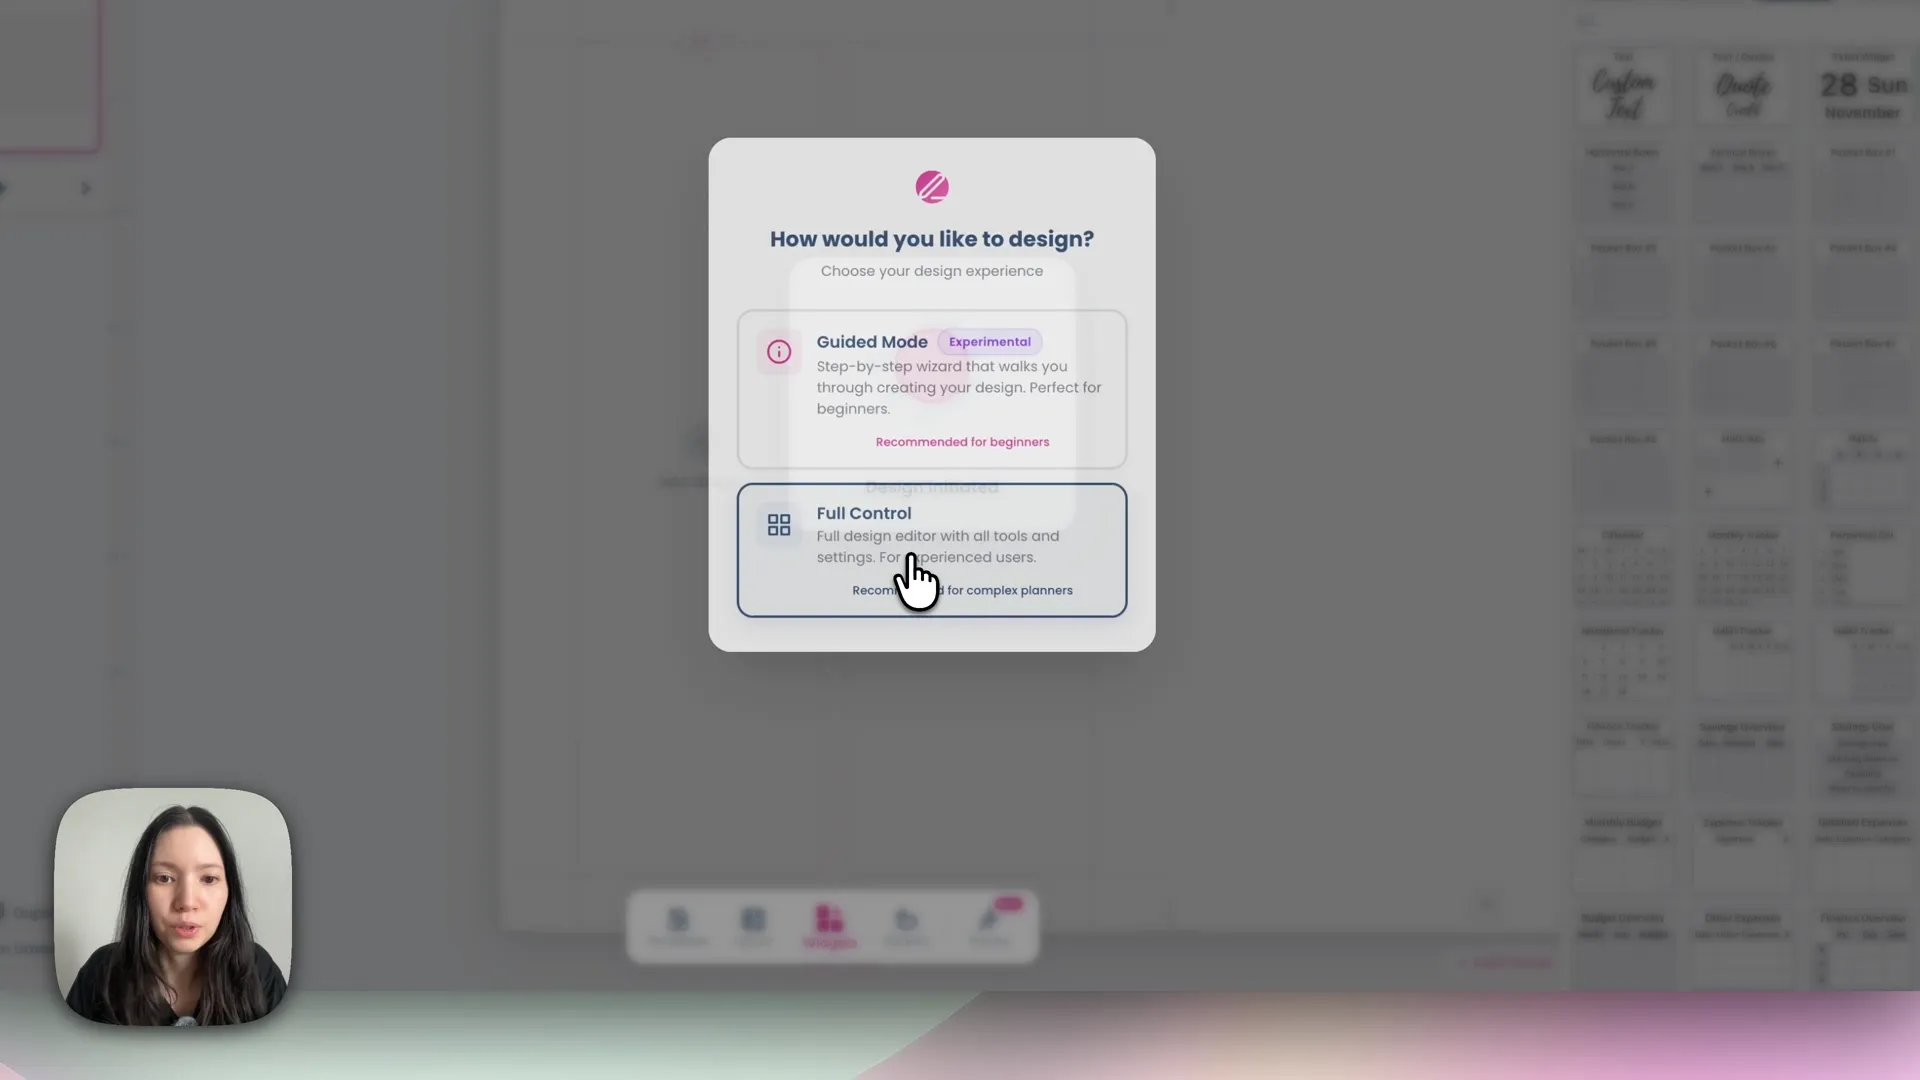
Open planifypro.com, click Create, then choose Full Control.
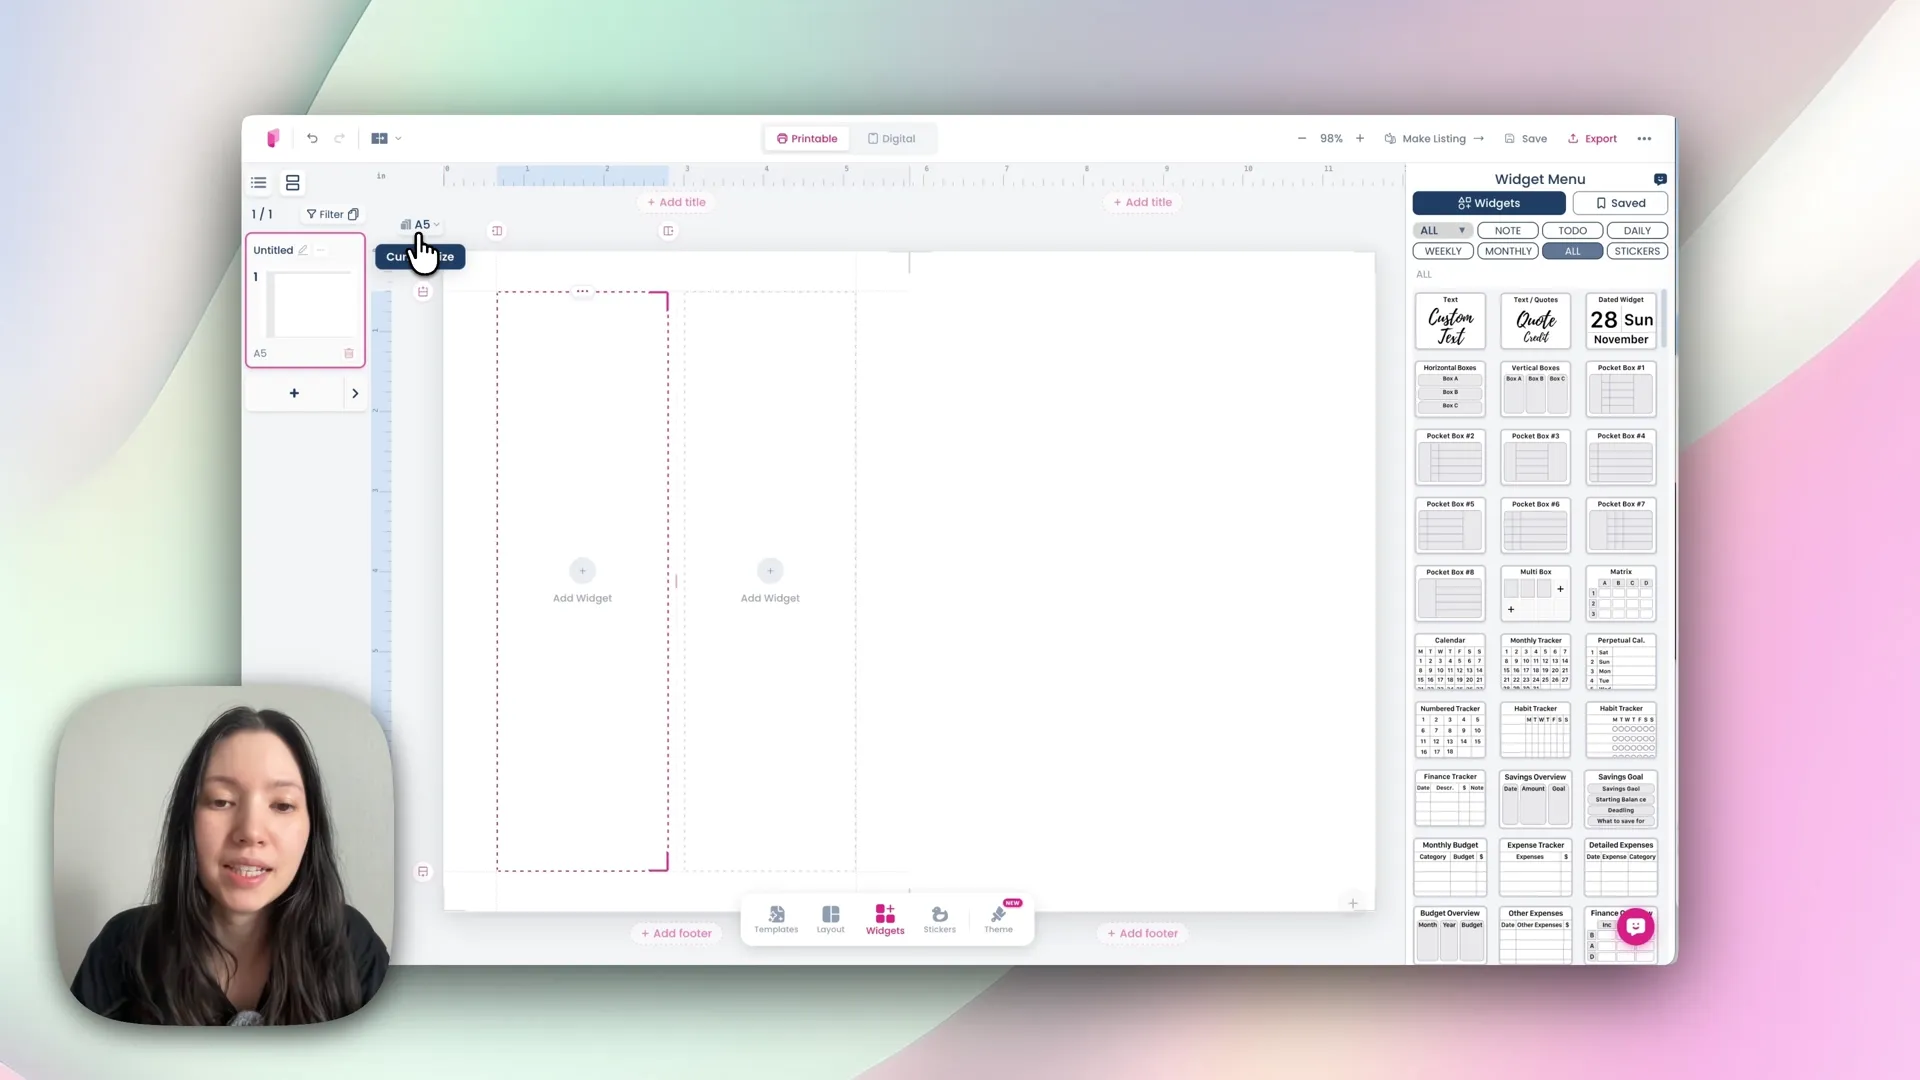
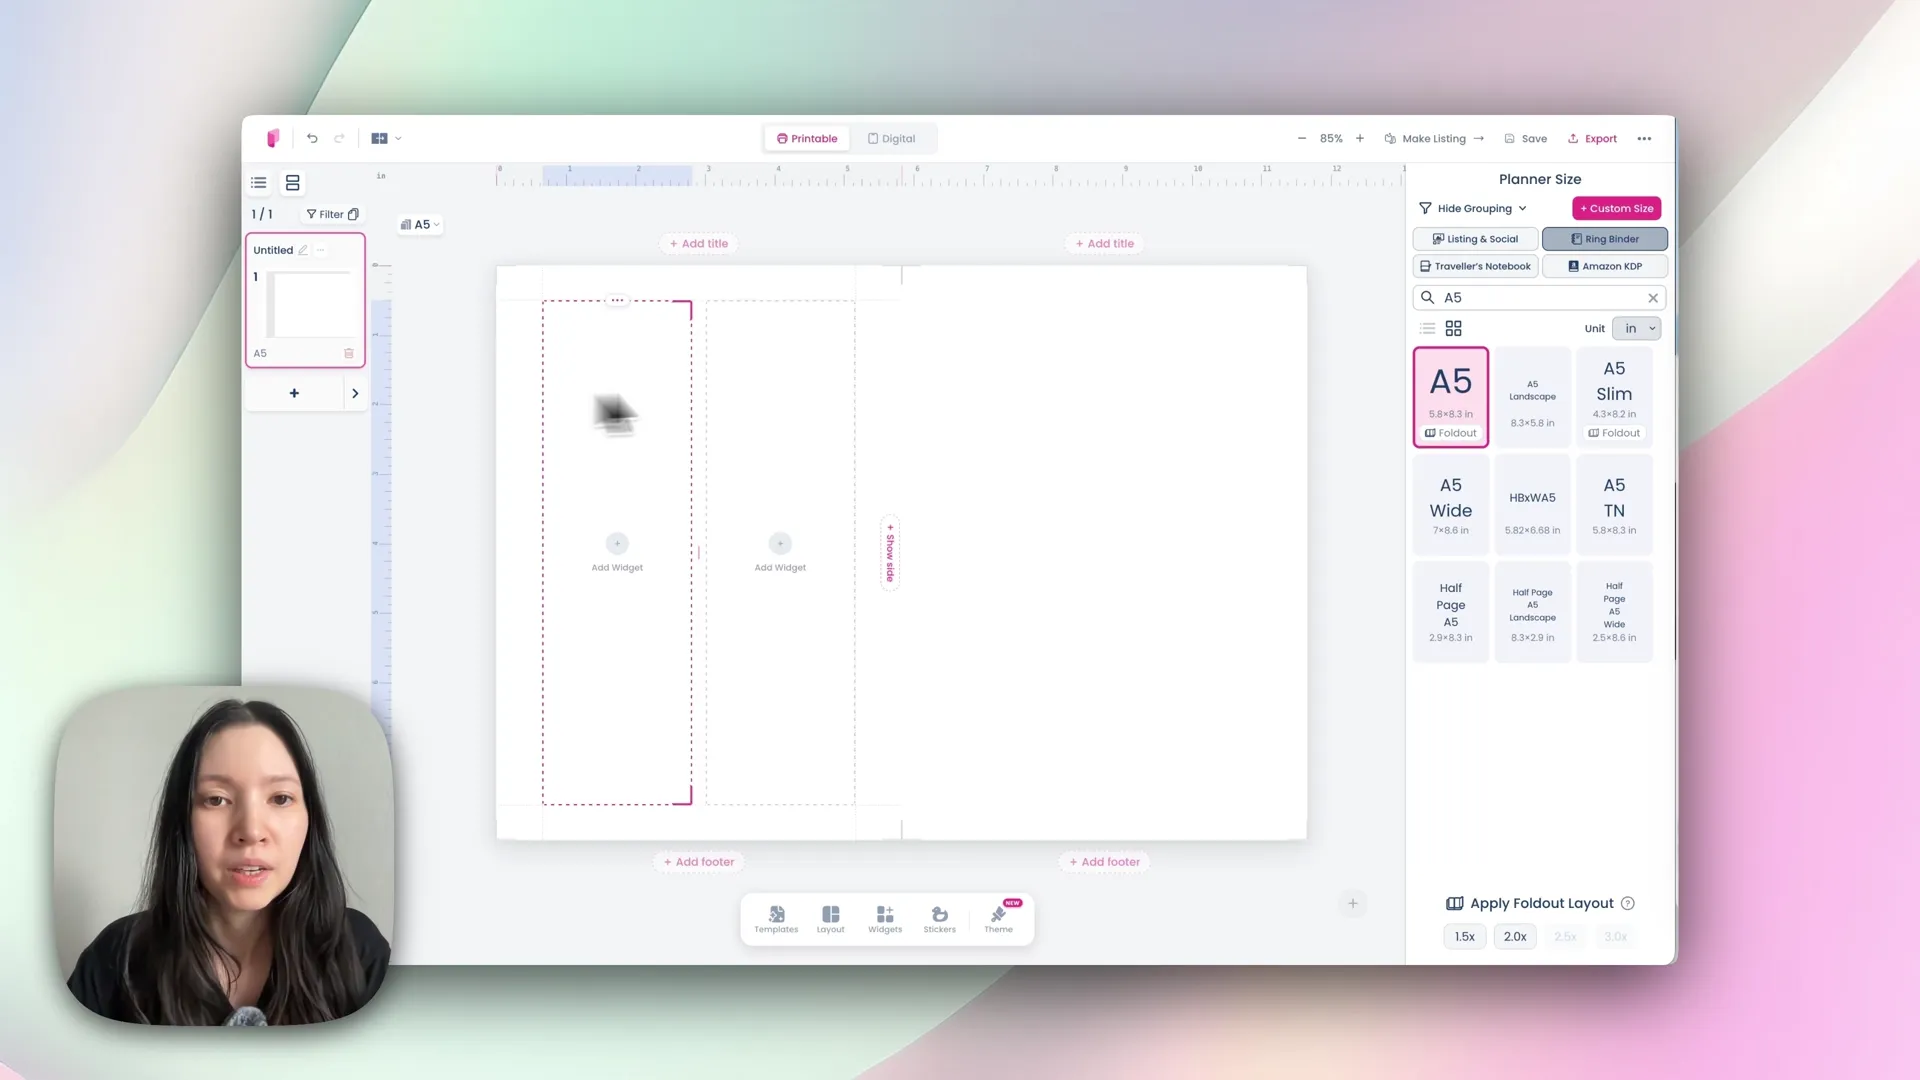
Your project opens in A5 by default. You can change this at any time with the size button — US Letter, A6 and personal size are all there. Pick one size now and stay with it; every page and the cover need to match for a clean finished planner.
You'll notice you're working on a left and a right page at the same time. That's deliberate — it's the same view you get when you open a finished planner flat, so you can see the whole spread as your reader will.
Step 2: Set your margins for binding
This is the step most people skip, and the one that ruins a planner.
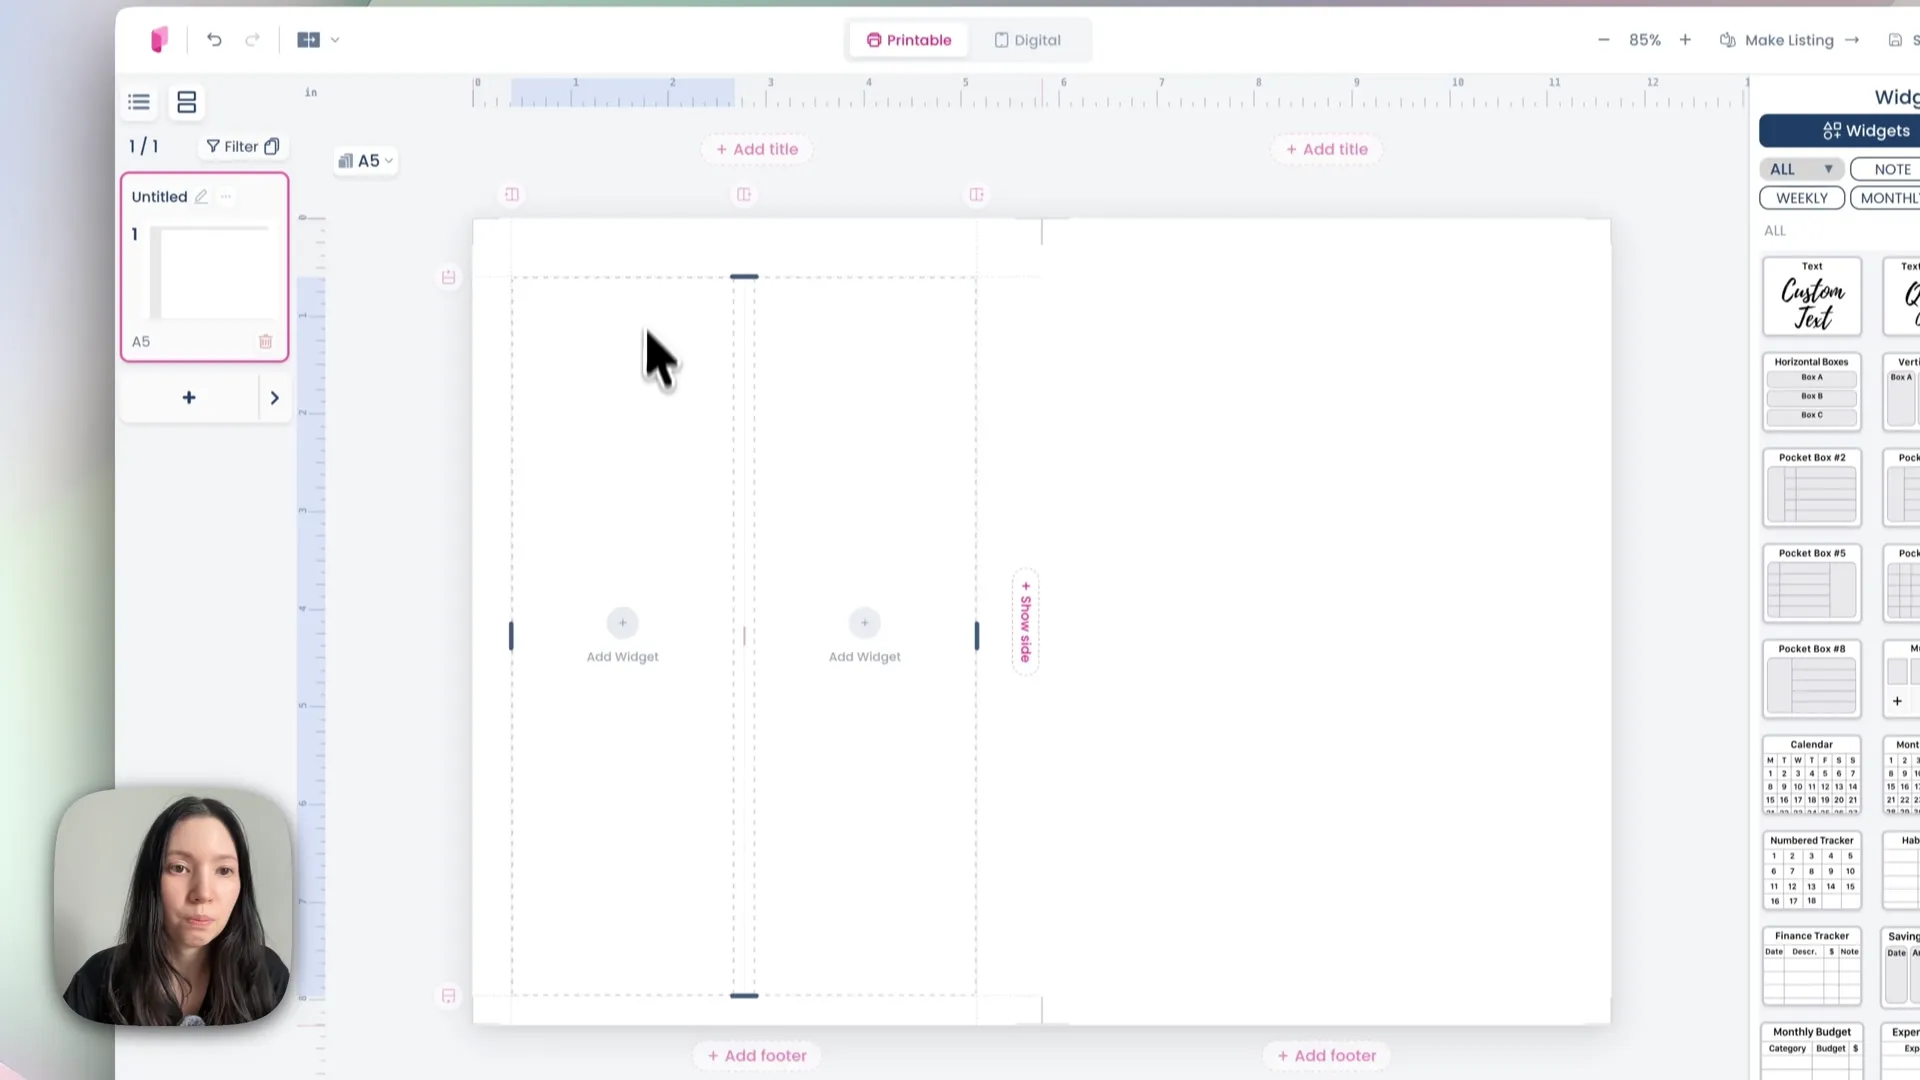
By default all four margins are equal. That's fine for a notepad. But if you're hole-punching pages into a binder, the rings eat into your text unless you leave extra room on the inside edge.
Recommended margins for a binder planner:
Inner margin: 0.5 inches — the edge that gets punched
Outer margin: 0.3 inches
Top and bottom: 0.3 inches
Drag the margin guides directly on the page and the measurement shows as you go, or set them numerically under Layout → Padding. Margins apply to the left and right pages automatically.
Step 3: Make the cover
The front cover sits on the right, the back cover on the left — same as a real book.
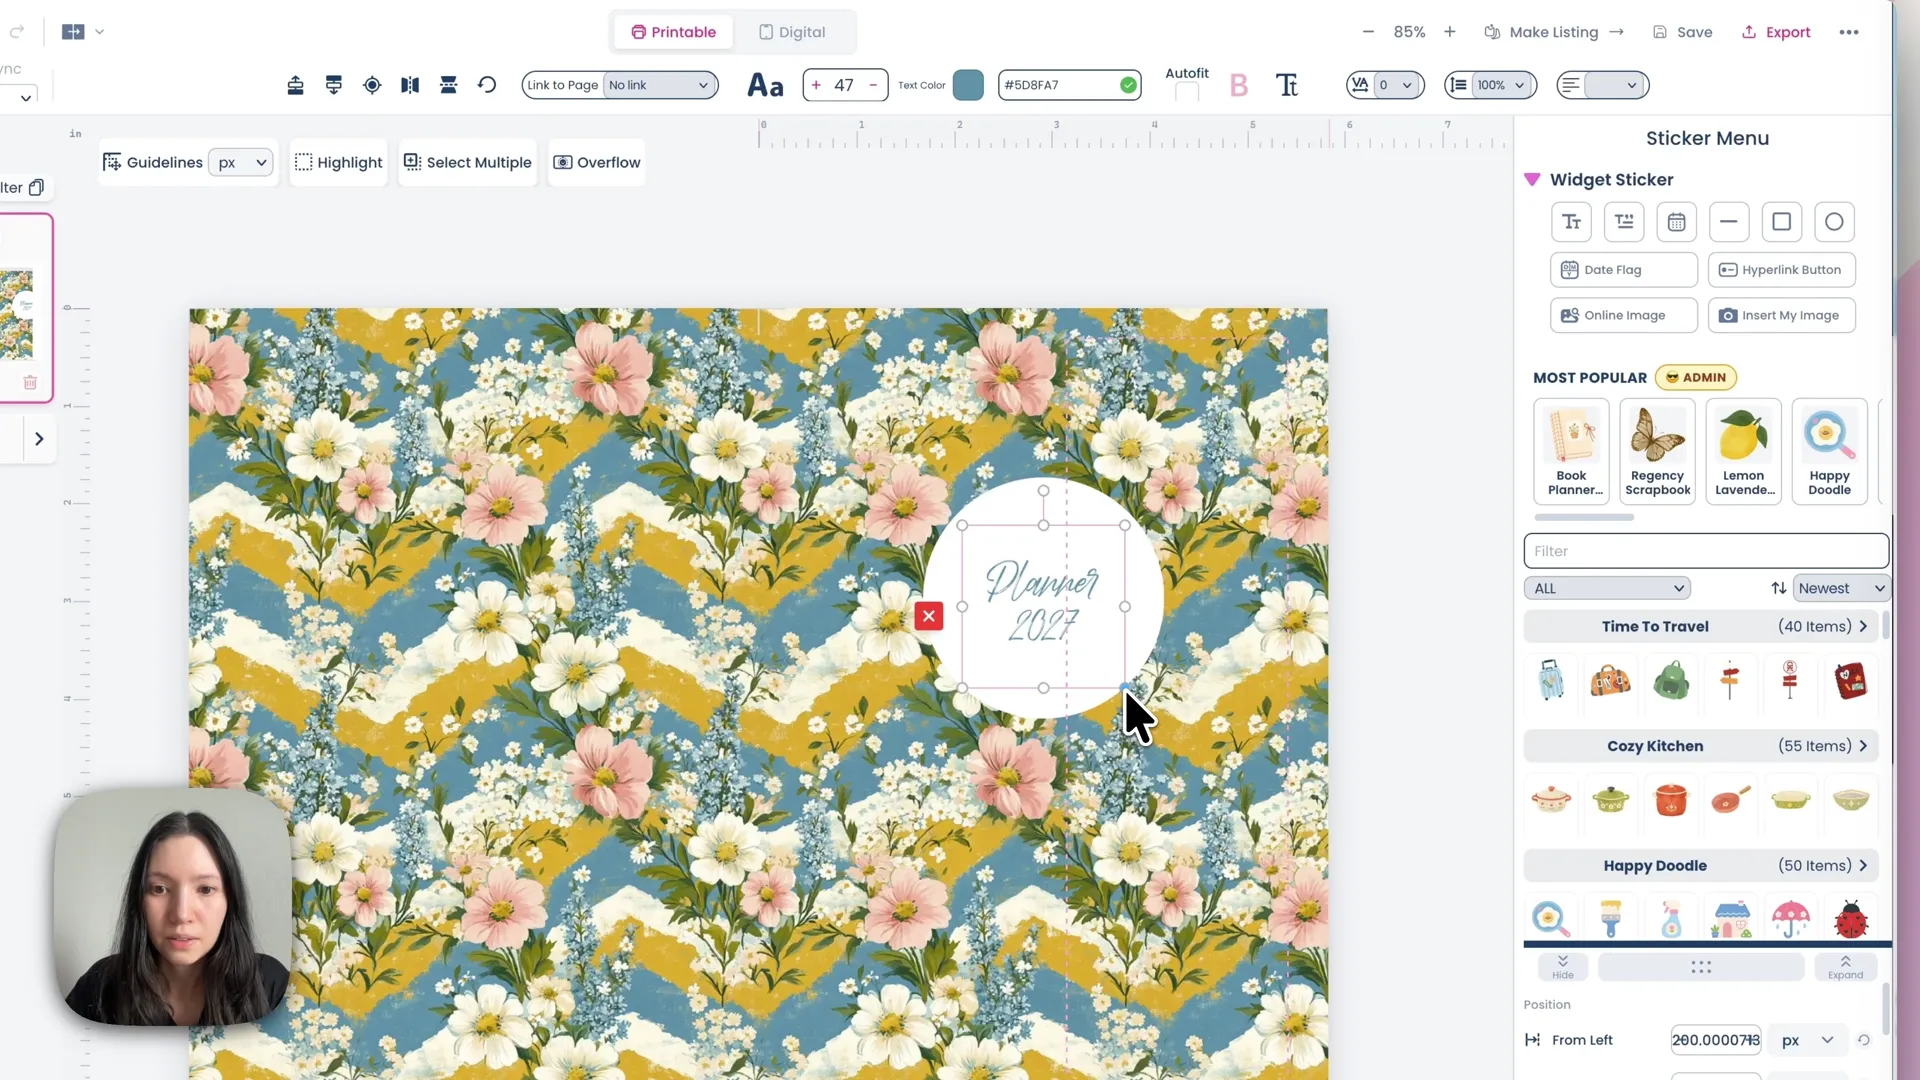
The quickest route is a pattern. Hover the Theme button, open the Pattern menu, and pick one.
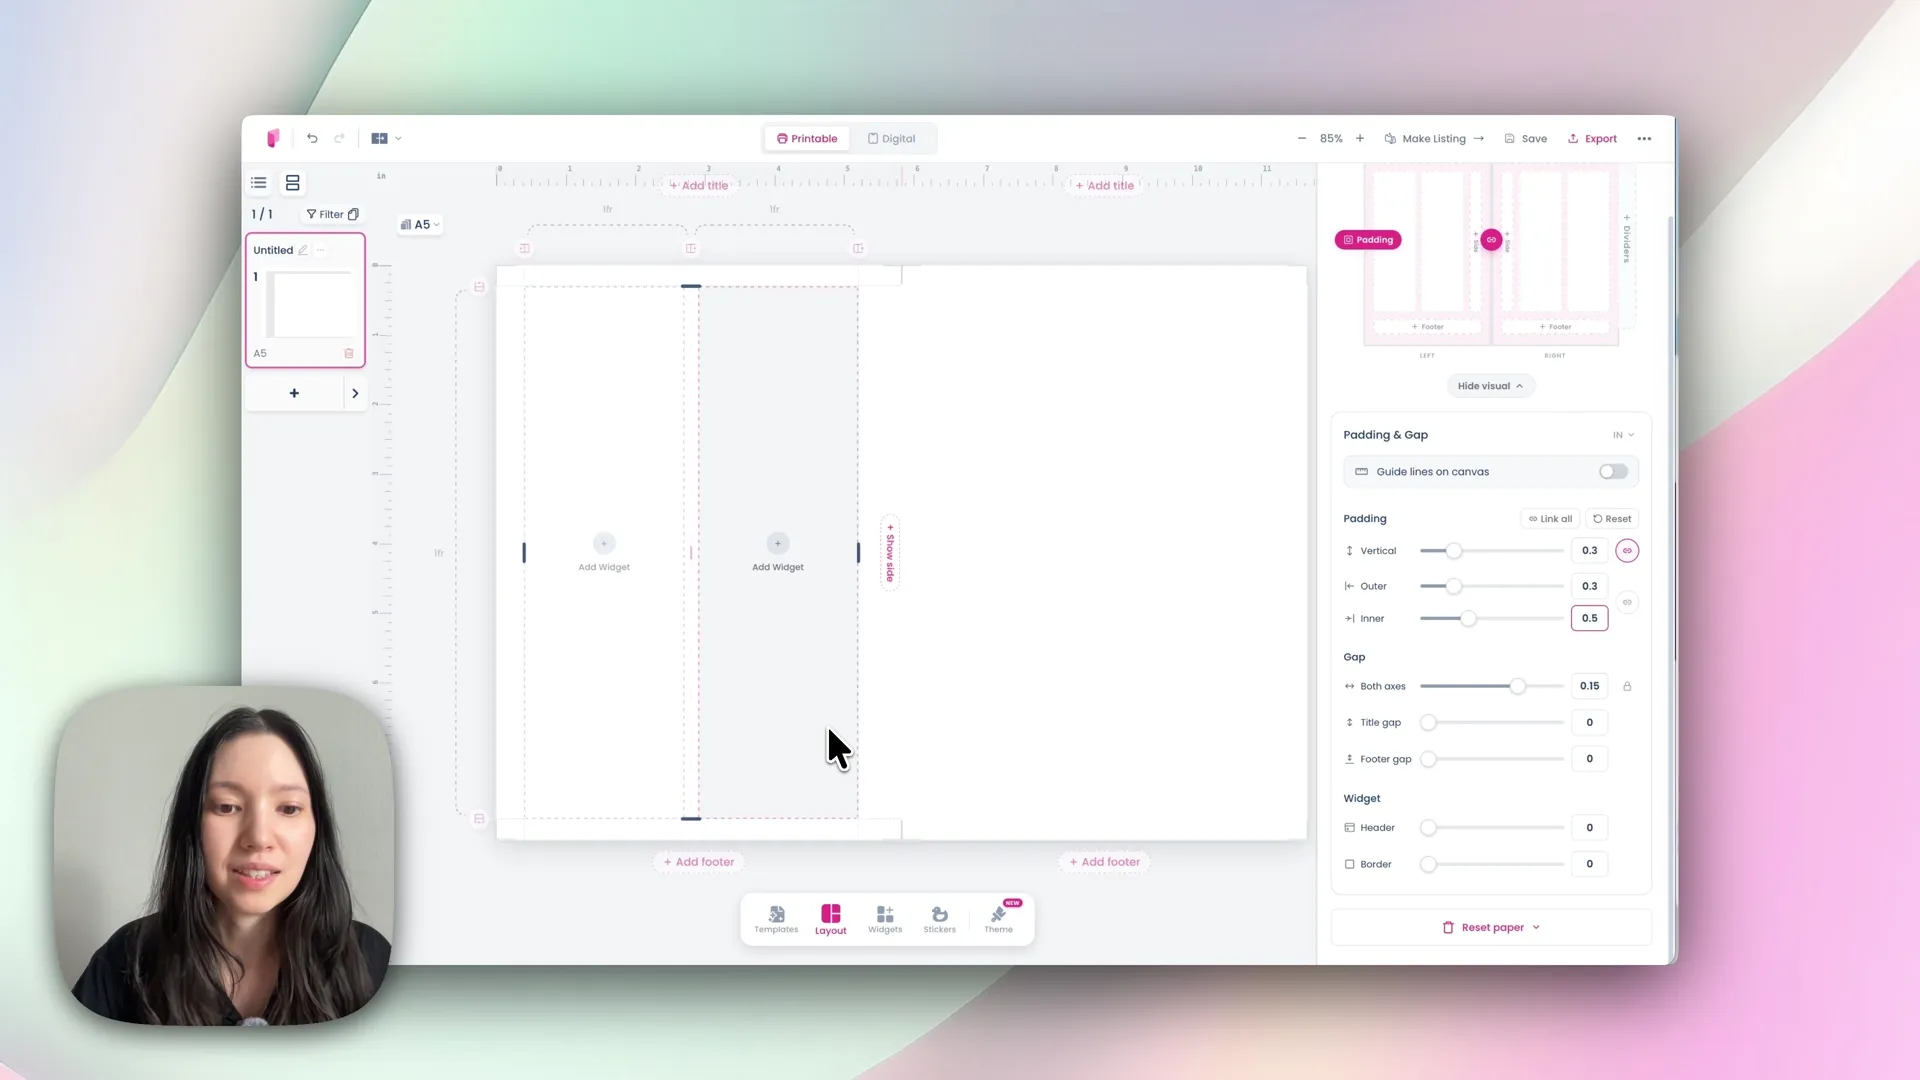
At the bottom you'll find pattern placement, which changes how it's applied:
Full — covers the whole page
Frame — a border
Wave — a curved edge
There's also a continuous option, which runs the pattern across both pages without breaking in the middle.
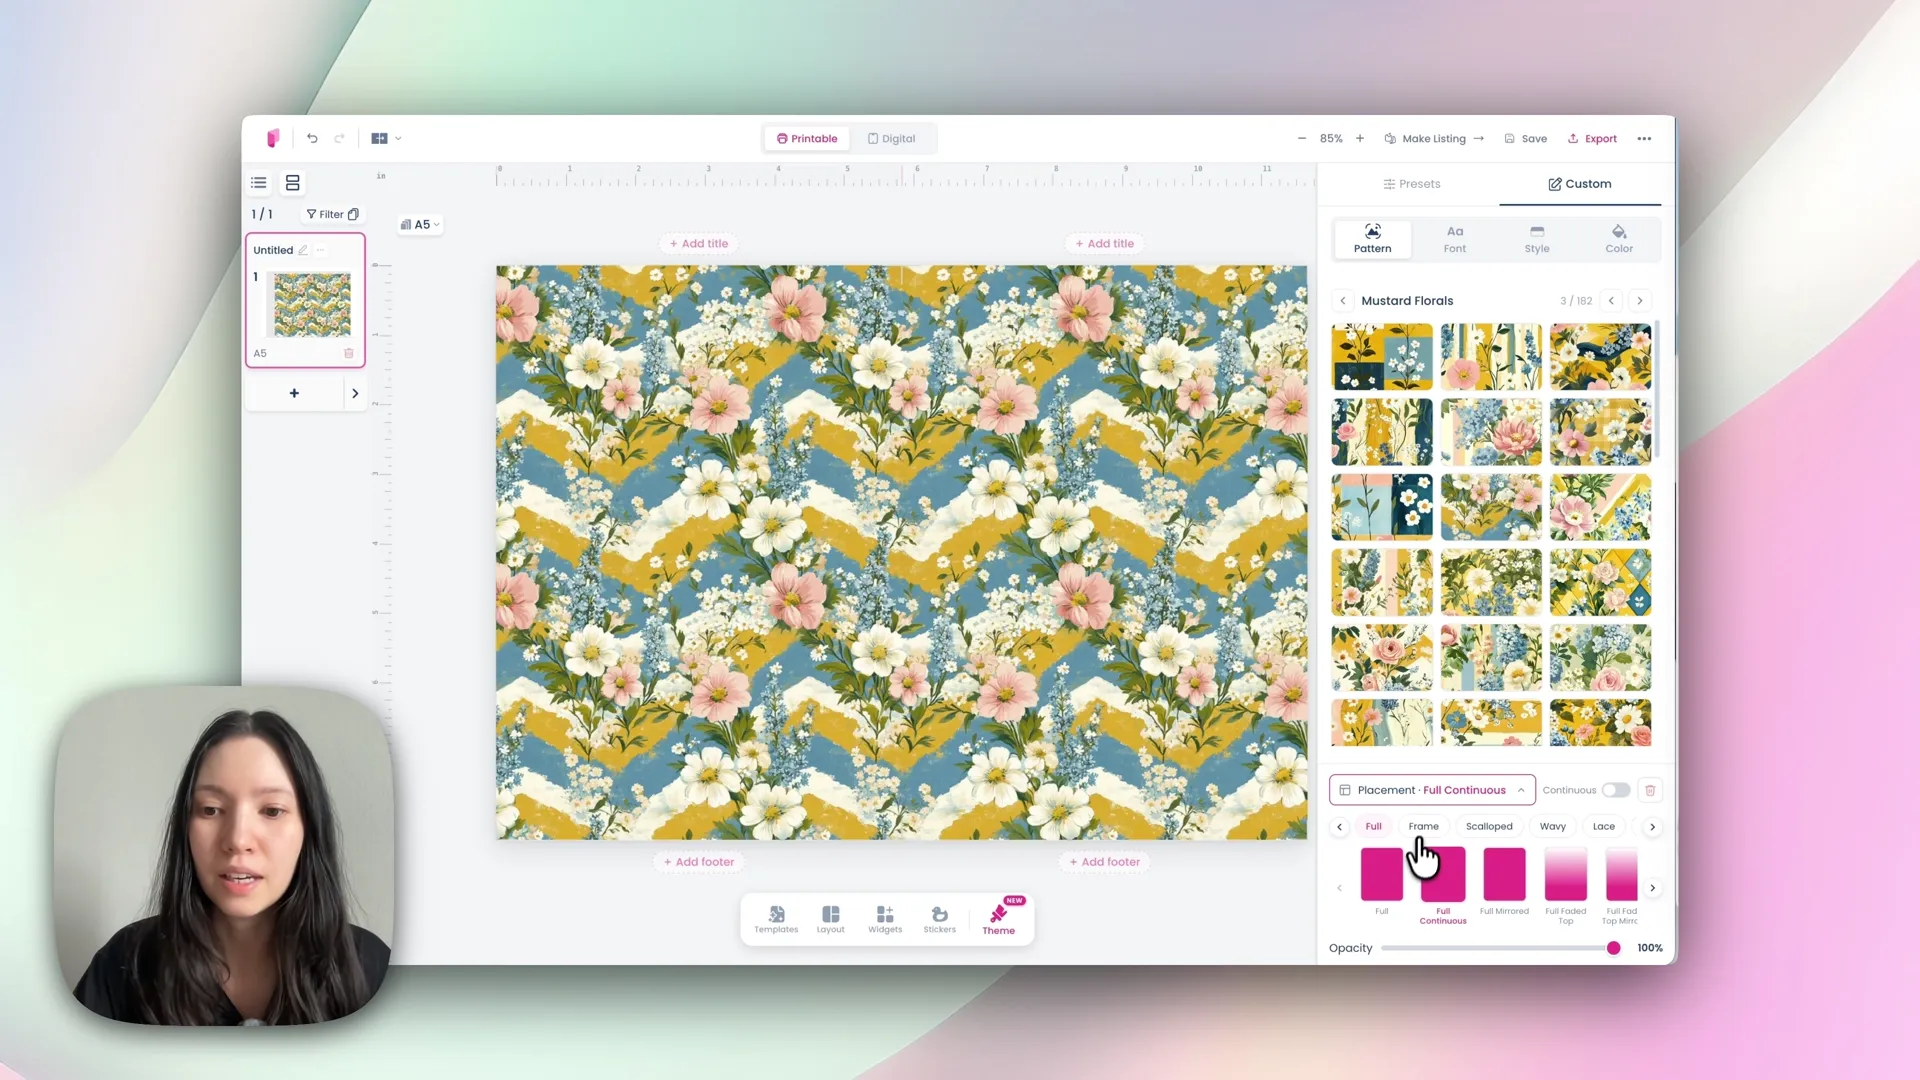
For the title, go to Stickers and drop in a rectangle or circle as a backing shape, then add a text element on top and type your title — "Planner 2027". Change the font and size from the toolbar, set the shape's fill colour, and adjust the text colour to match.
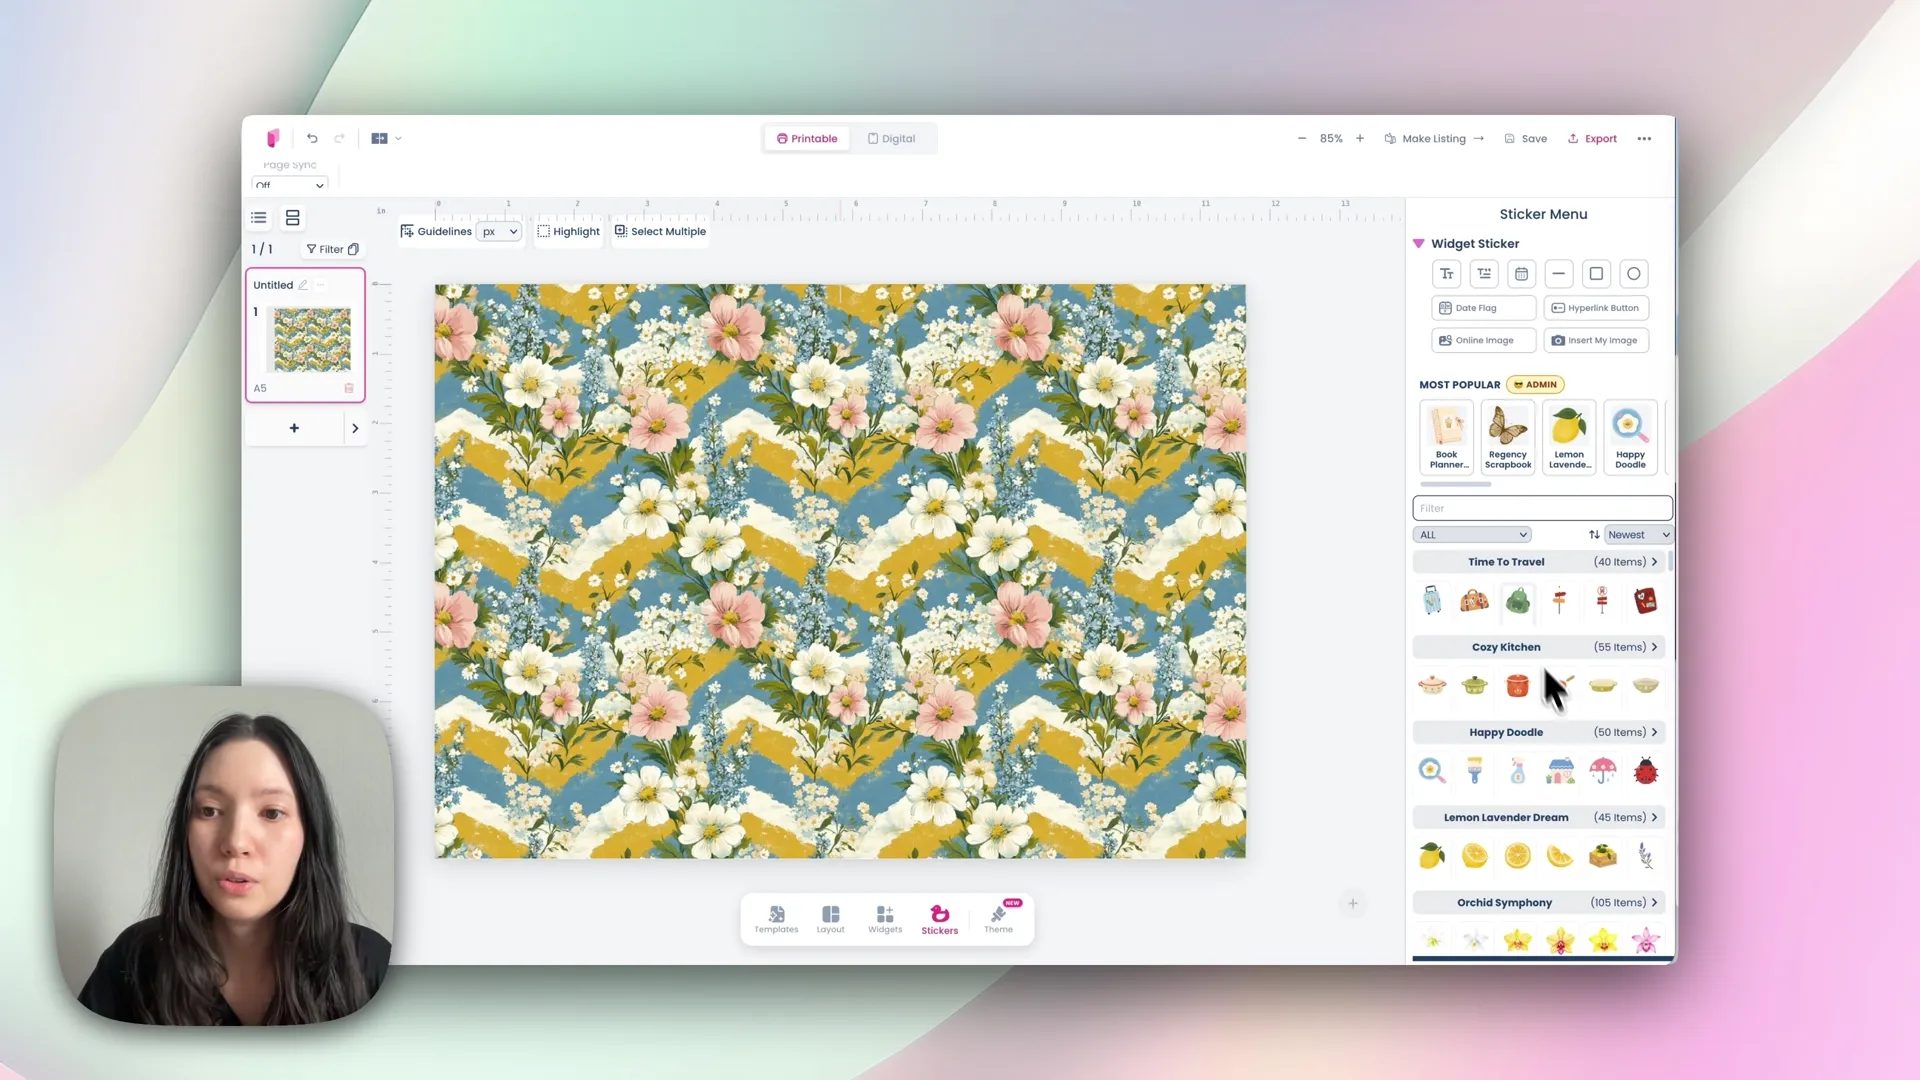
You can layer on more stickers from the menu, or upload your own.
Step 4: Build the monthly pages
Add a page with the plus button — the layout you pick doesn't matter, because you're about to apply a template over it.
Go to Templates → Starter → Monthly.
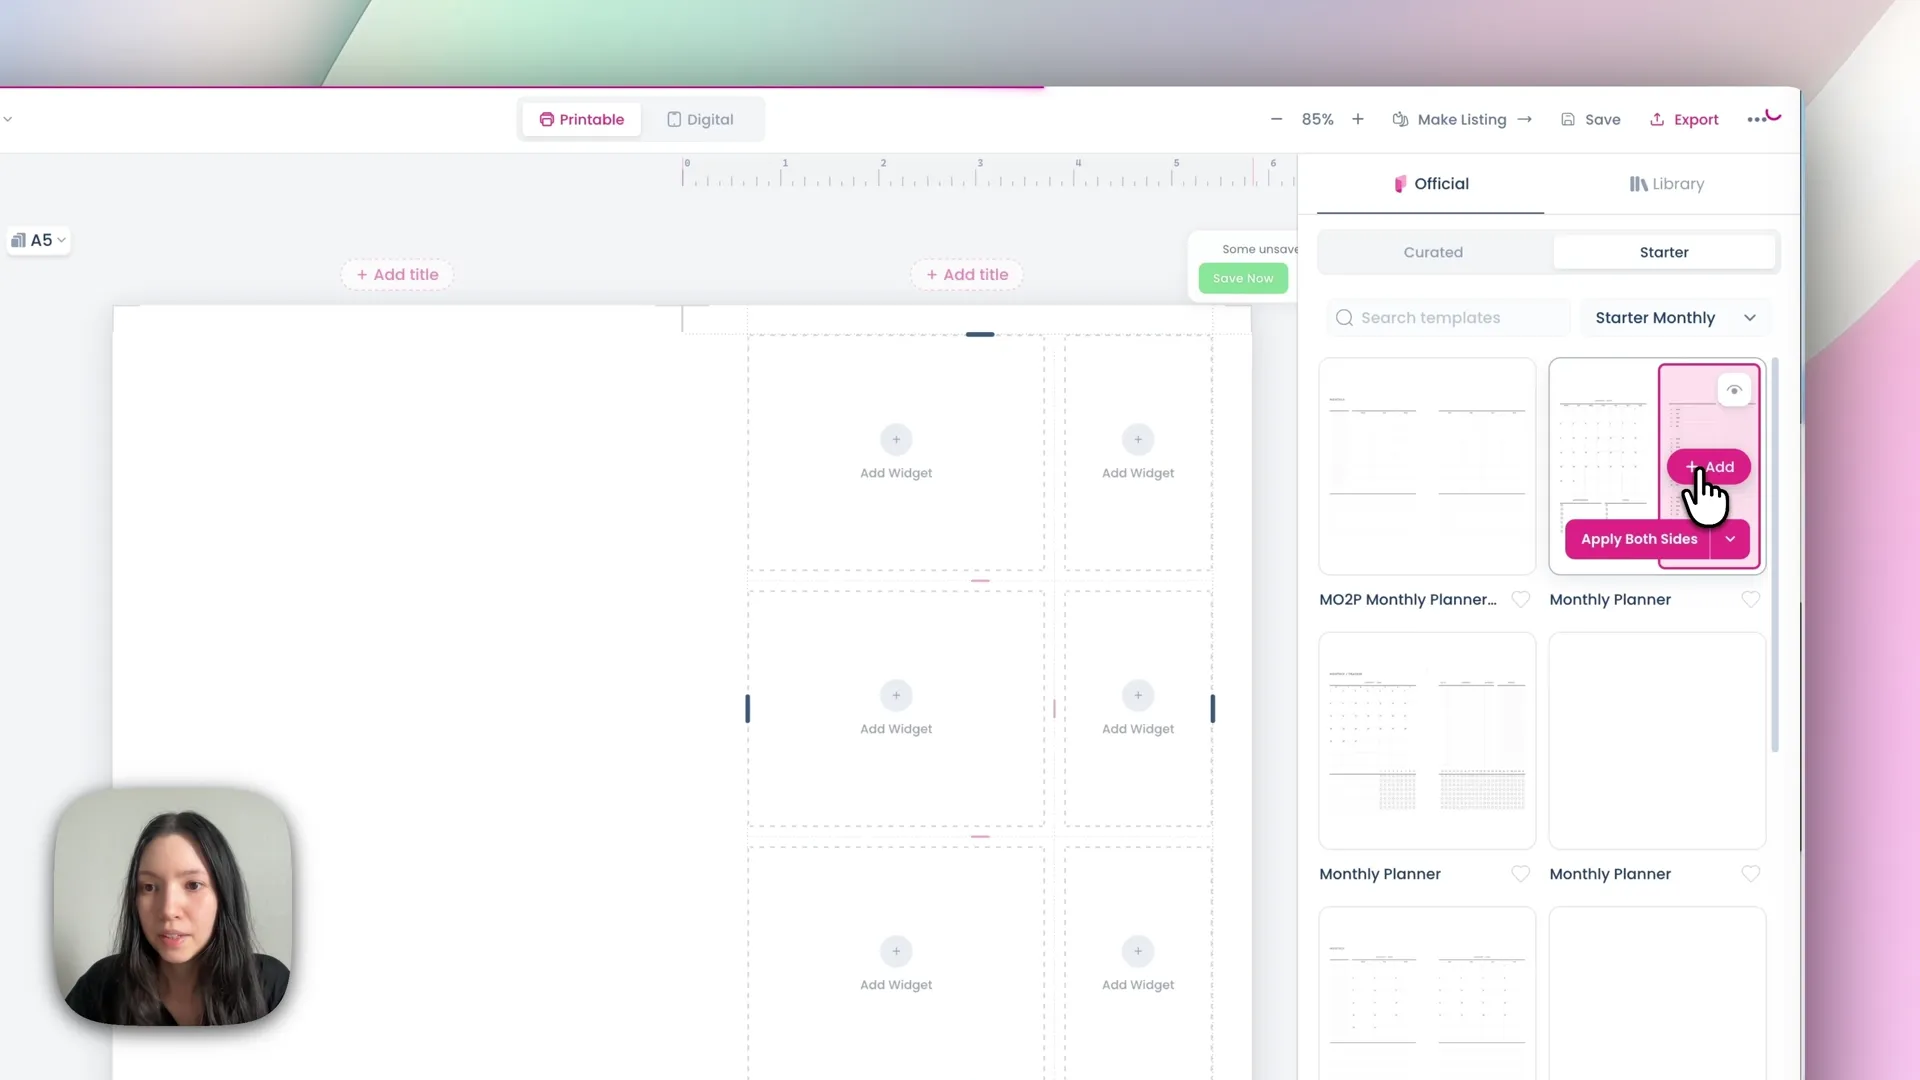
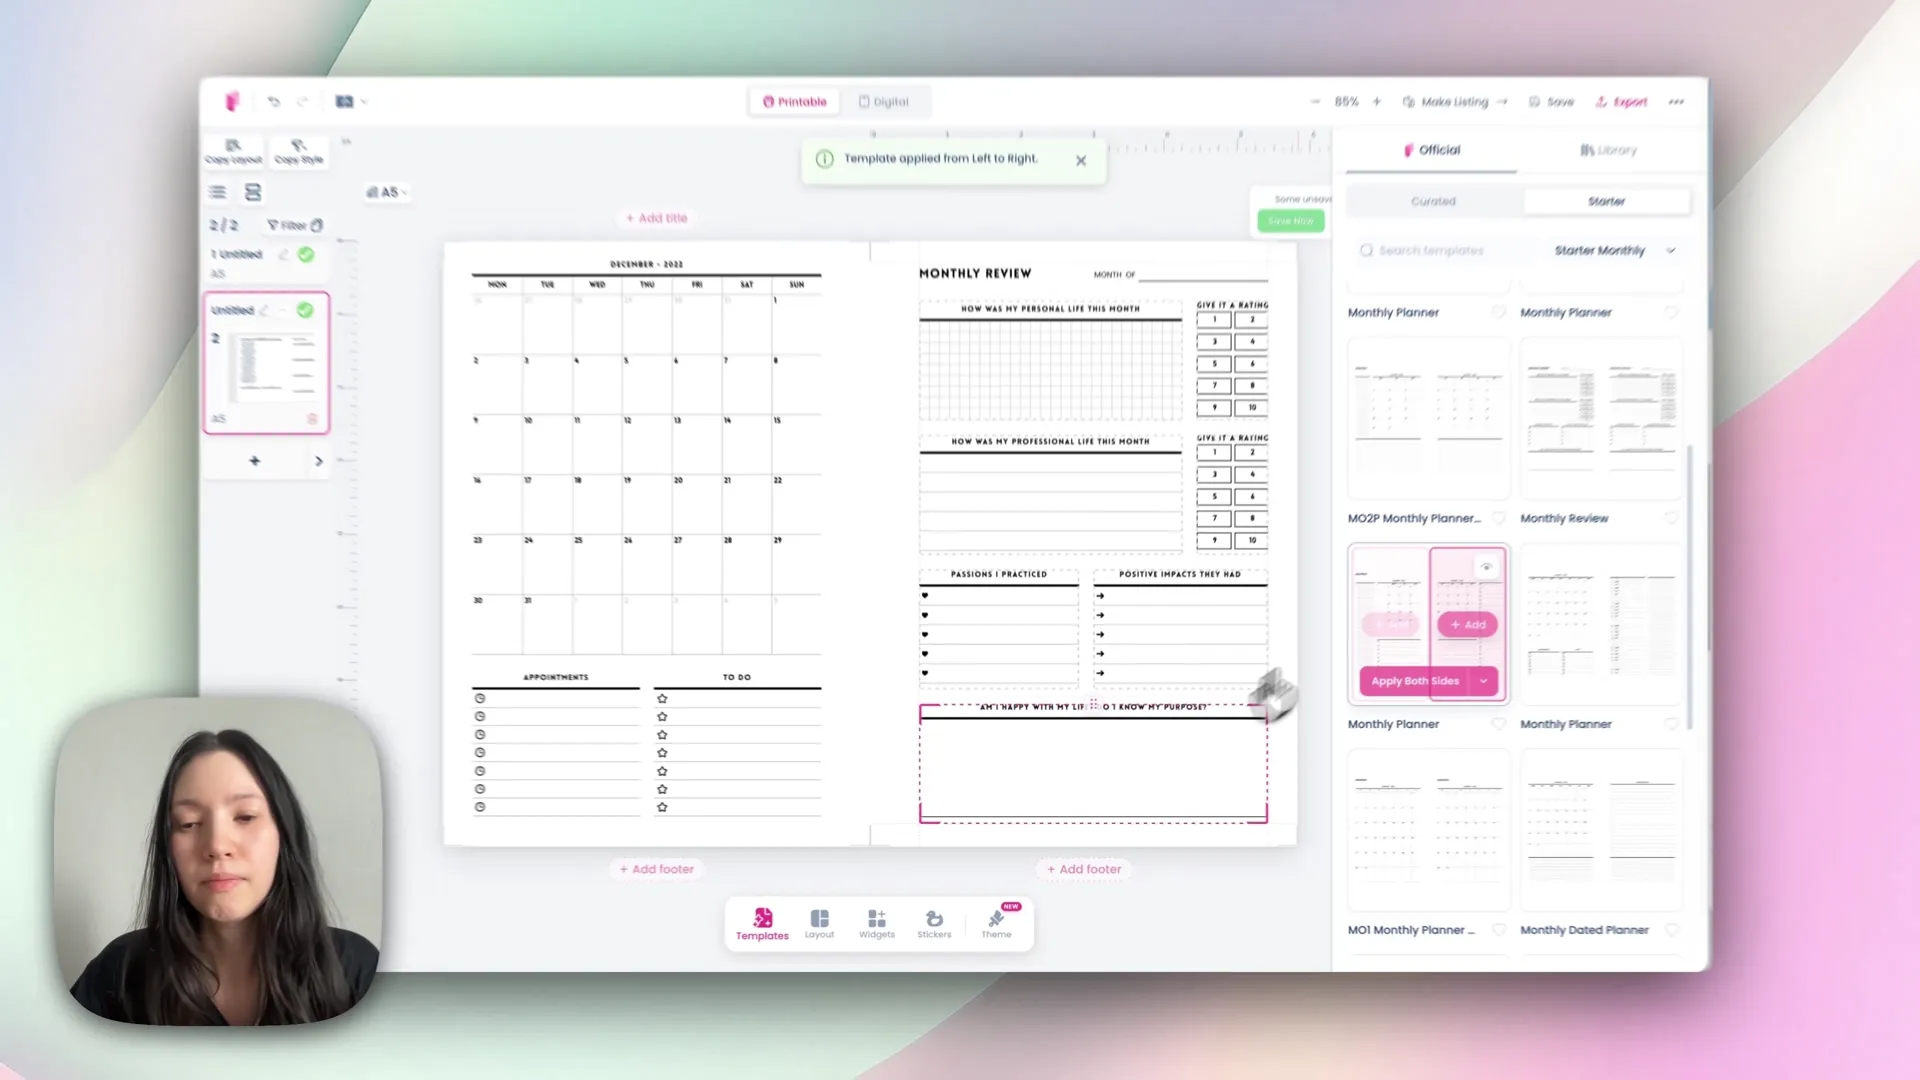
You can apply a template to just the left page, just the right, or use apply to both sides for a monthly spread running across two pages.
Once it's in:
Set the year to 2027 on both pages
Optionally switch on the moon phase for a lunar calendar
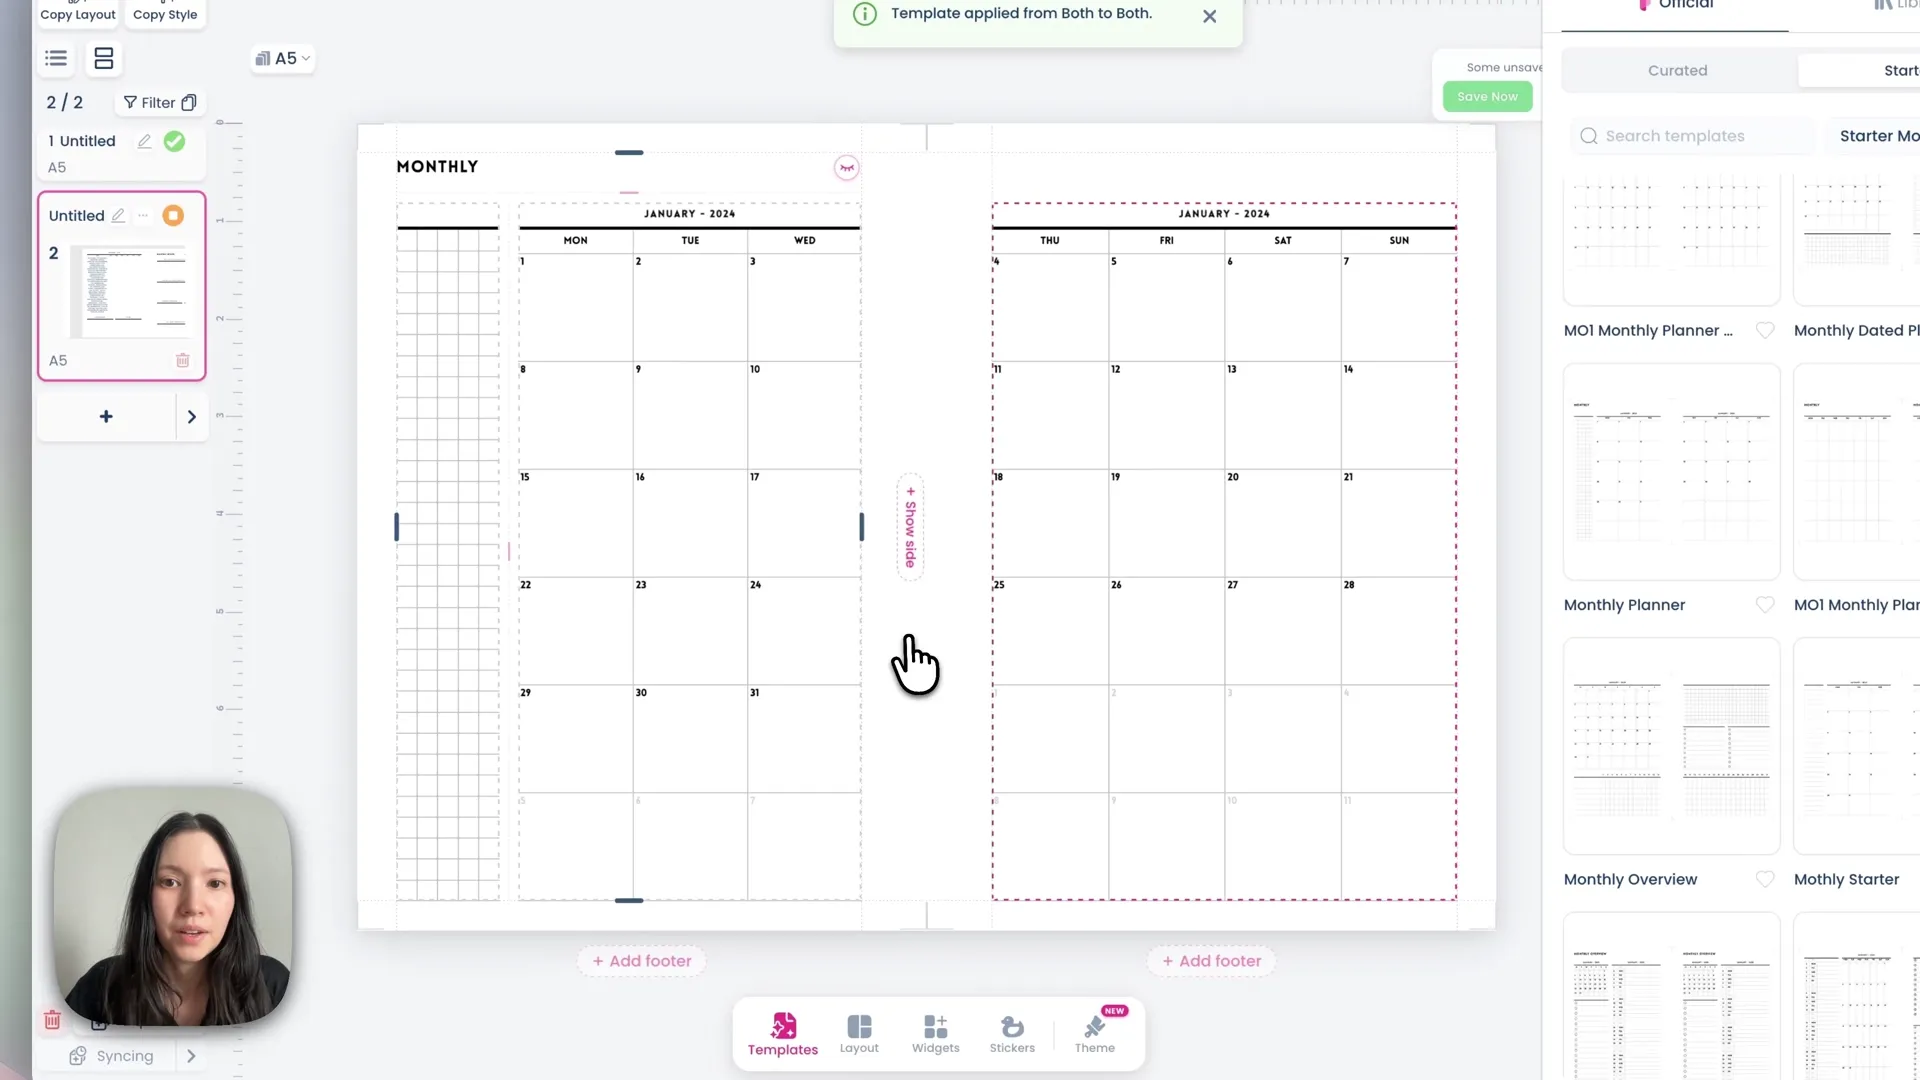
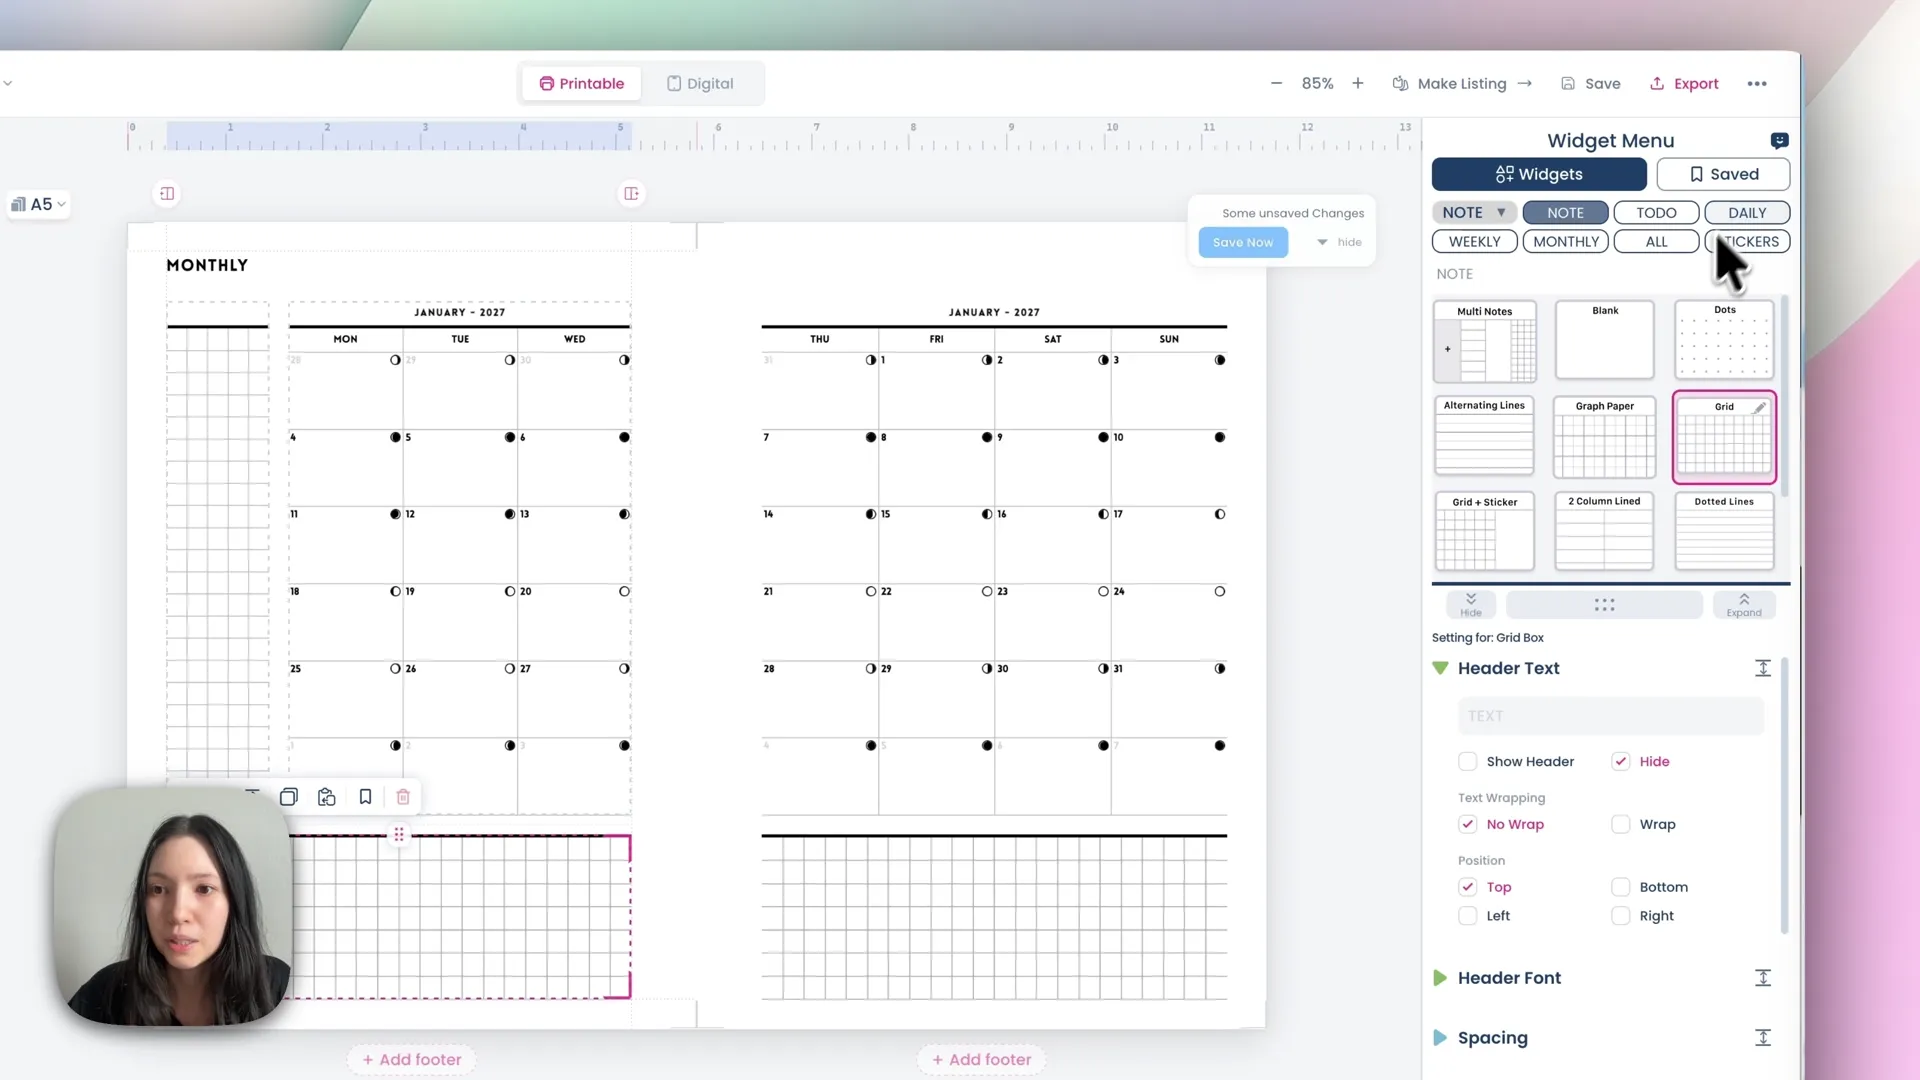
Every widget can be adjusted. Click one and you'll see buttons for adding rows and columns — useful for an extra notes box along the bottom. Drop a grid or lined widget into the new space, then drag its corner to size it exactly. Widgets can be copied and pasted between pages, and any widget's header text can be hidden using the height control.
Then duplicate for the year. Click the arrow, type 11, and choose Start duplicate and run dates. That creates the remaining eleven months and dates them automatically, running through to December 2027.
Step 5: Build the weekly pages
For weeklies it's worth building from scratch, so you learn the layout editor.
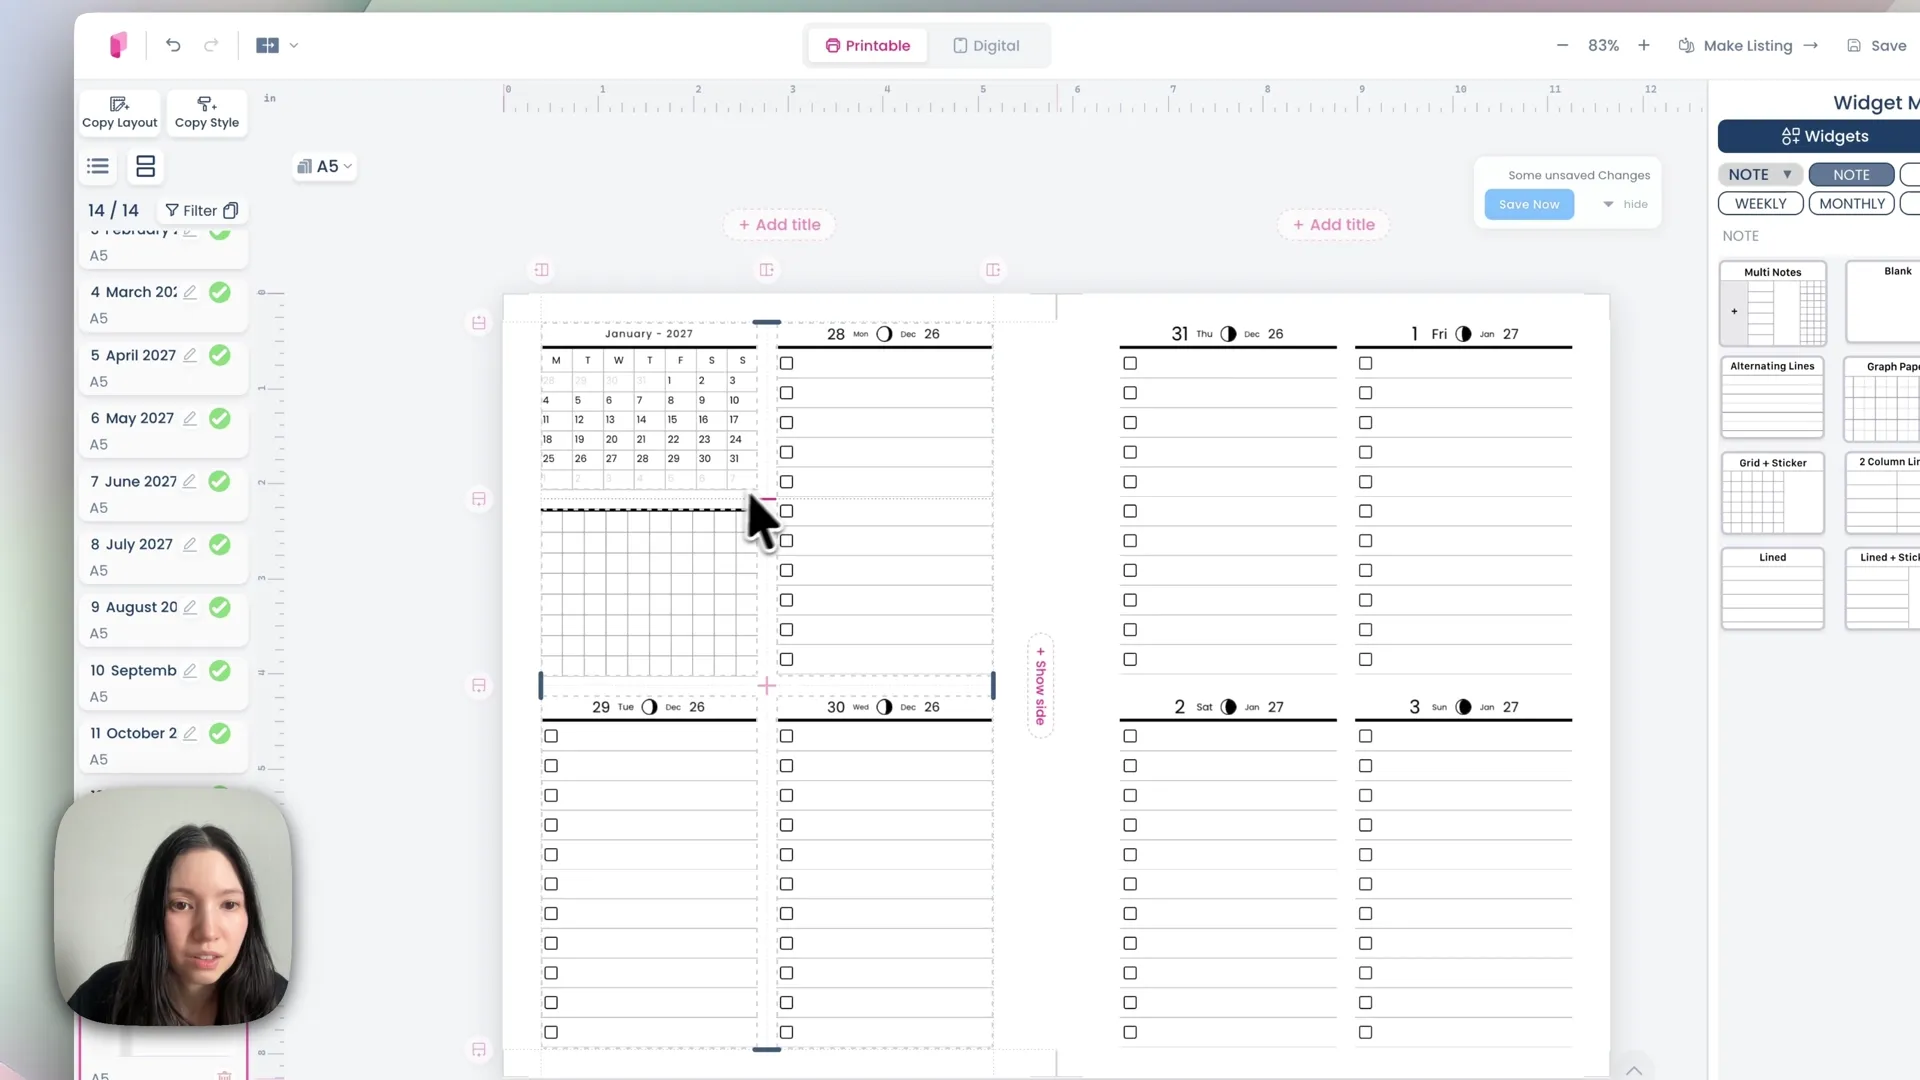
Add a page with a single large widget box, then use the widget's row buttons to split it into four boxes on the left and four on the right — eight day-boxes across the spread.
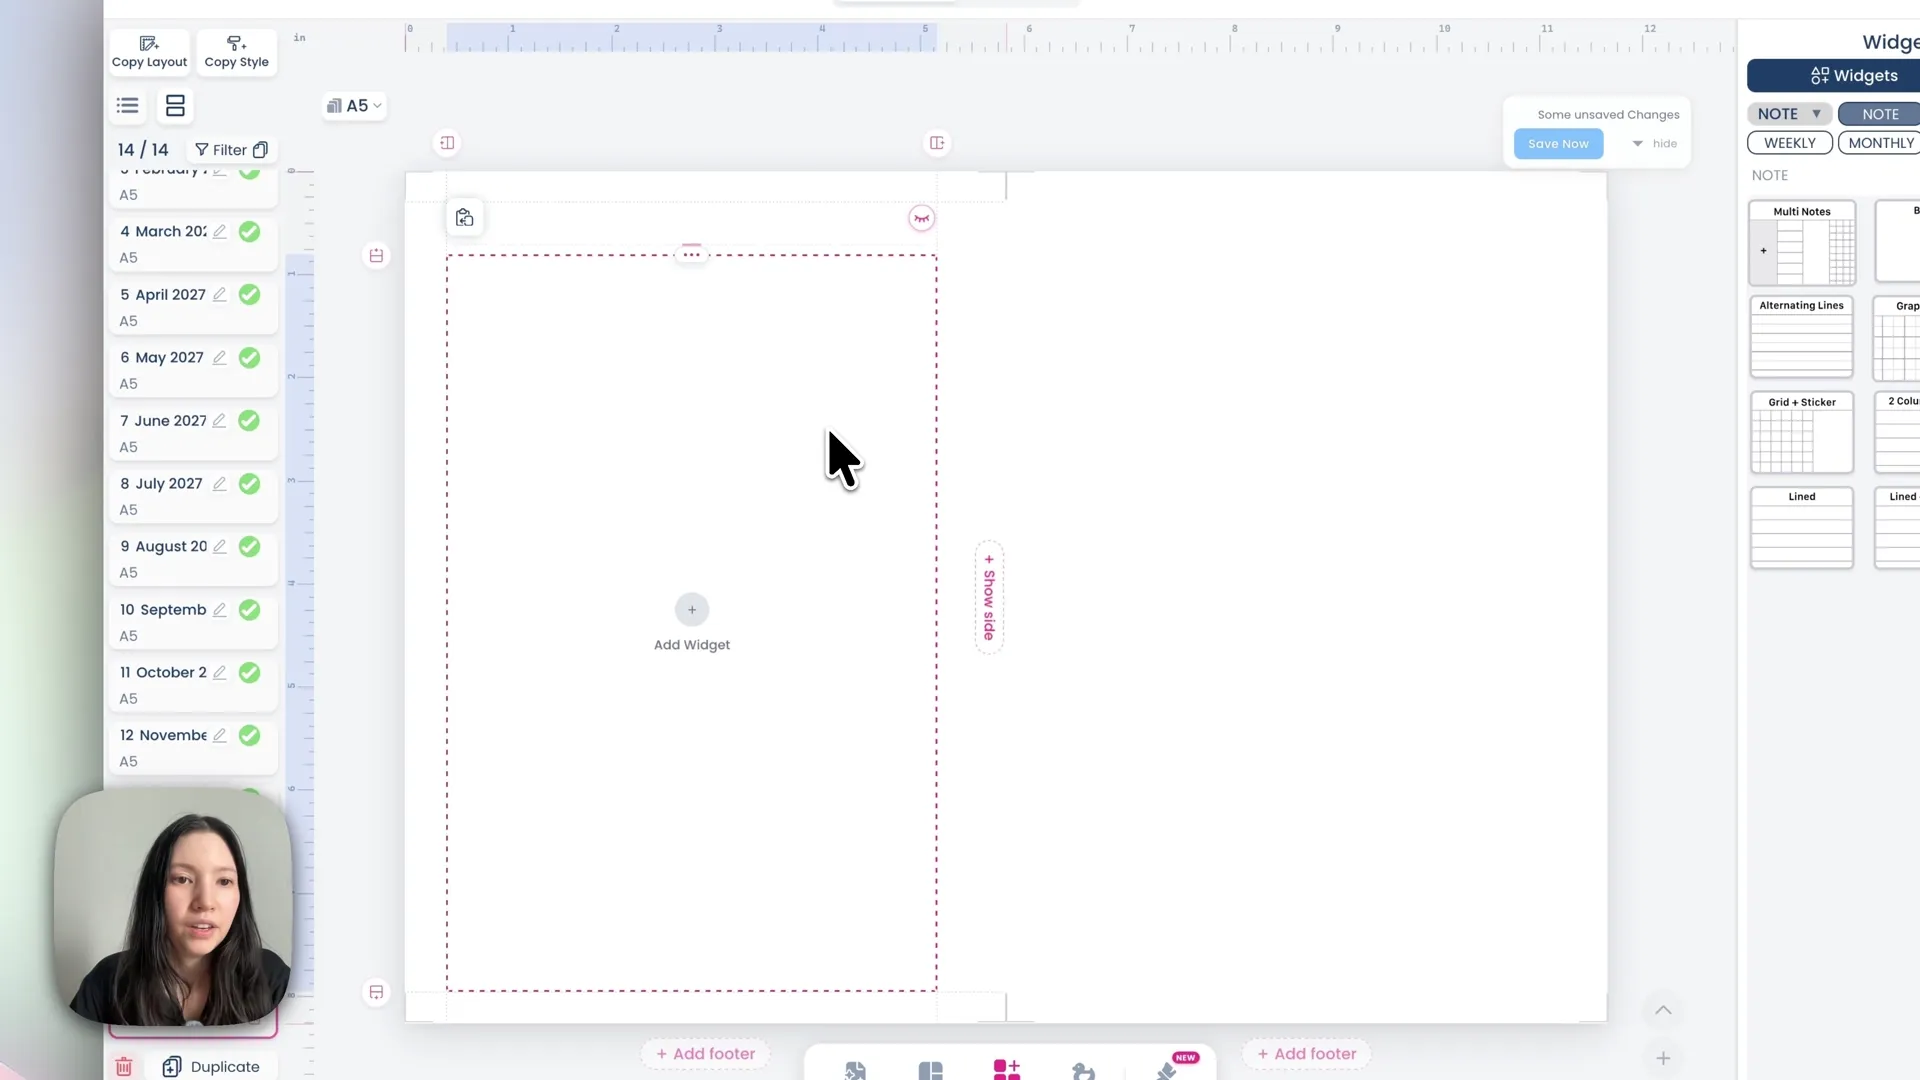
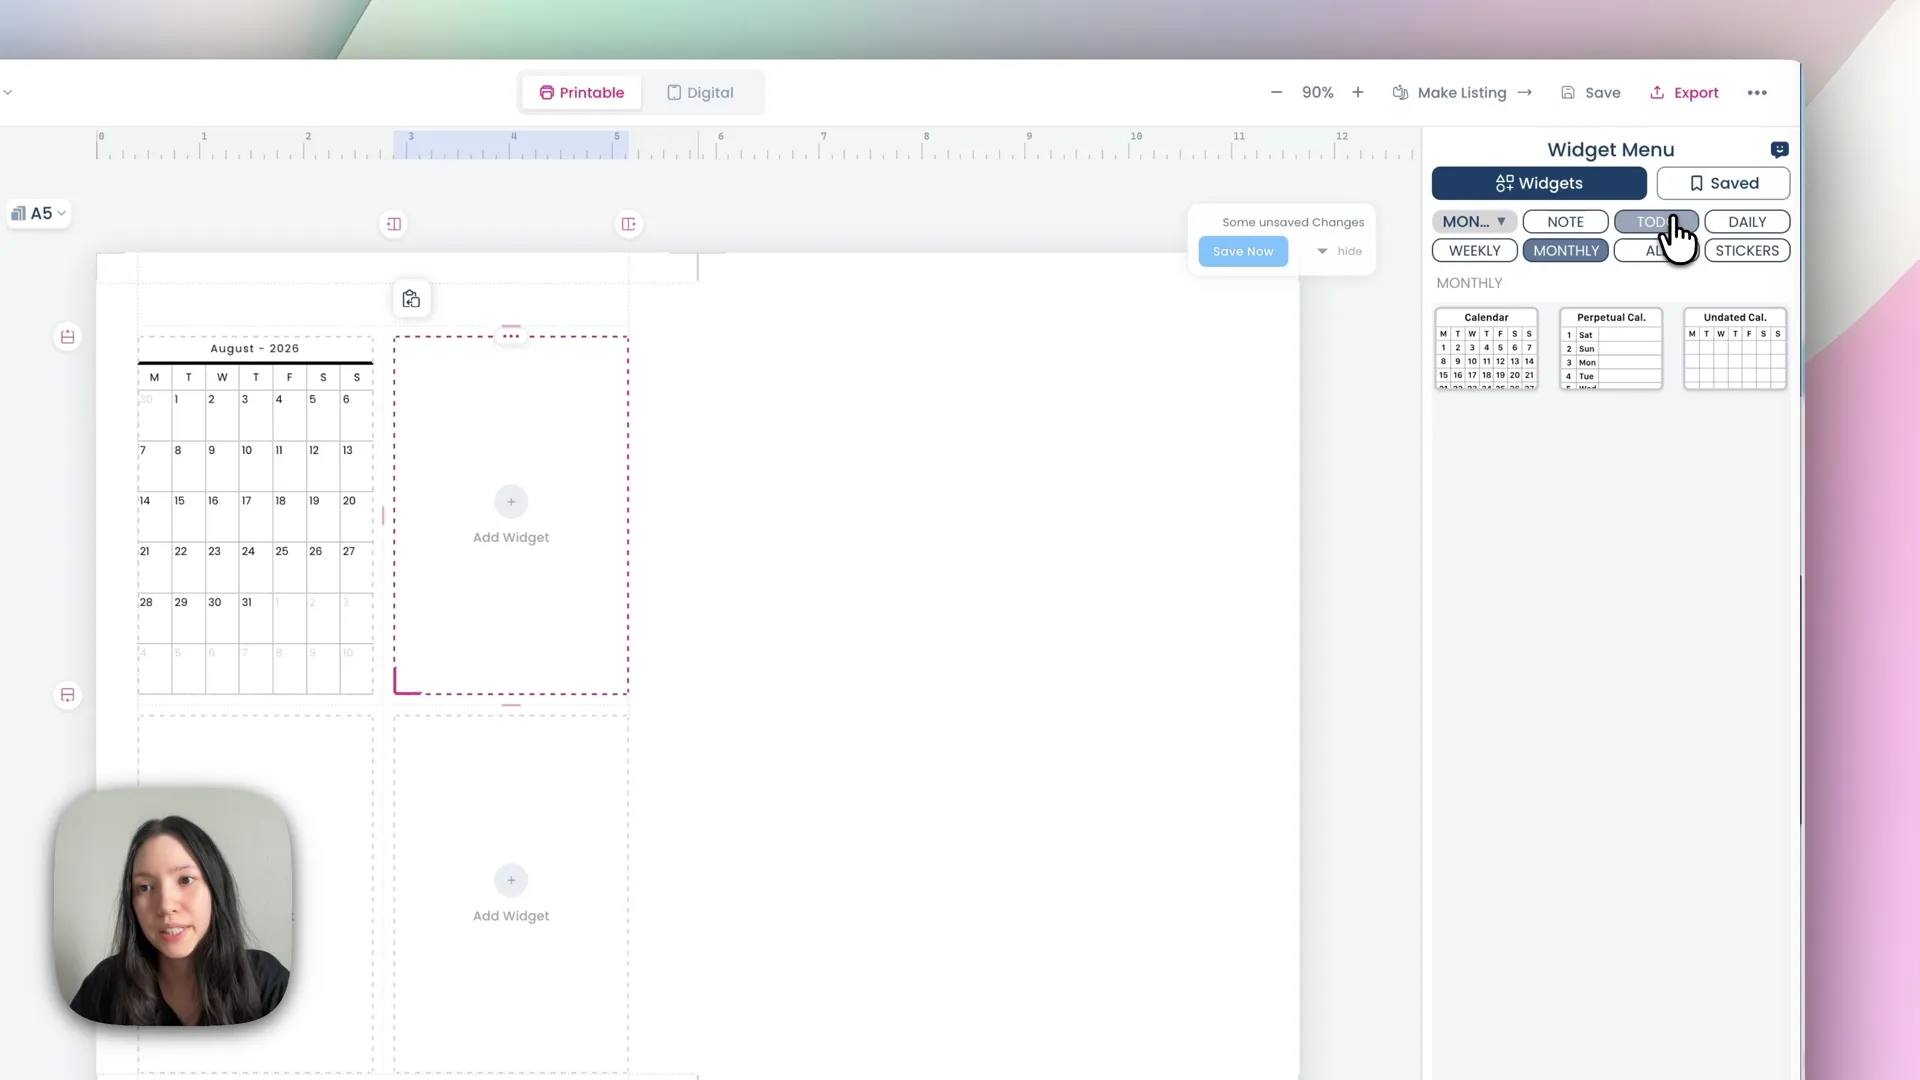
Add a monthly calendar widget in one box, then a to-do list in another. On the to-do widget you can change the bullet icon to checkboxes, change the colour, and remove the header text. Copy that widget into the remaining boxes.
Now add date flags. Two similar-sounding options exist, and the difference matters:
Date flag — sits on top of the widget
Date — sits outside the widget and pushes it down
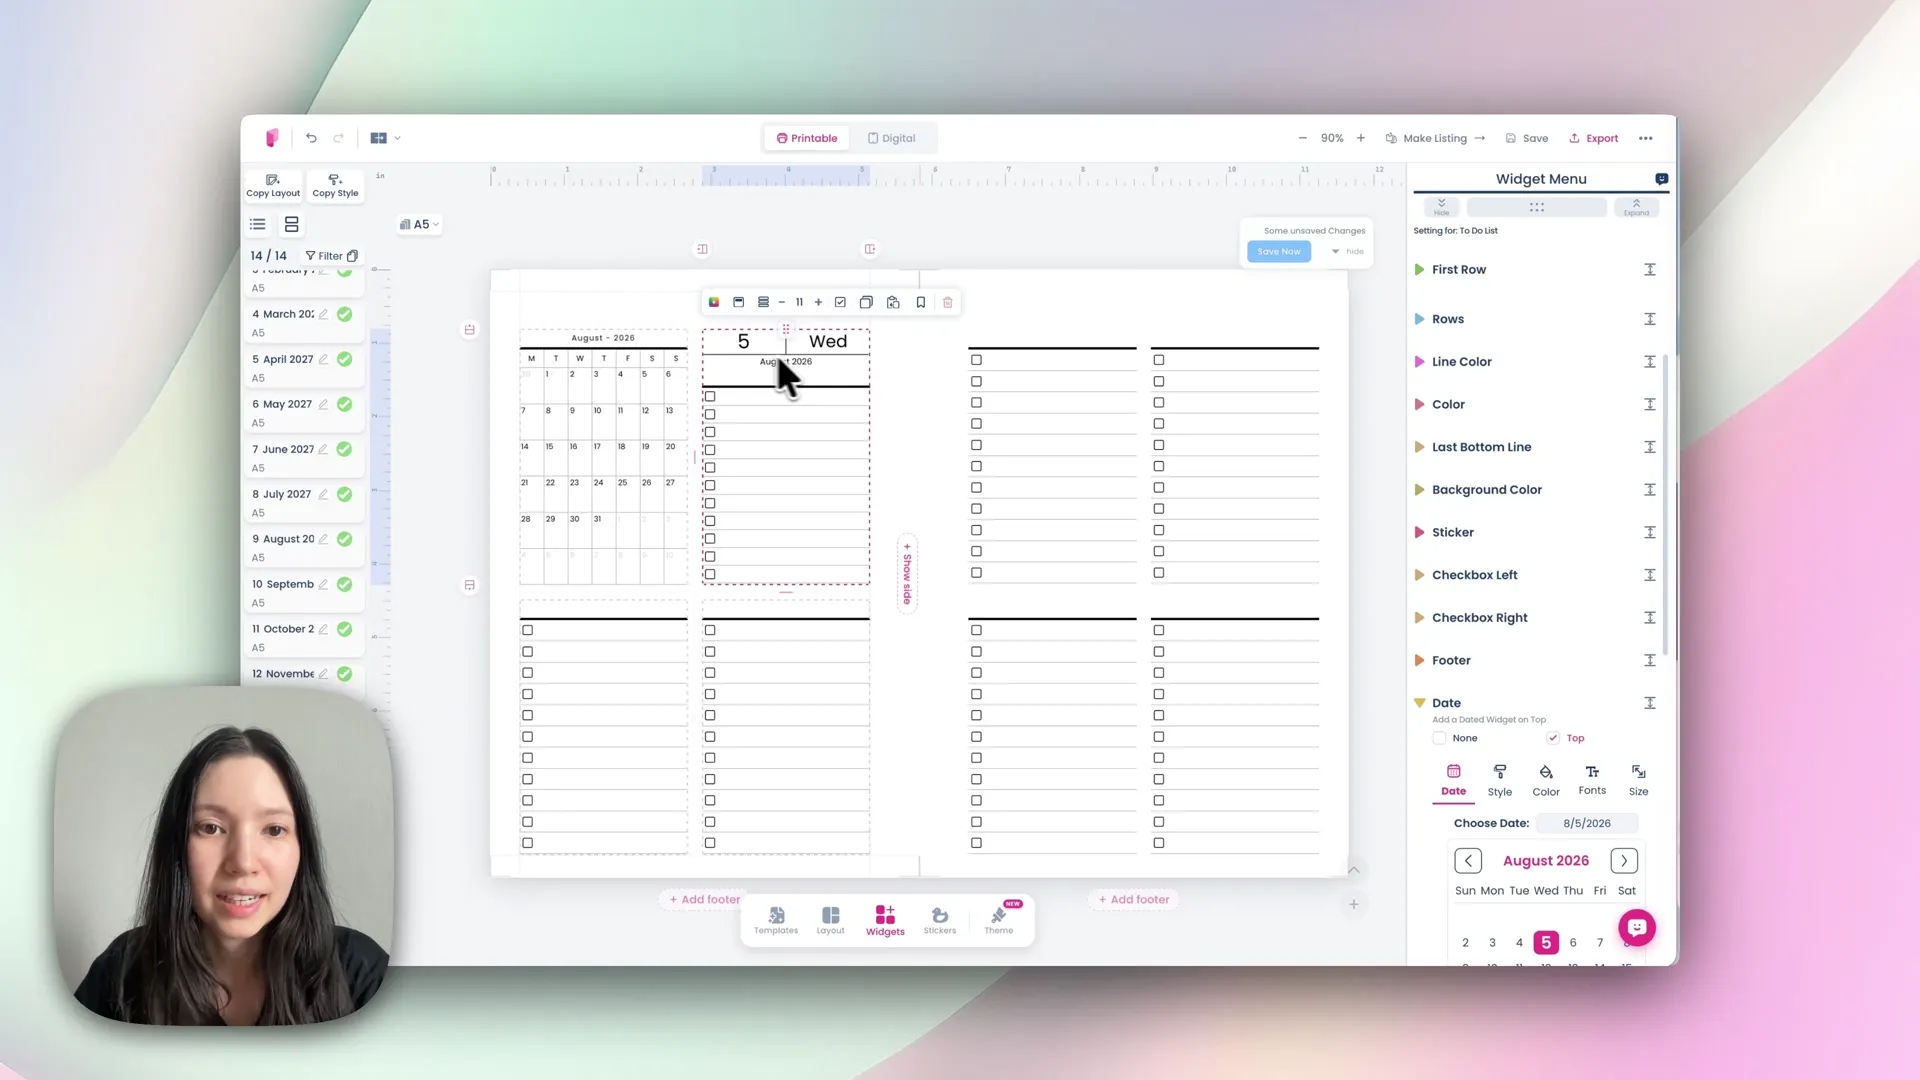
Use date flag. Under Style pick the flag shape, under Size adjust width and height, and under Colour hide the border by setting it to white. Turn on auto-fit font size so the text scales neatly inside the flag.
Set the start date carefully. 1 January 2027 falls on a Friday, so the planner's first week actually begins on Monday 28 December 2026. Set the first flag to 28 December, then work across: 29, 30, 31, then 1, 2, 3 January — and remember the year rolls over to 2027 partway through the spread. Double-check that row before duplicating.
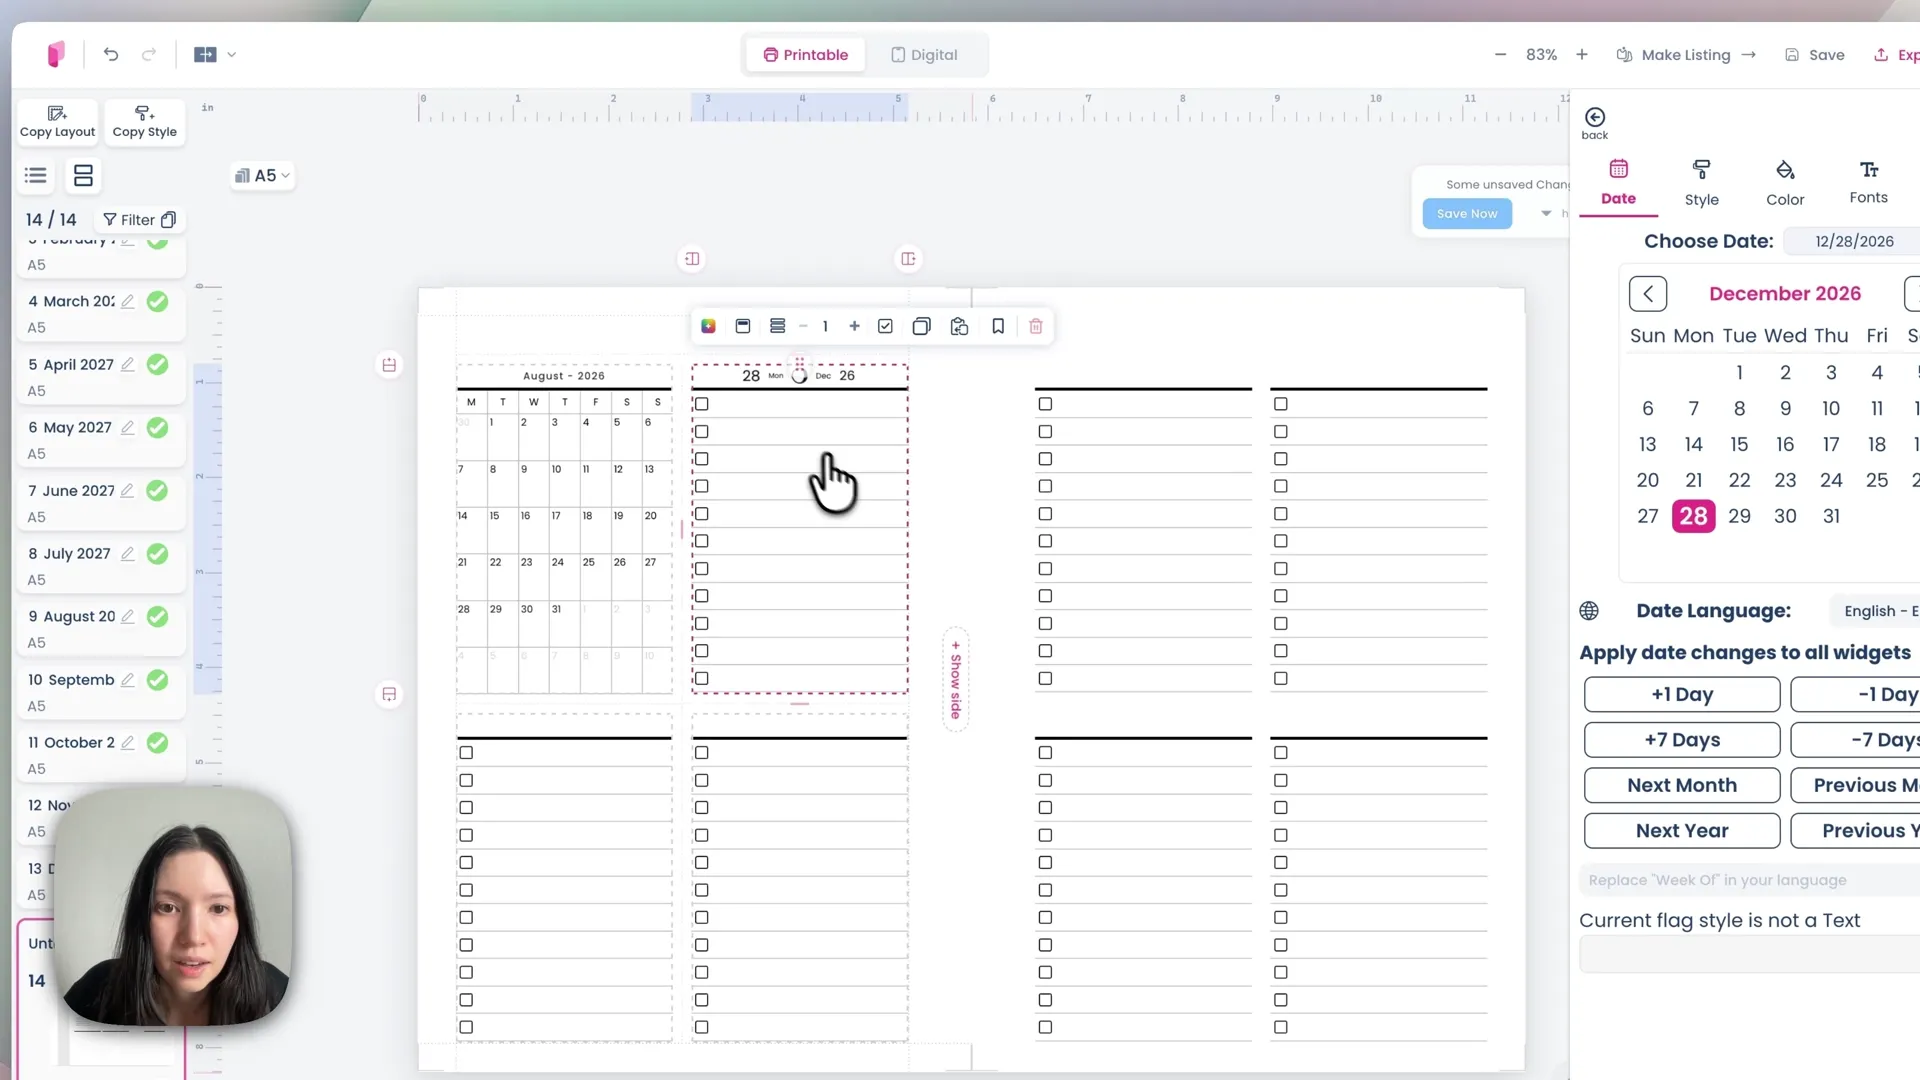
If a spread has an unwanted title bar above it, hide it with the eye icon rather than deleting the space.
Then duplicate. Click the arrow, type 51, and run it. That fills out all fifty-two weeks with correct dates.
Step 6: Build the daily pages
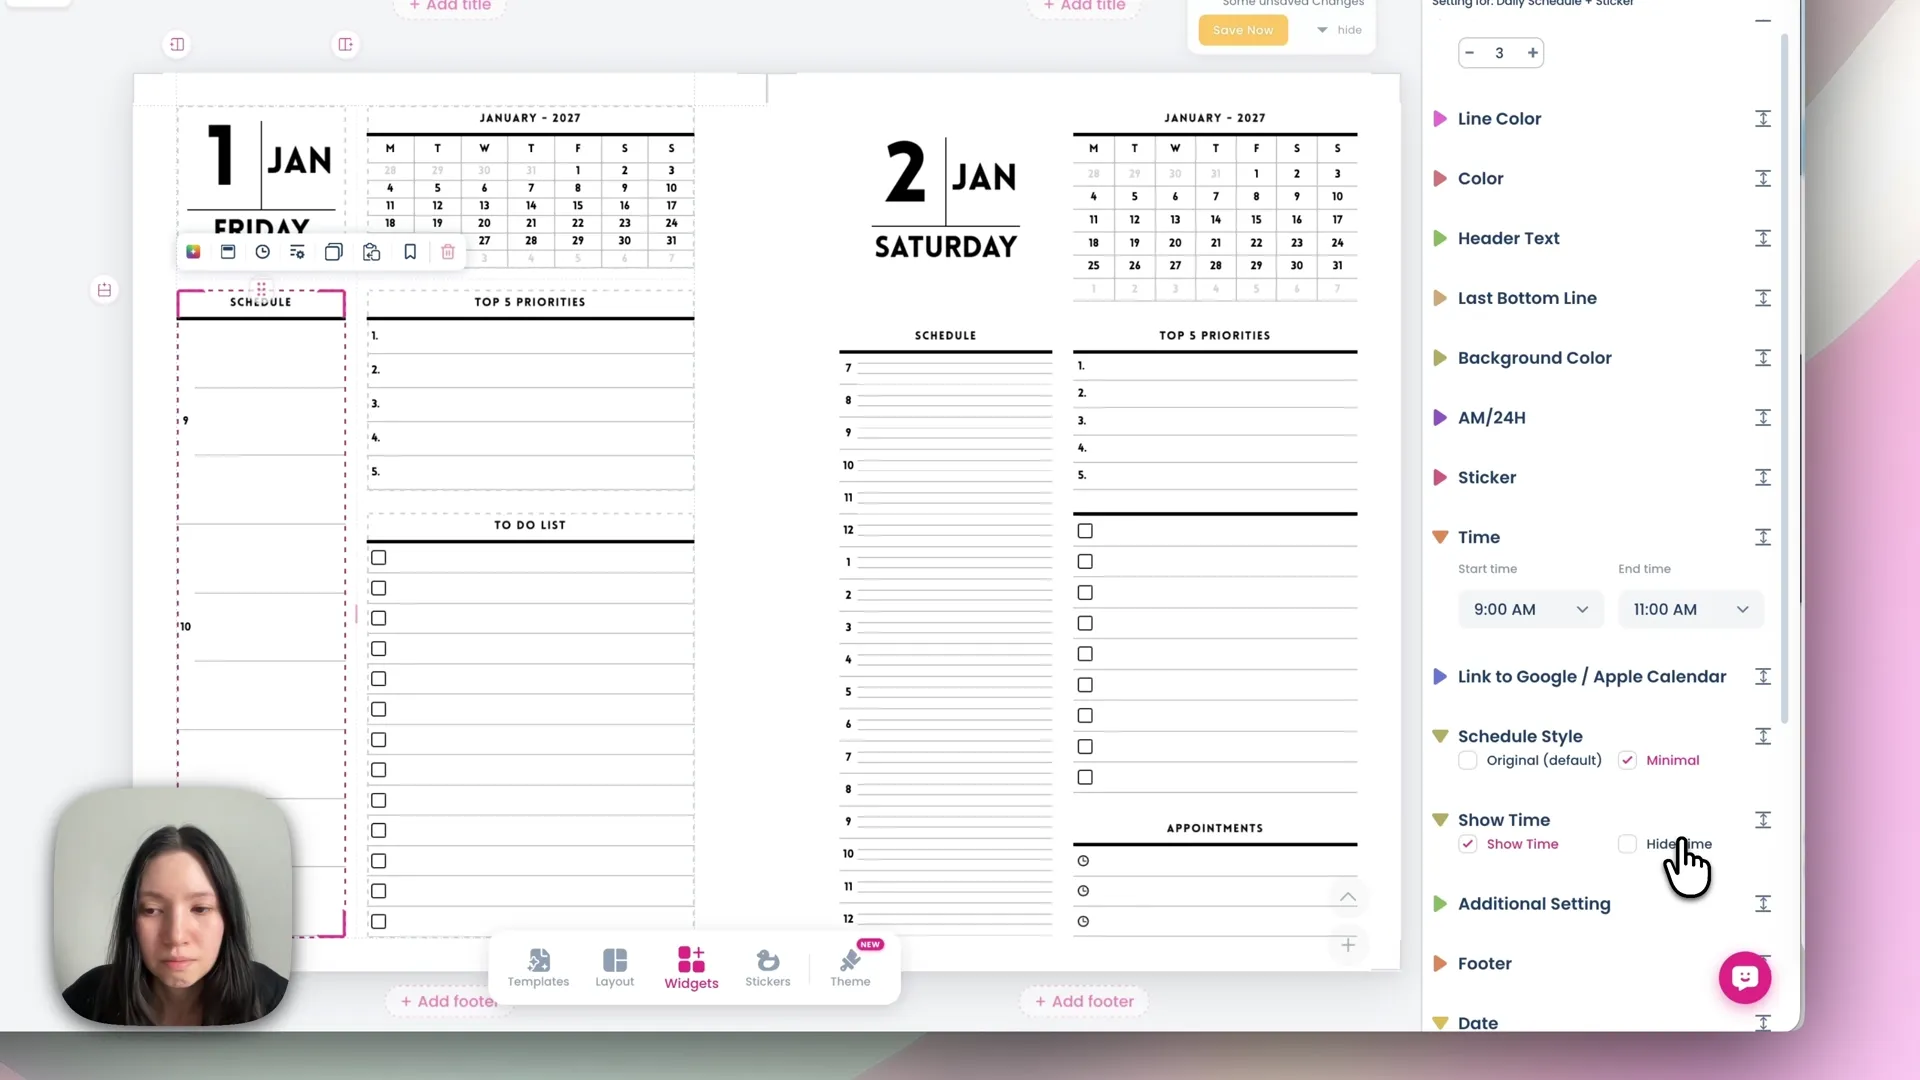
Dailies are fastest from a template. Add a page, then go to Templates → Starter → Daily dated and apply one.
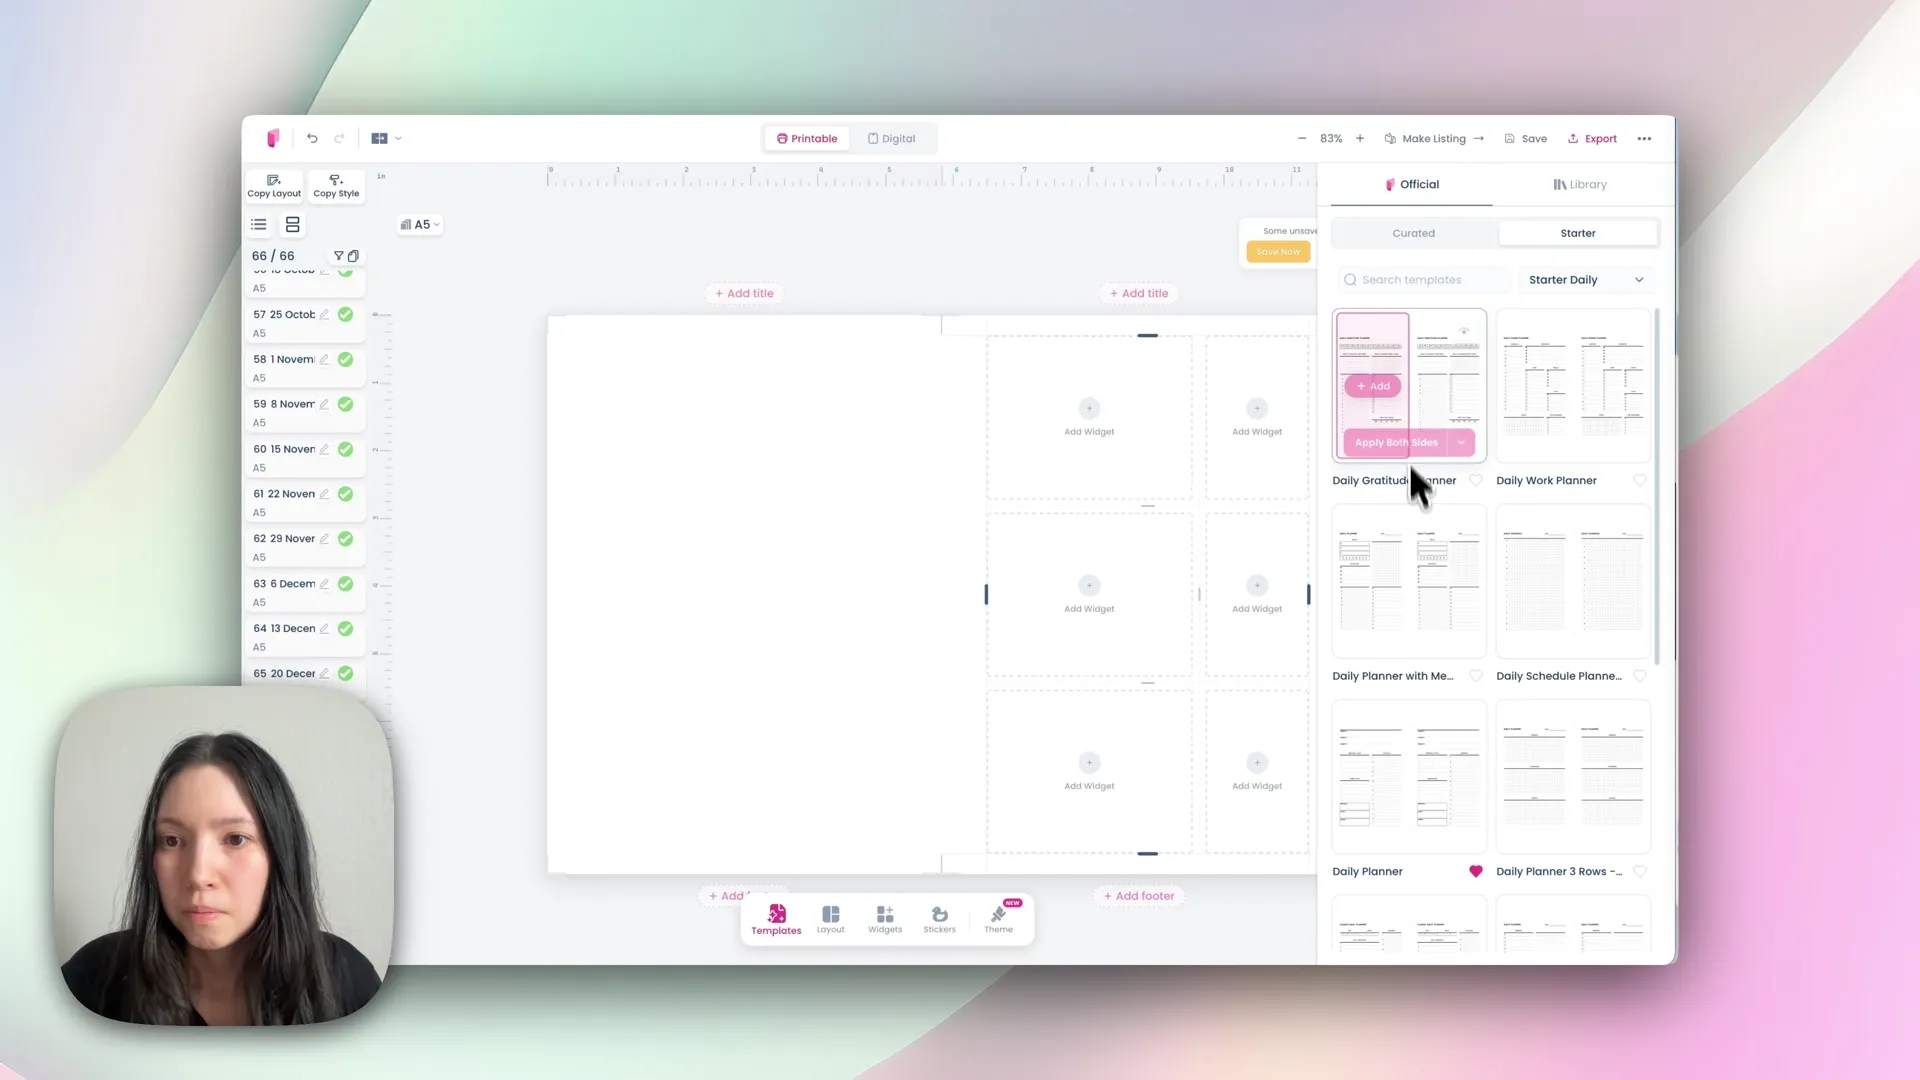
Most daily templates are designed as one day across two pages. If you'd rather have one day per page, use copy left to right to duplicate the left page onto the right, then change the date on the right-hand side.
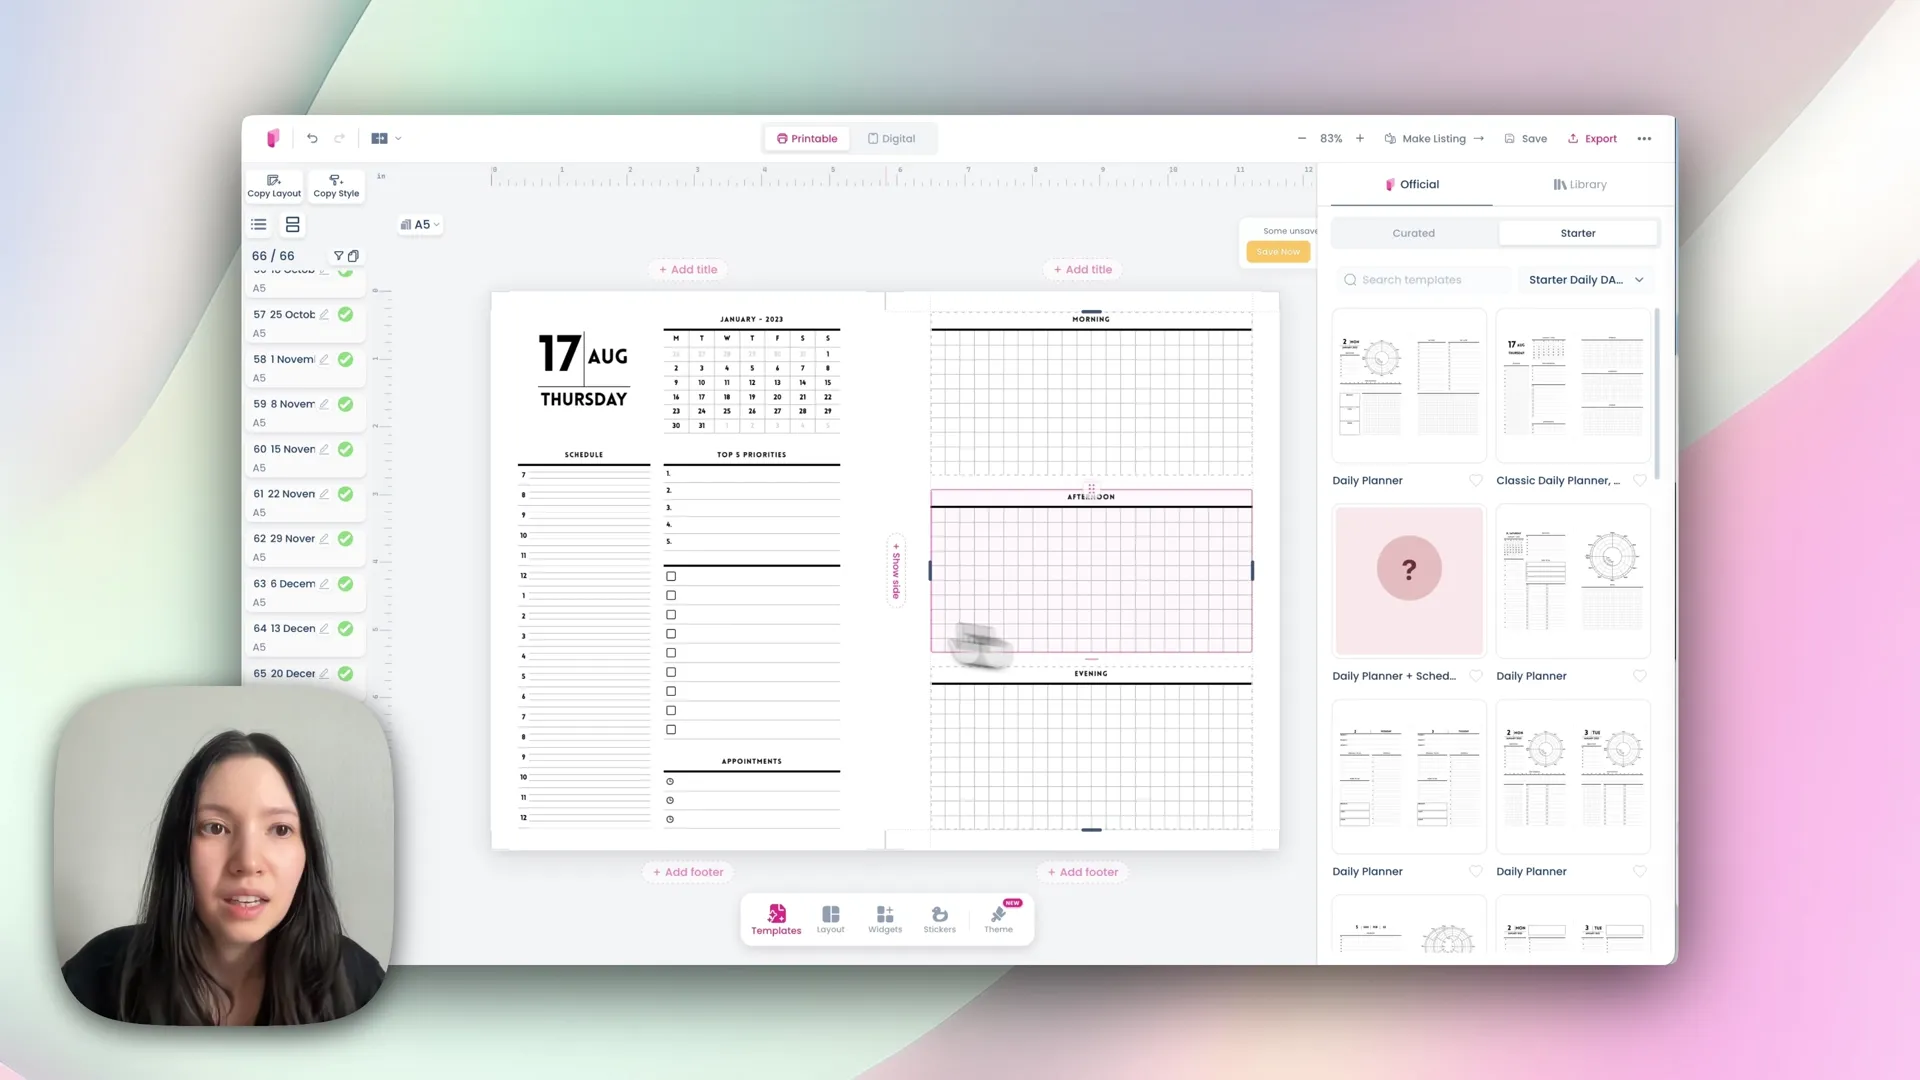
Customising the daily page:
Headers — every widget can have one switched on and renamed, e.g. "To-do list"
Schedule — set start and end time (say 9:00 AM to 11:00 PM), choose AM/PM or 24-hour, and set the increment and line spacing under additional settings
Removing lines — set the line colour to white to make them invisible against the background
Extra columns — drop in a simple list widget and increase its rows to around 27–28 to fill the page
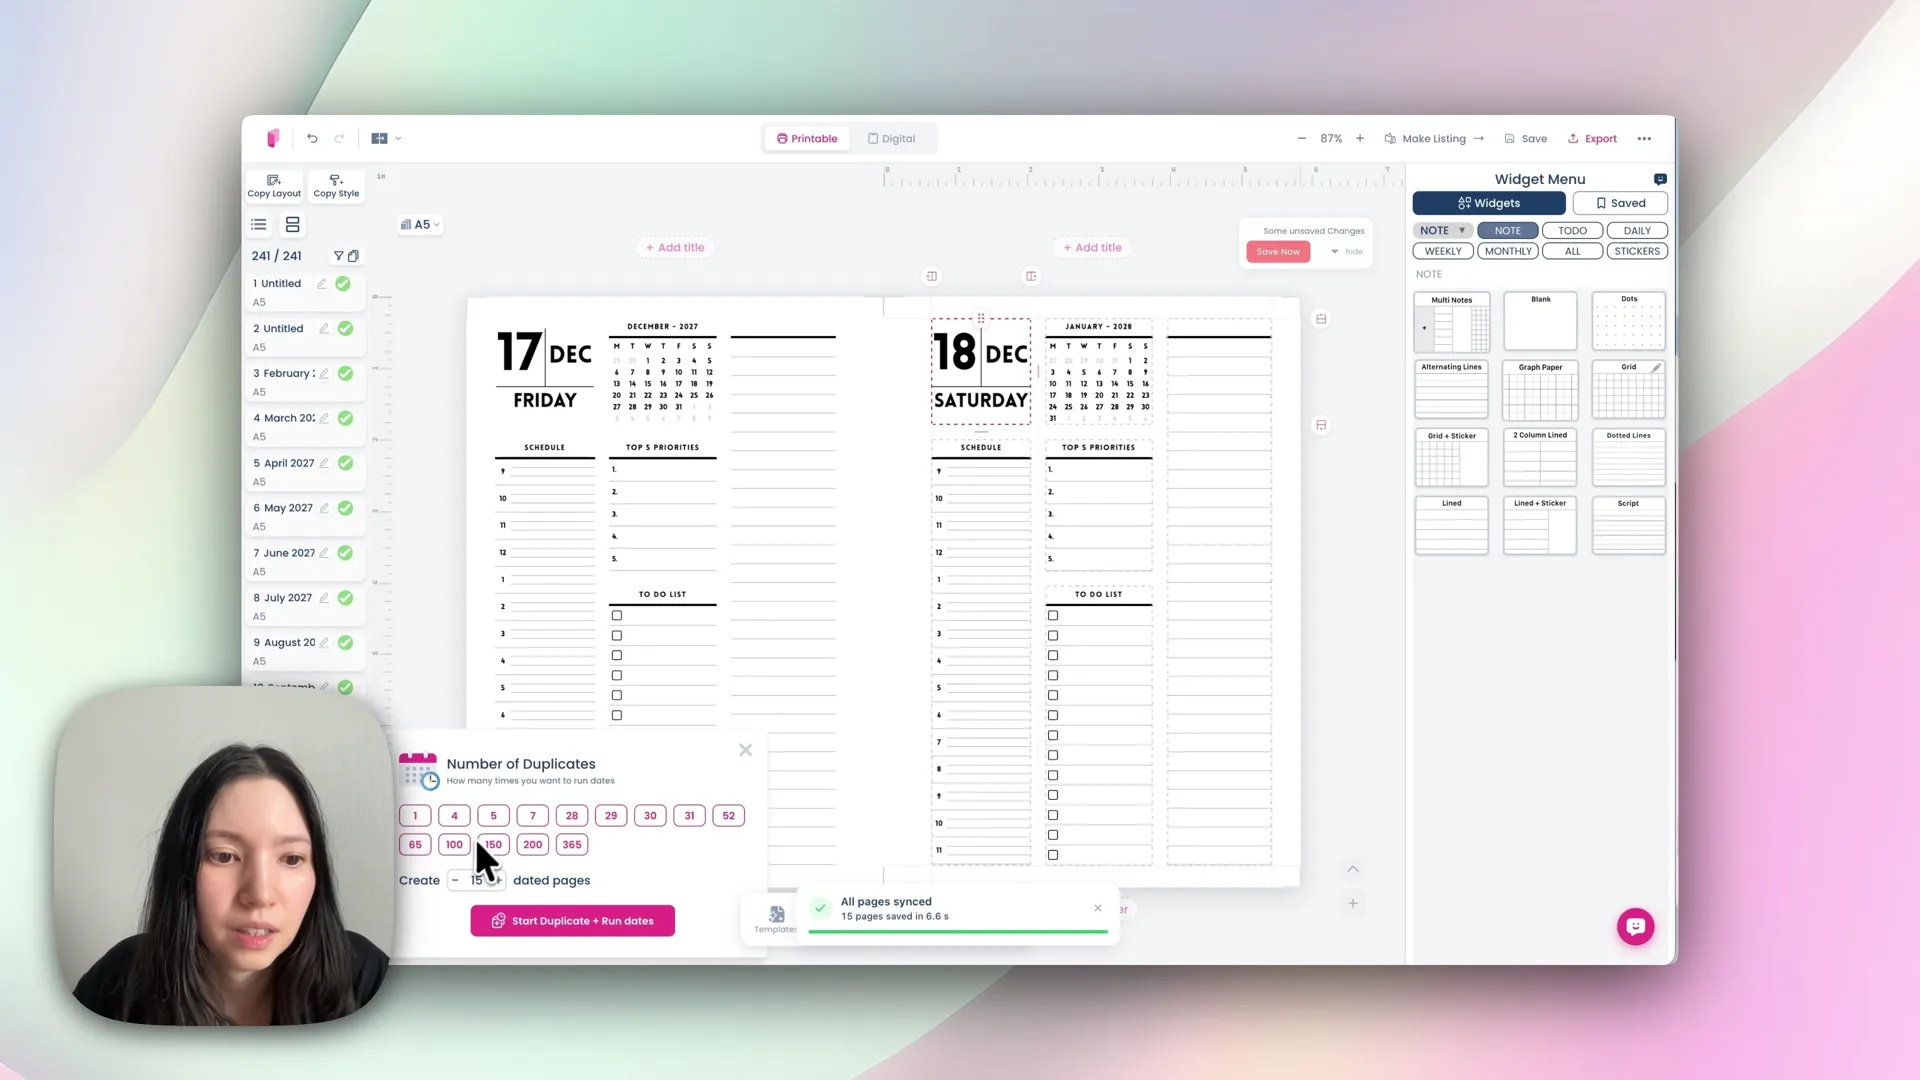
Then duplicate. Because each spread carries two dates, you only need about 150 duplications to produce roughly 300 daily pages. Run 160, check how far through the year you've reached, and top up with another 15 or so until you land on 31 December 2027.
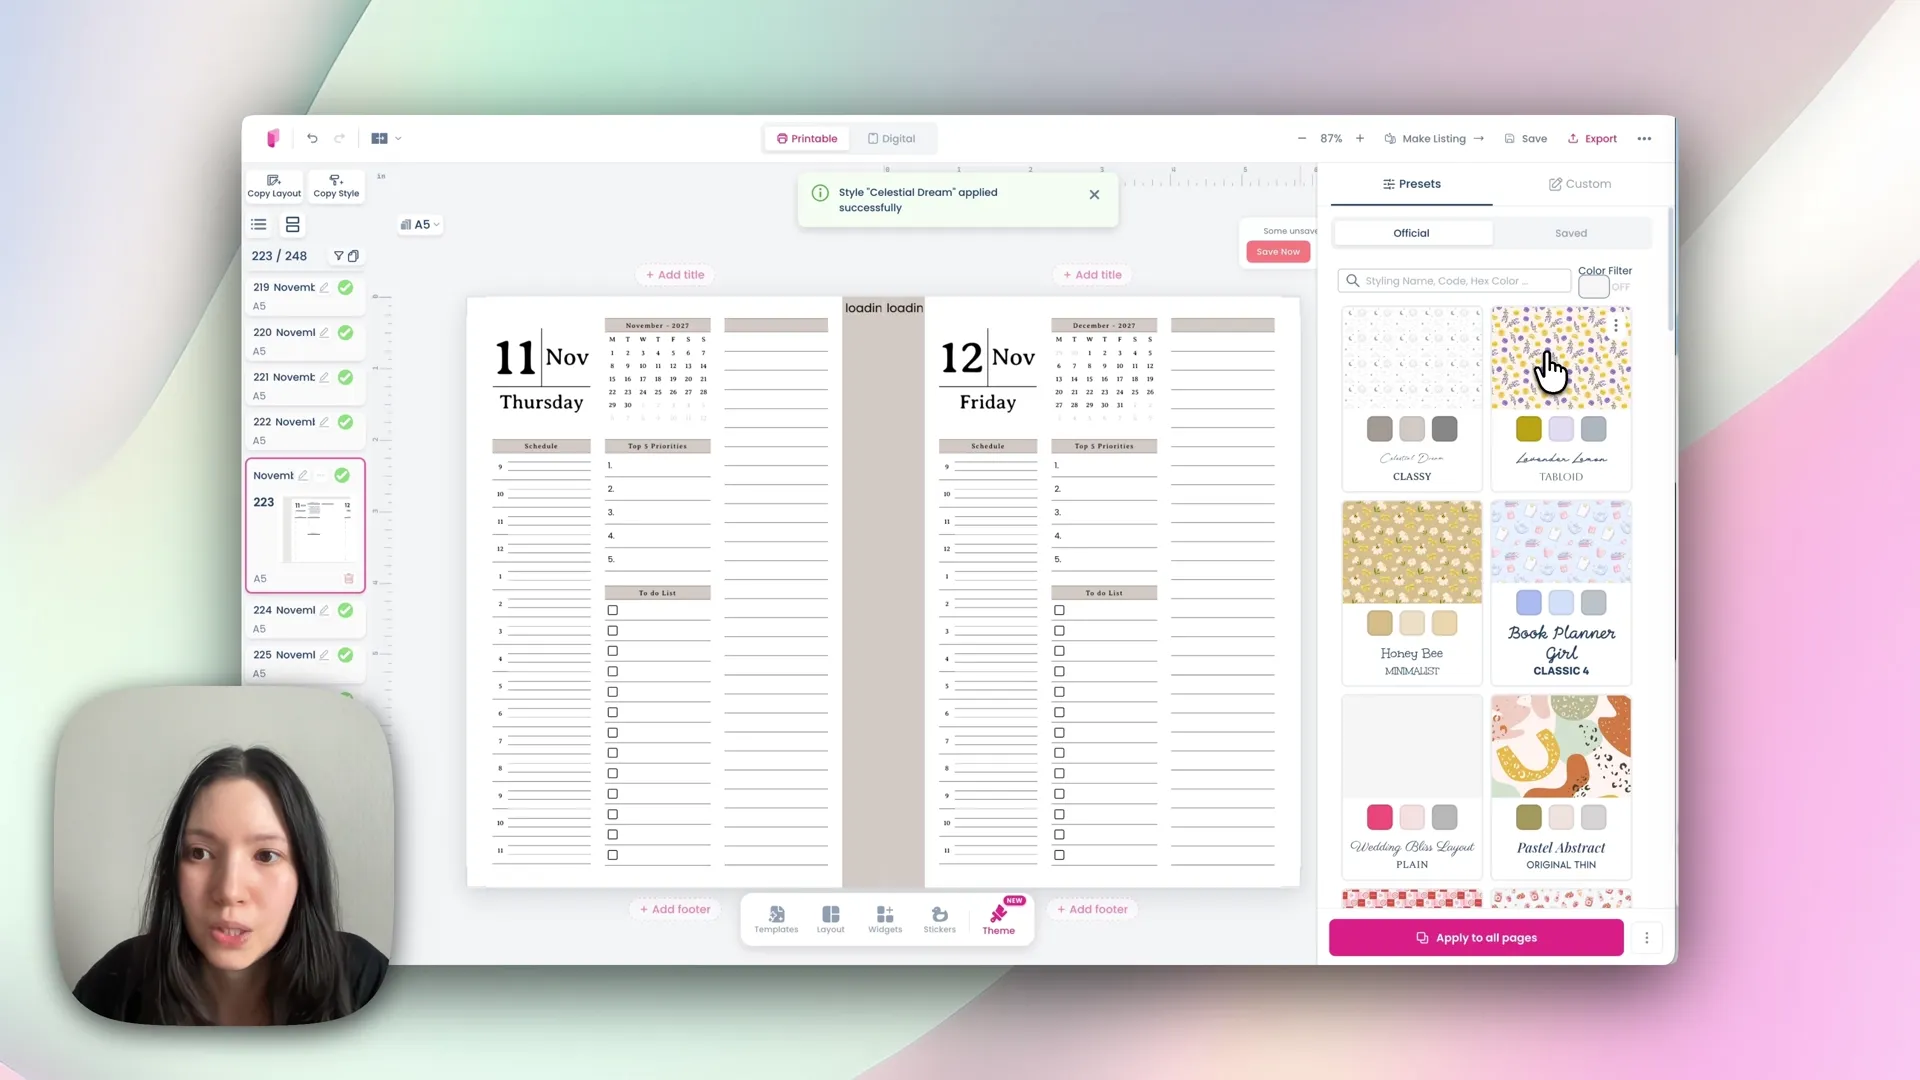
Step 7: Style the whole planner at once
Open Theme → Preset and apply one of the ready-made presets — it restyles widgets, fonts and colours instantly.
To go further, open Theme → Custom, which gives you four menus:
Pattern — choose a pattern and its placement, or upload your own PNG
Font — apply a ready-made pairing, or set fonts individually for titles and widget headers
Style — hover any style to preview it live on the page
Colour — set the outline colour, header colour and line colour separately
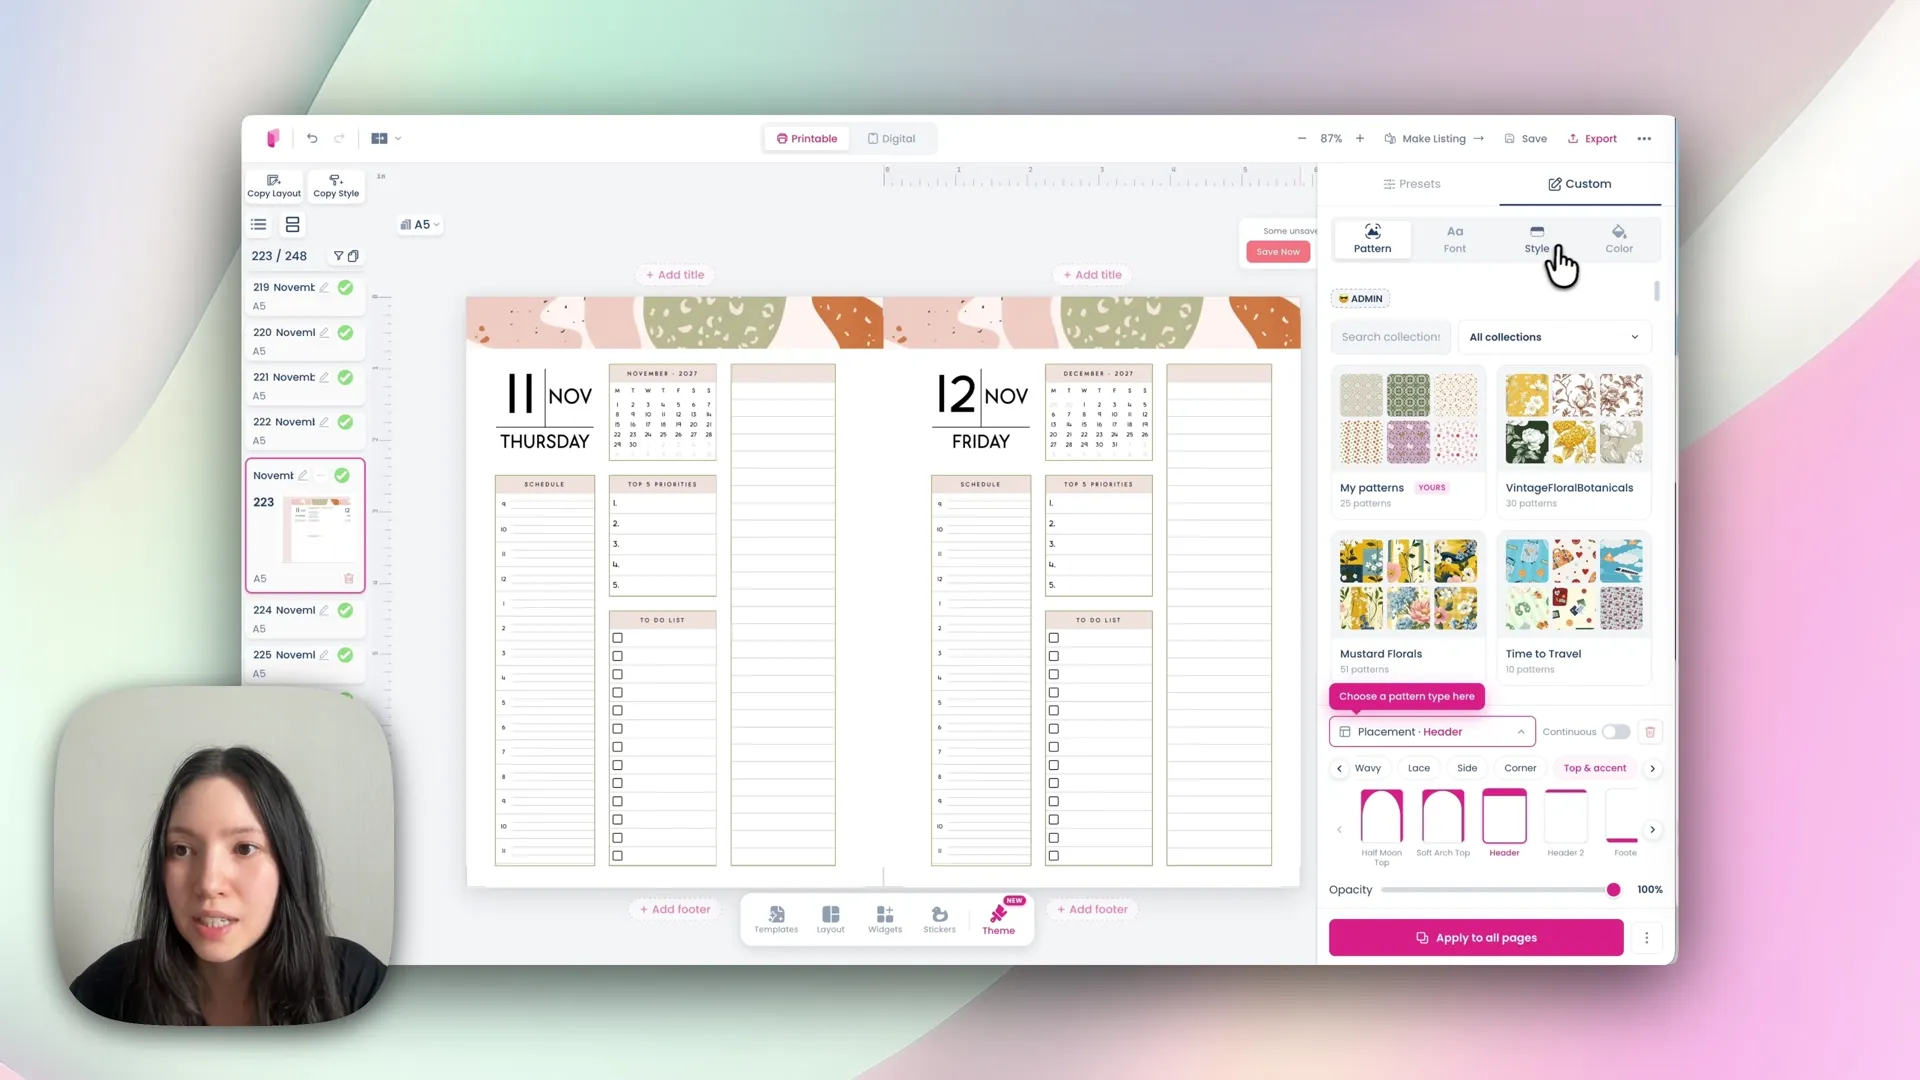
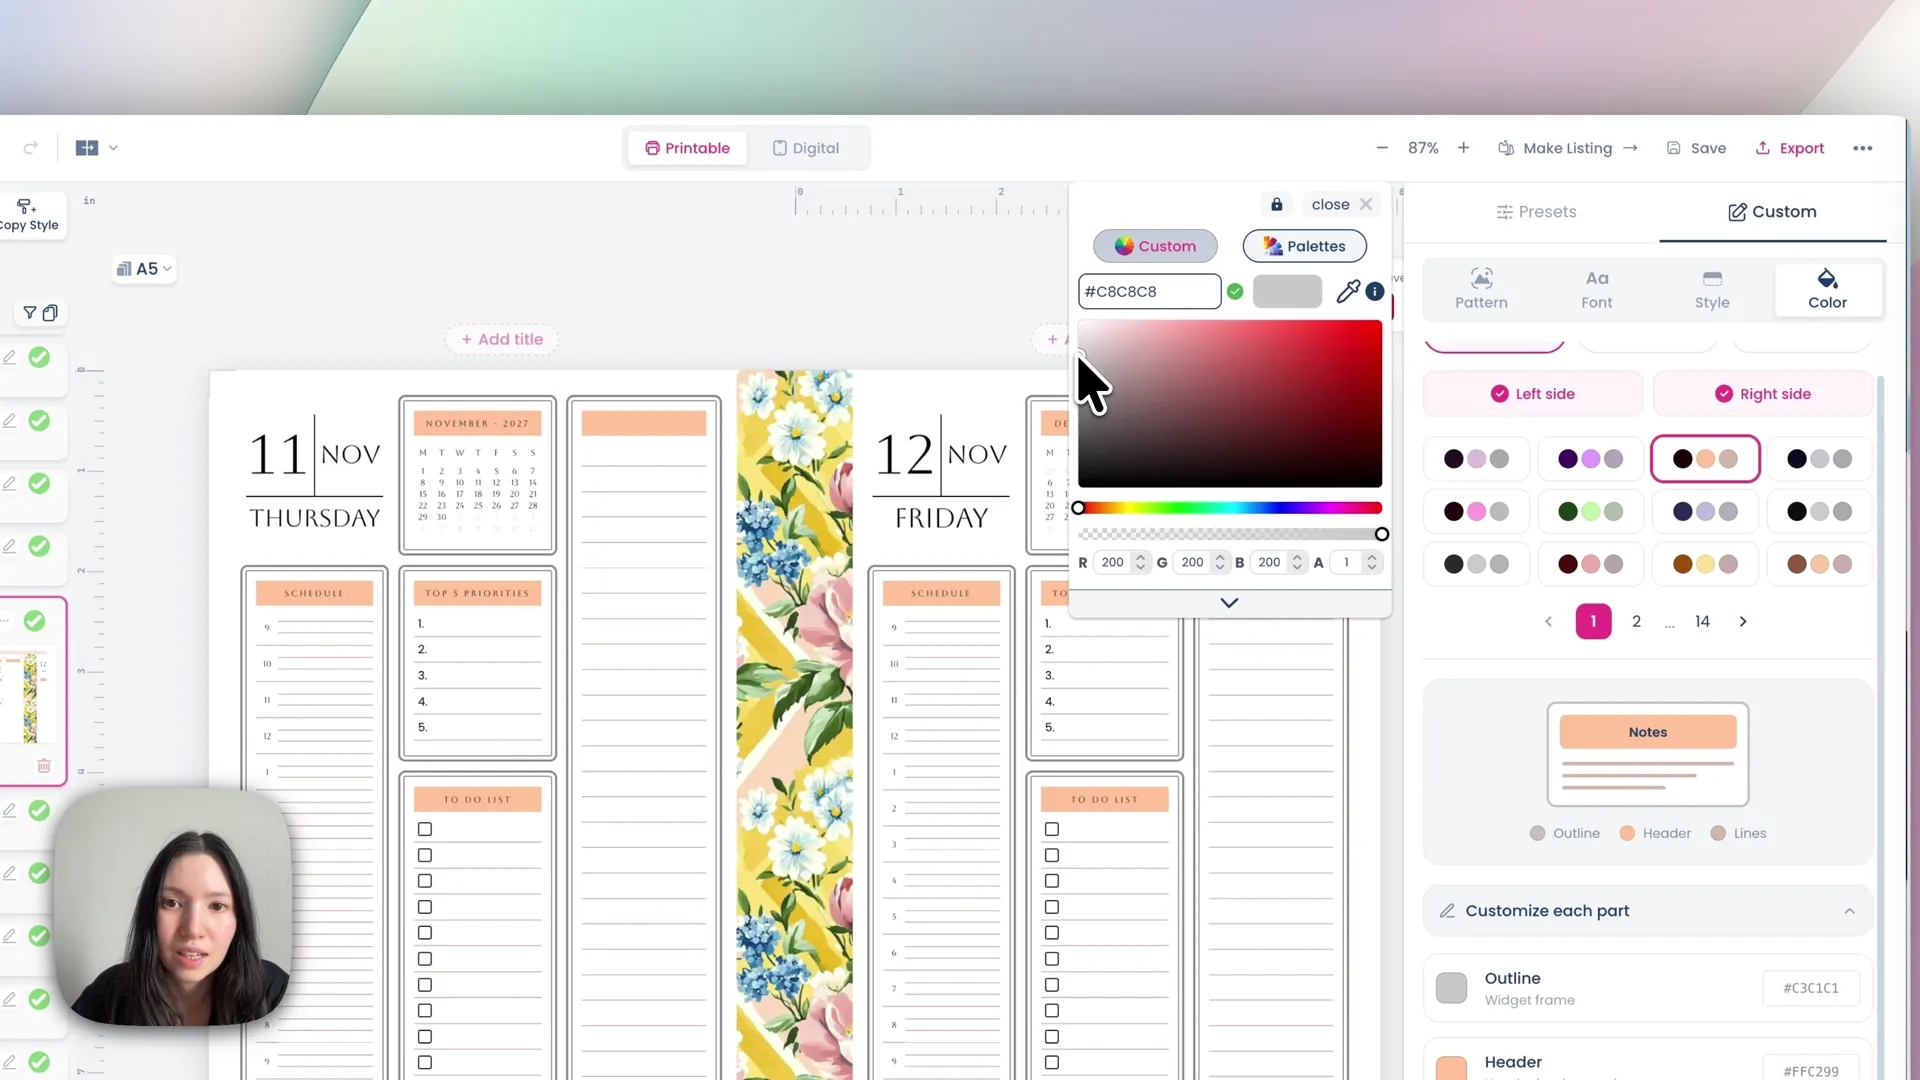
Each has an apply to all pages button, so you style one page and push it across the whole planner. You can also apply to a chosen range of pages — handy if you want weeklies styled differently from dailies.
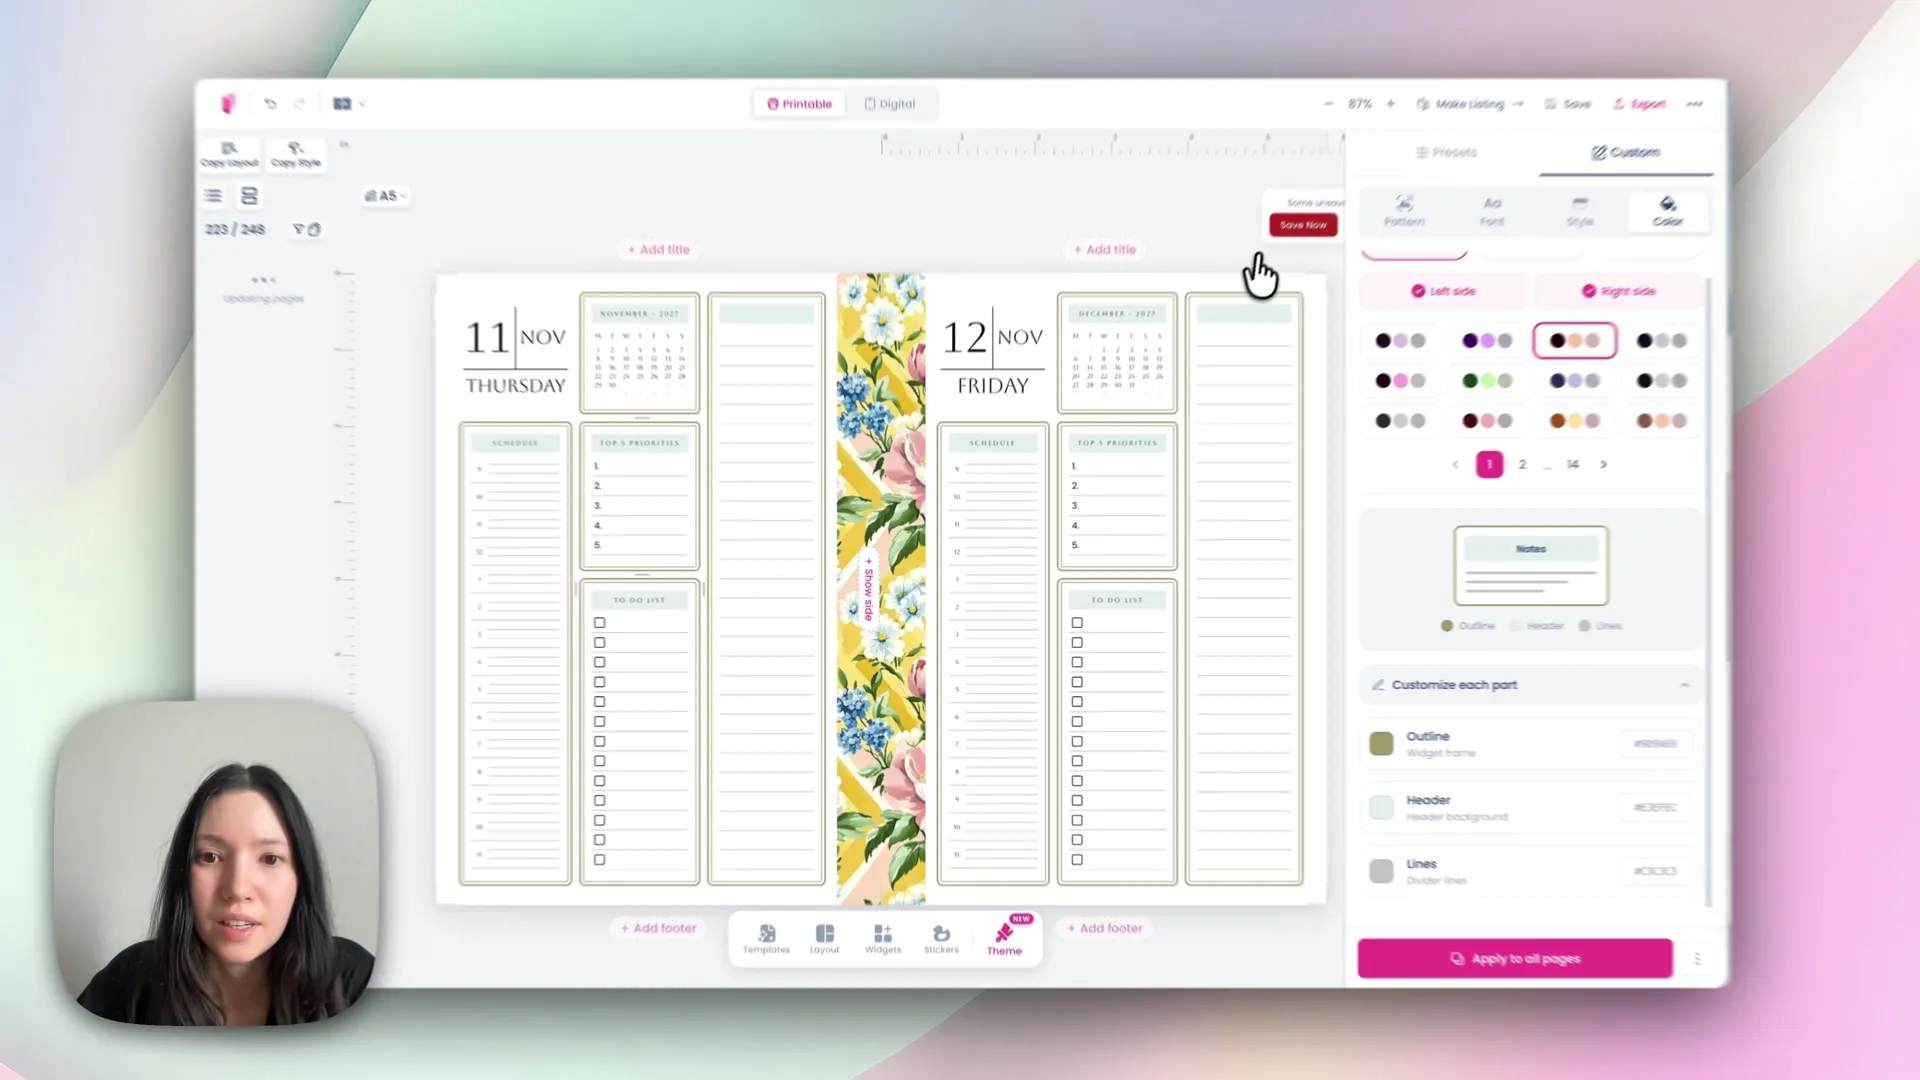
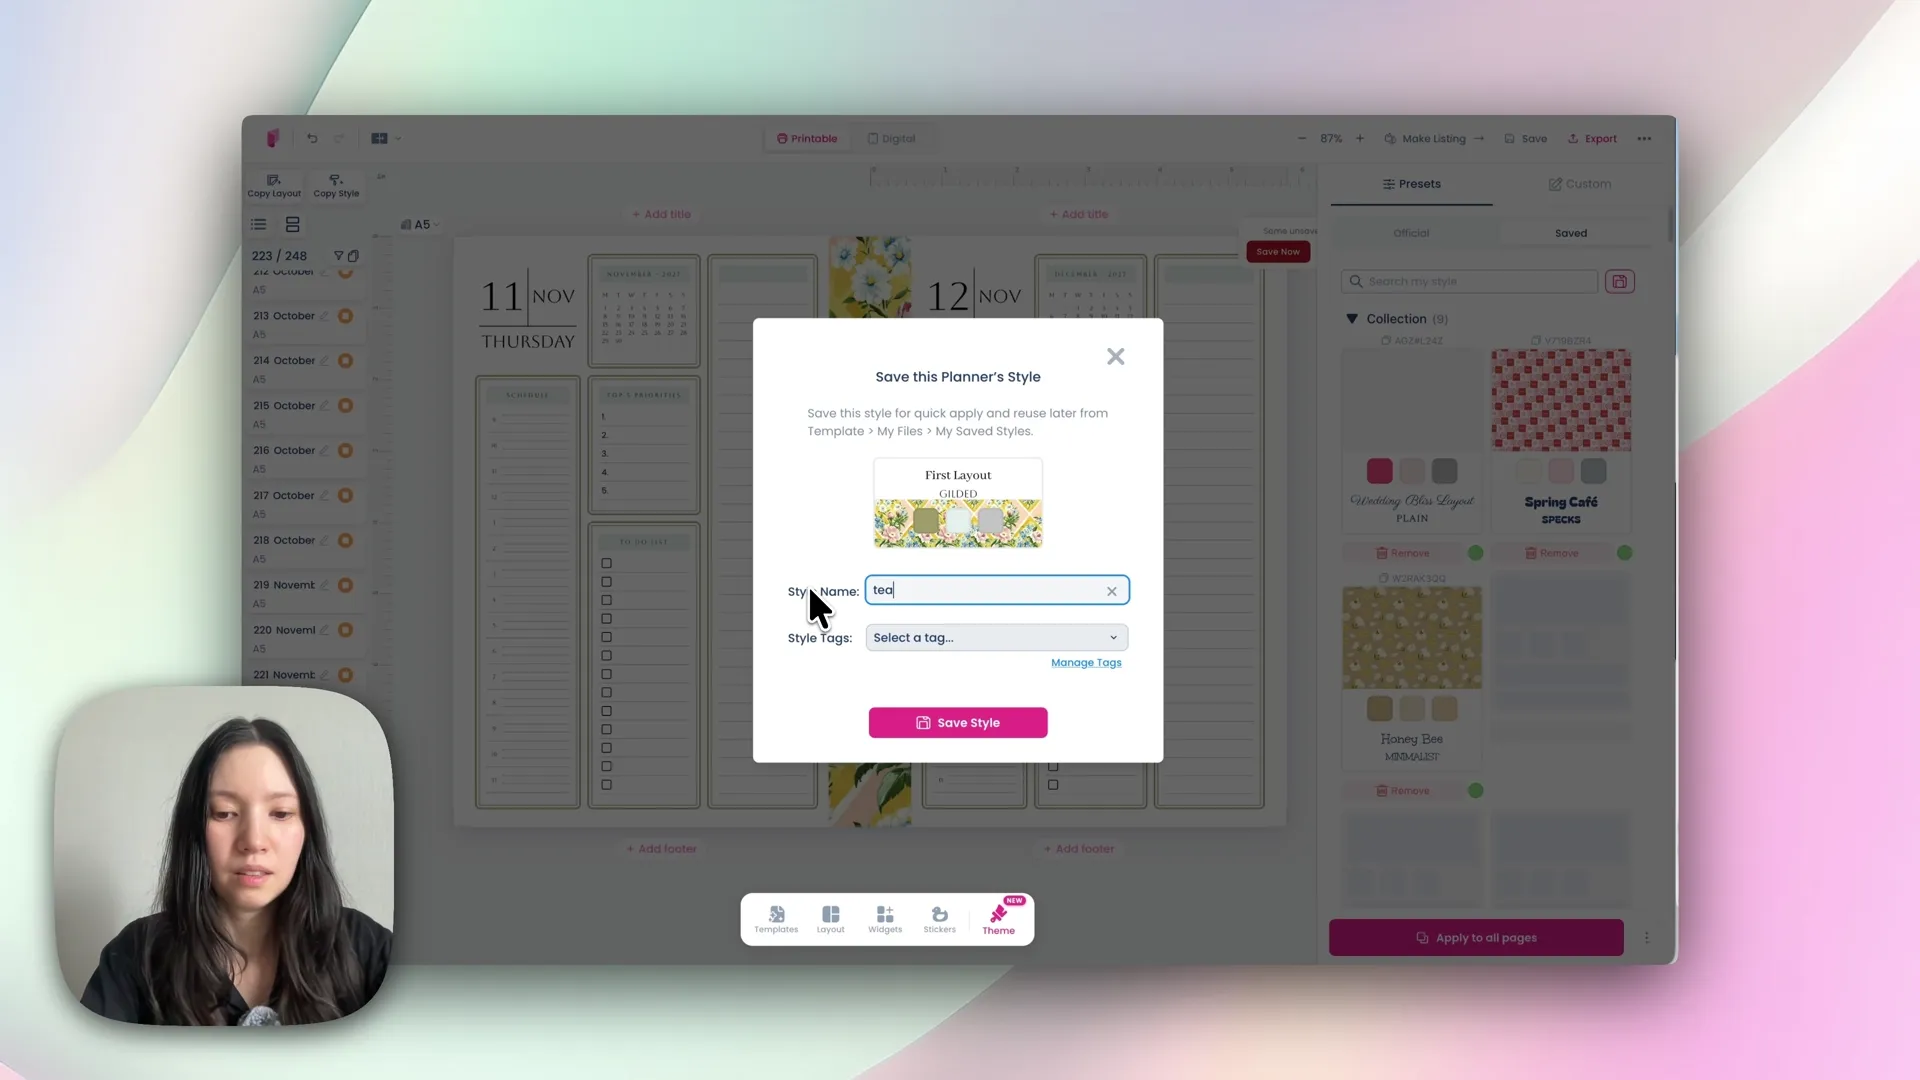
Save your preset. Under Preset → Saved, click save and name it. That preset can then be applied to any other page or future project in one click — which is how you keep a consistent look across a whole product line.
Step 8: Export for printing
Click Export, then choose the paper you'll actually print on:
A4 or US Letter — for printing two A5 pages per sheet
Pre-cut A5 — exports as single separated pages instead
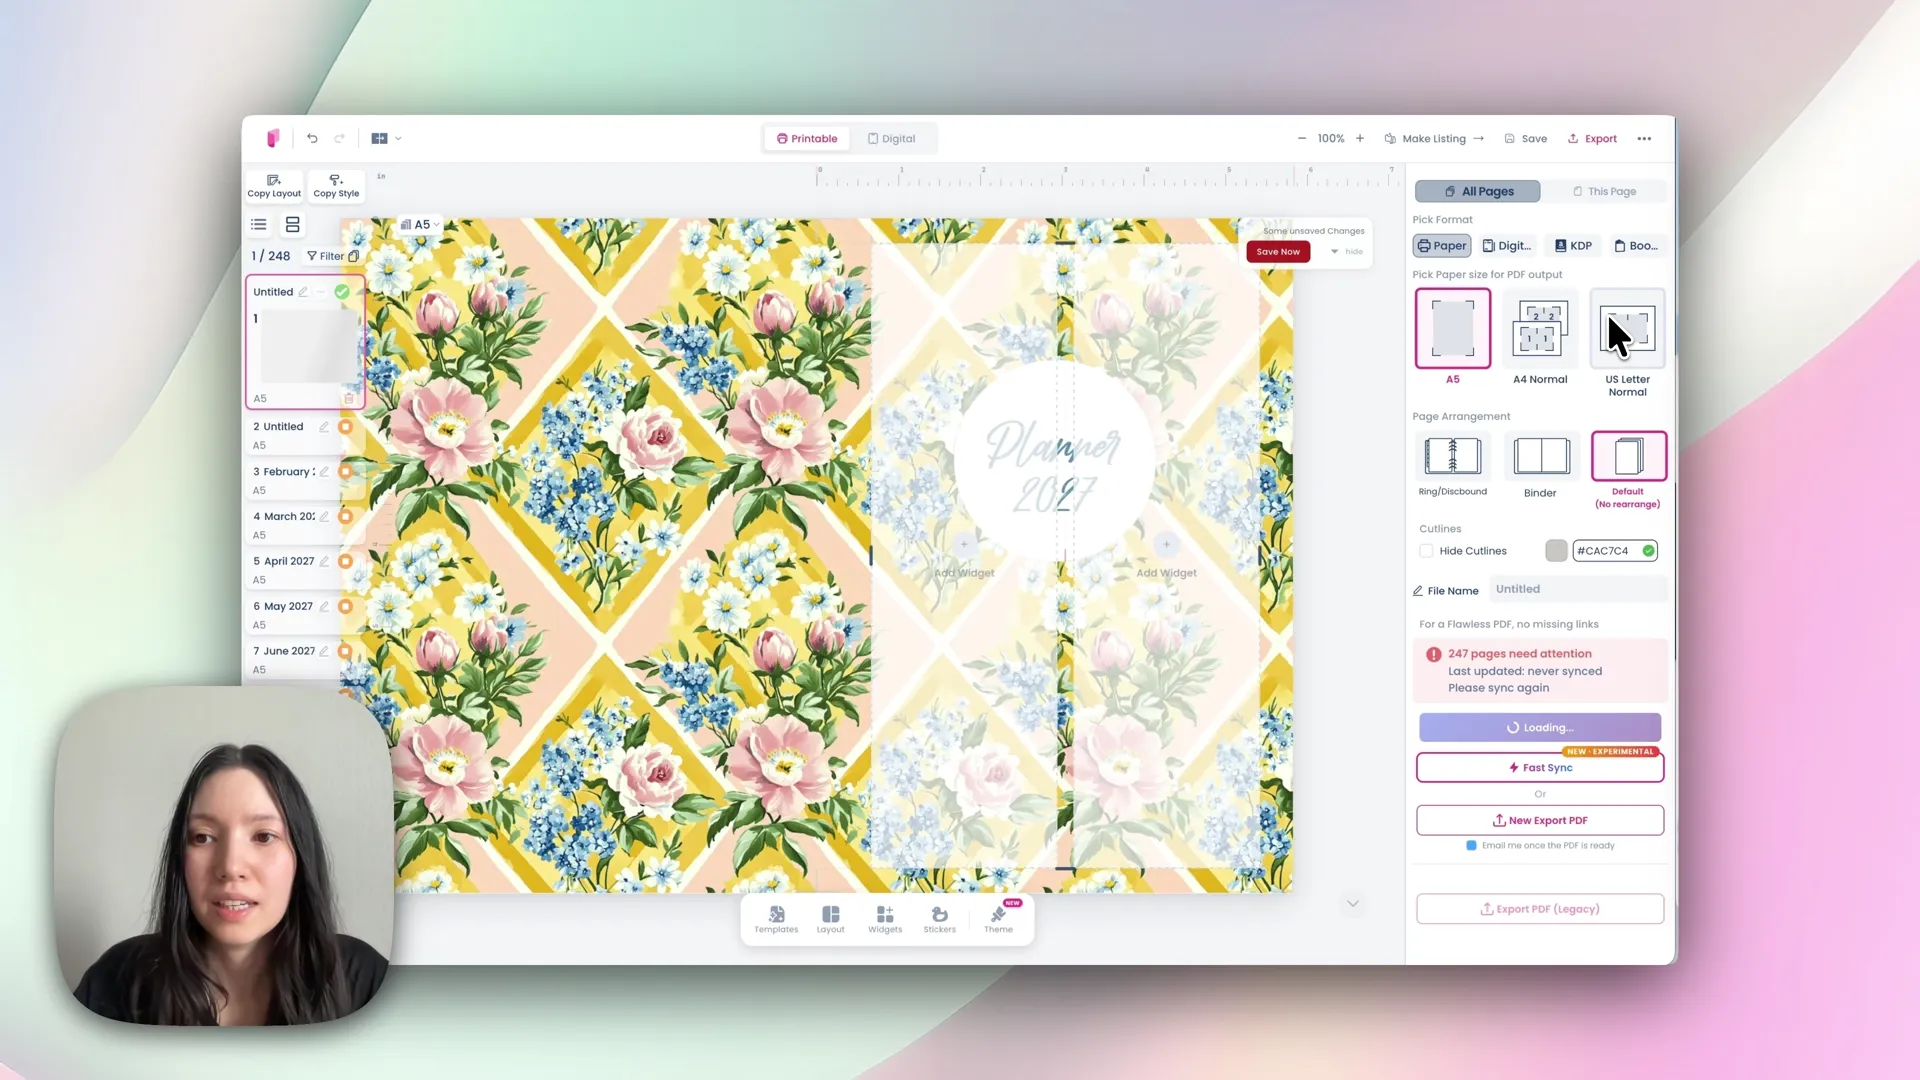
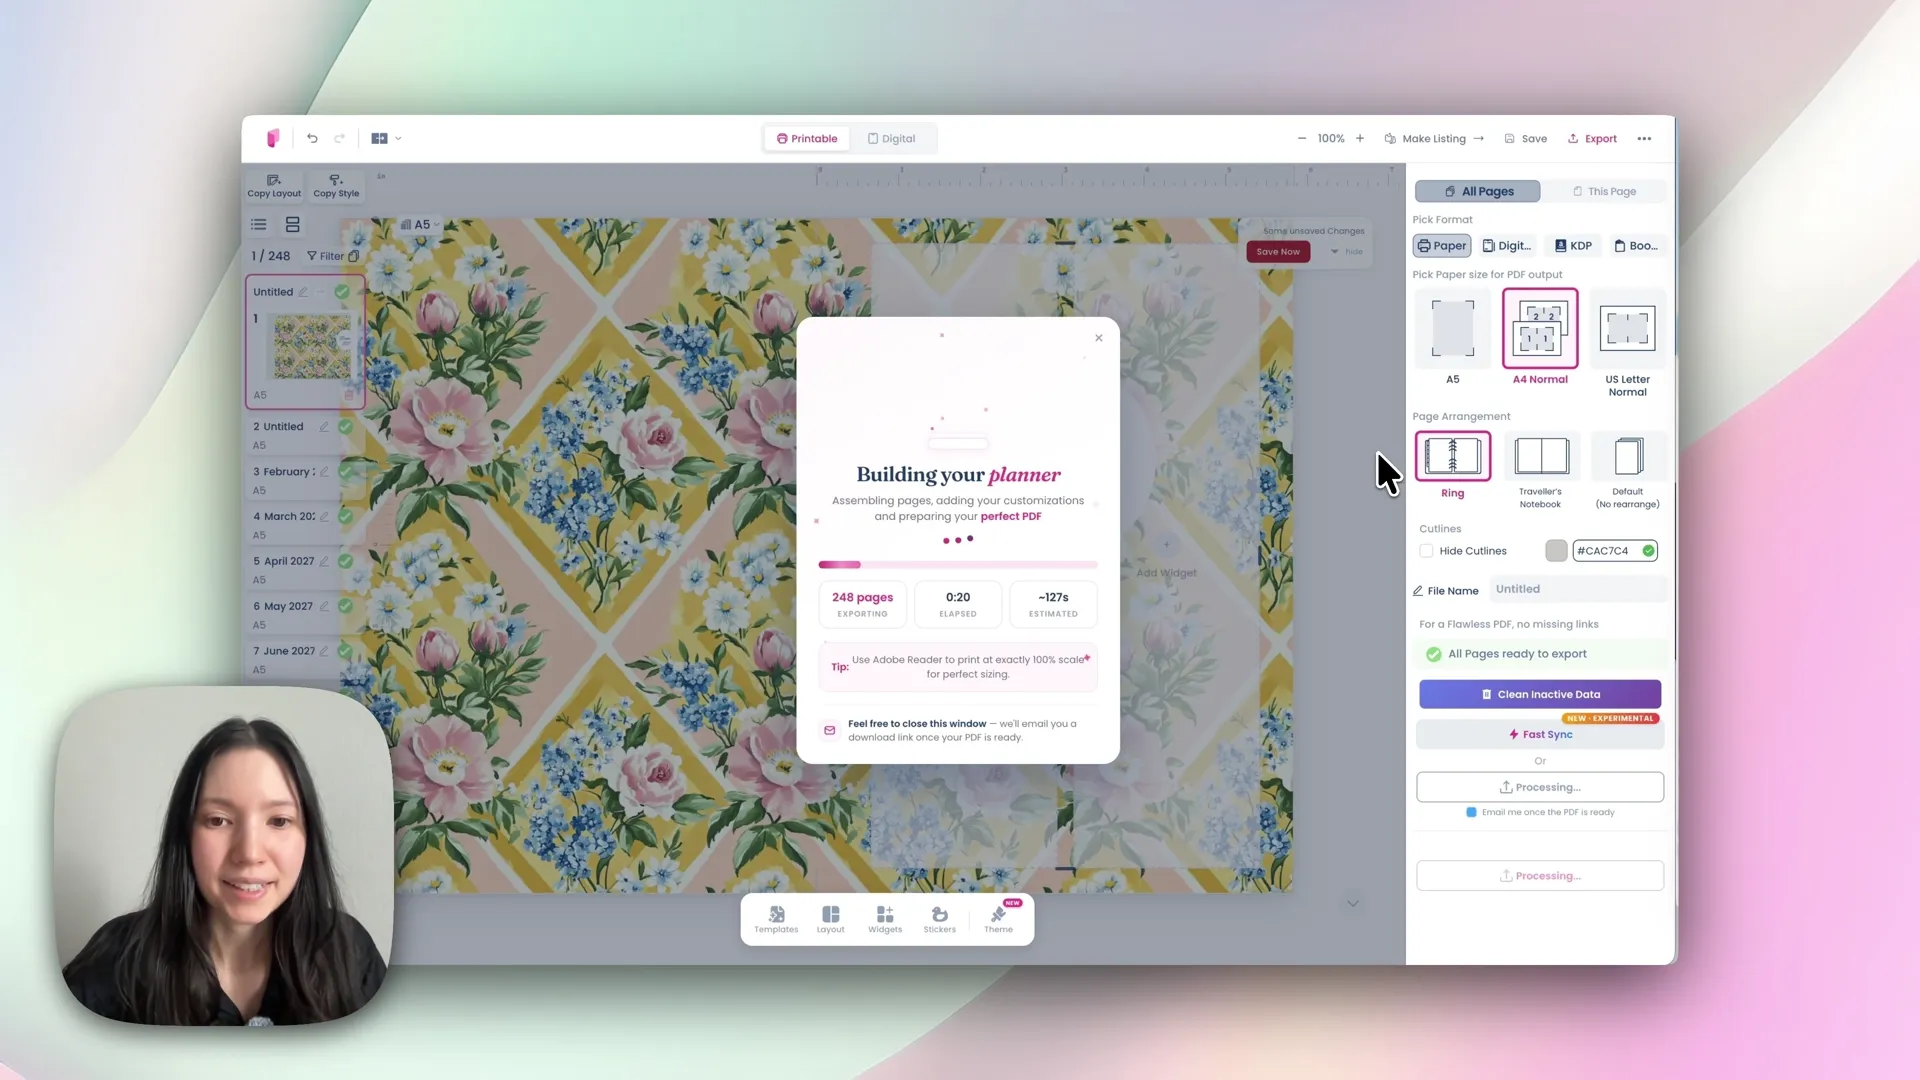
Tick the Ring option. This reorders pages so that when you print double-sided and trim, everything lands in the right sequence.
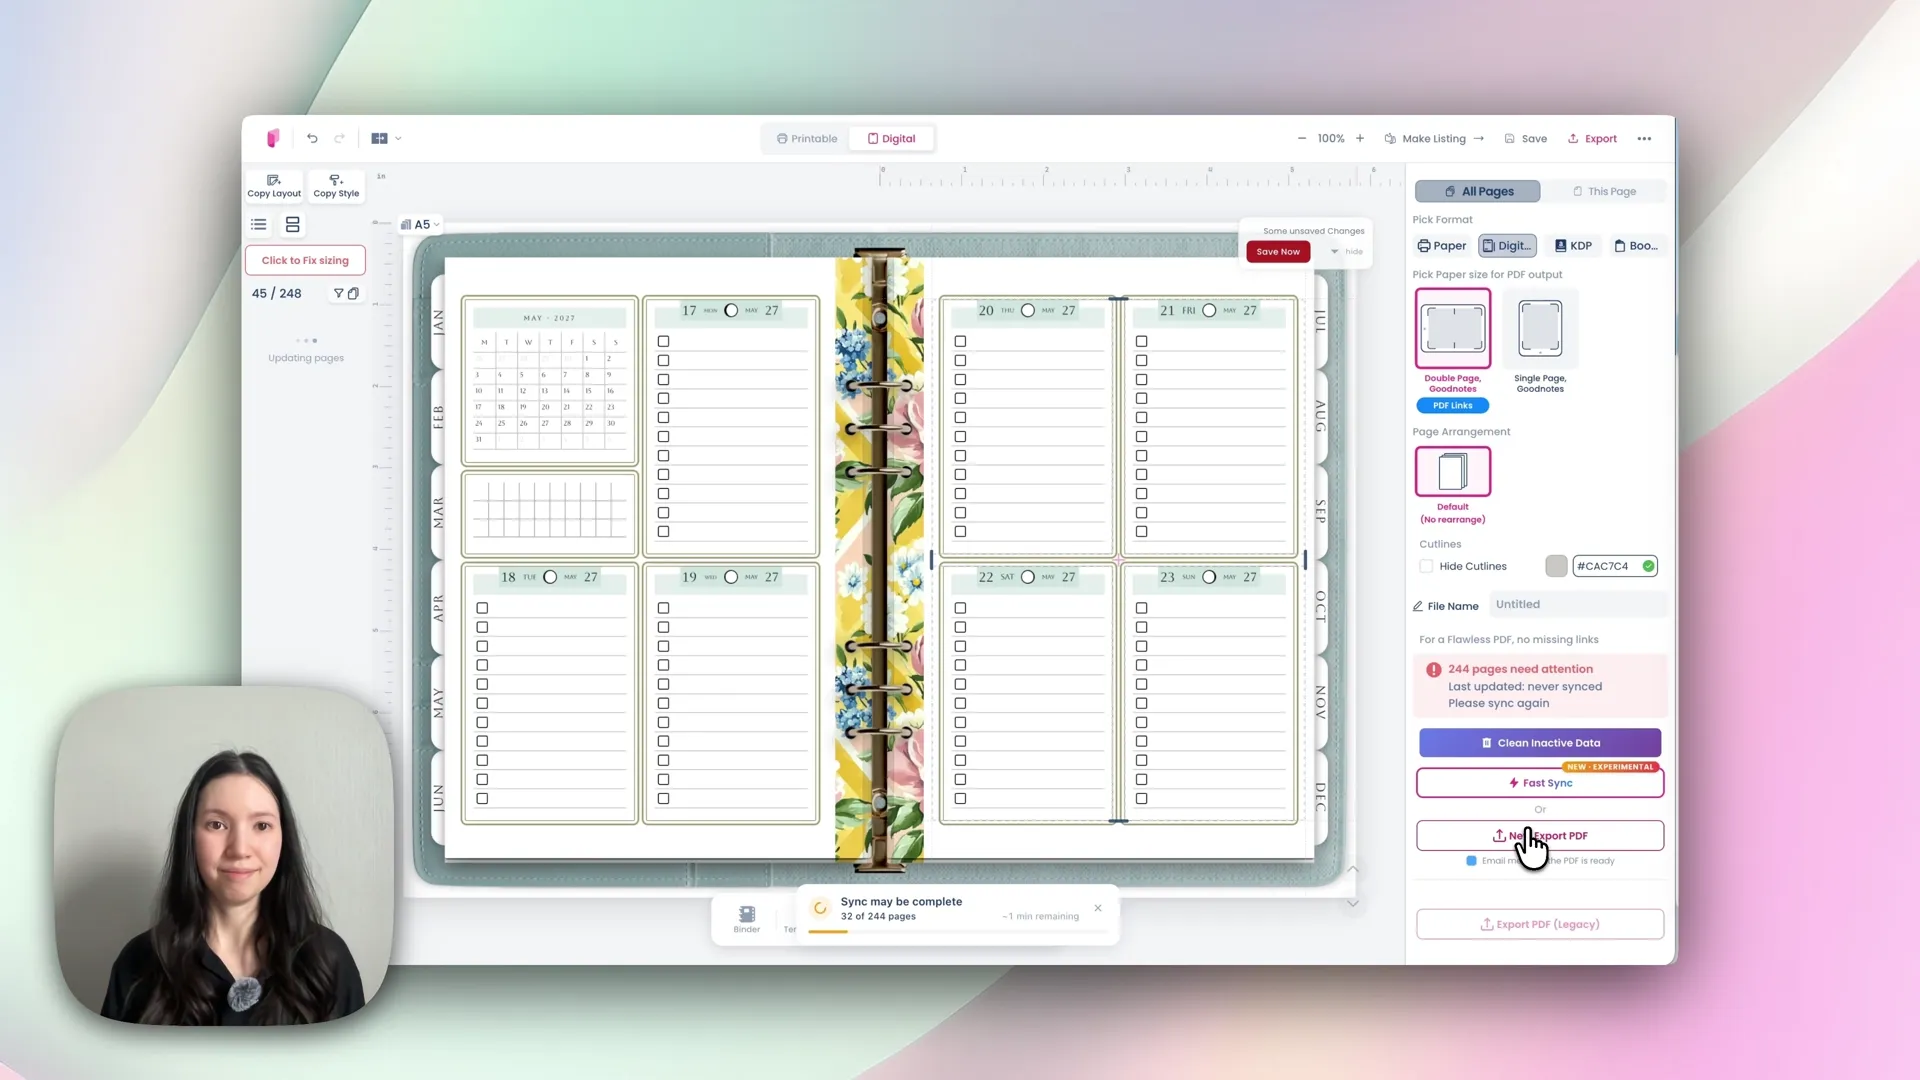
Then Fast Sync, then Export PDF. Export takes around ten minutes for a full planner, and you'll get an email when it's ready — you can close the browser meanwhile. Finished files live under My Exports → Open Export Centre.
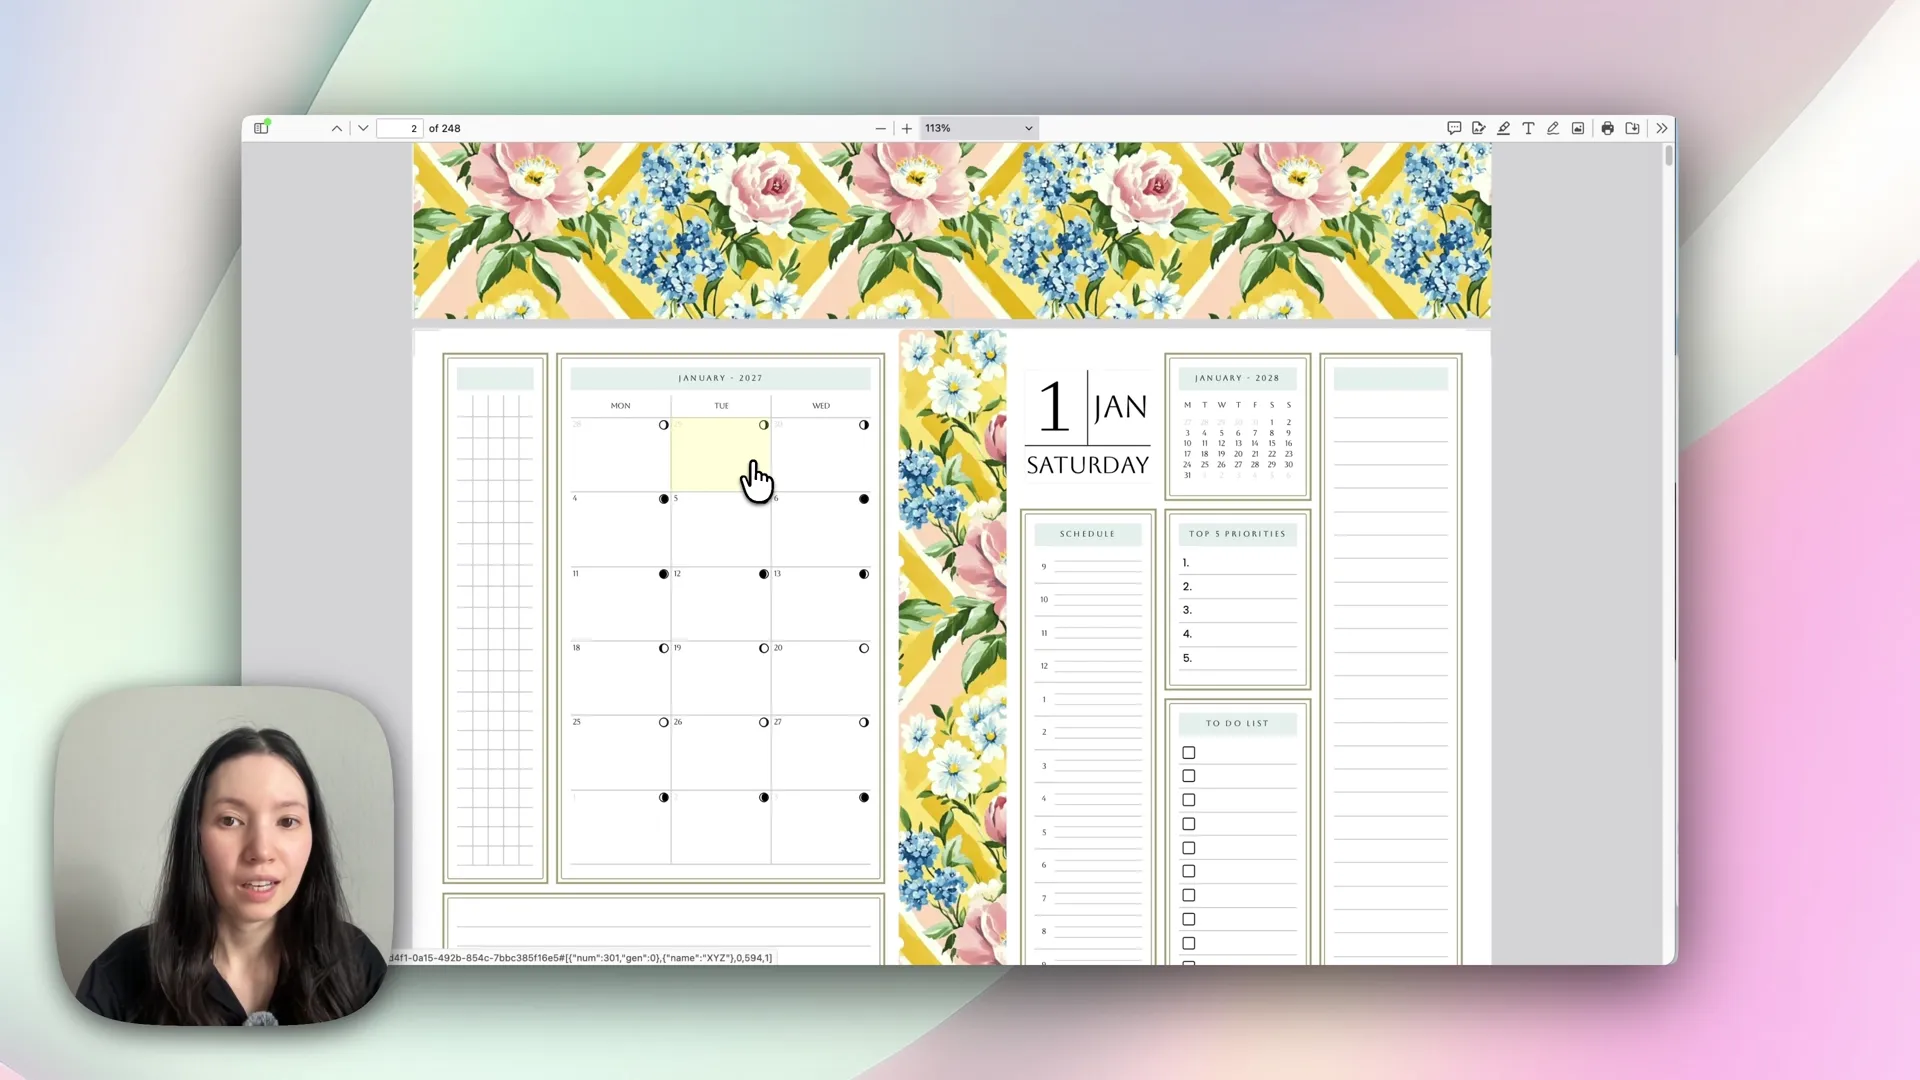
Your exported PDF will look scrambled — this is correct. You'll see a calendar on one side and a daily page on the other. Once printed double-sided and trimmed down the middle, every page falls into the right order. If you exported at US Letter size, the file comes out as single pages instead, because Letter isn't wide enough to hold two A5 pages side by side.
Step 9: Print it
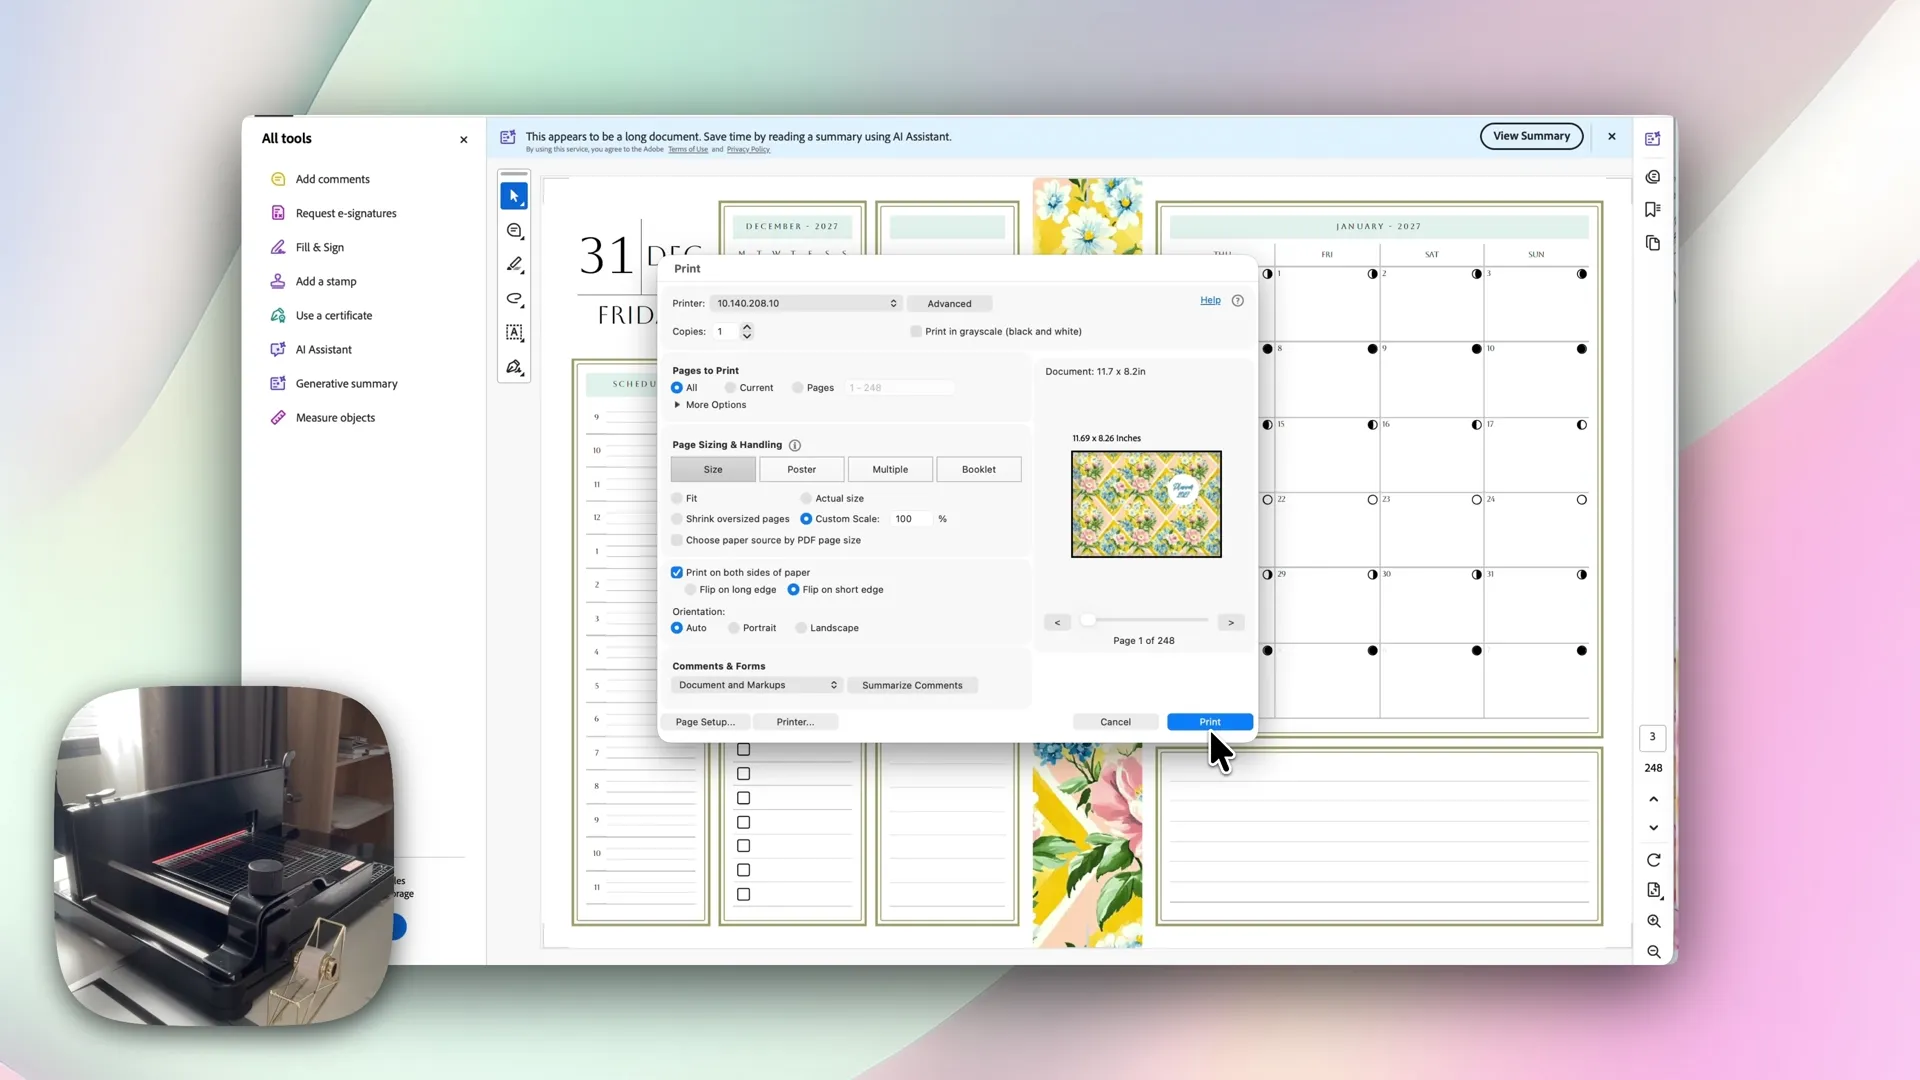
Open the PDF in Adobe Acrobat Reader and use these settings:
Pages: all
Scale: custom, 100% — never "fit to page"
Orientation: auto
Flip on SHORT edge if printing on A4
Flip on LONG edge if printing on US Letter
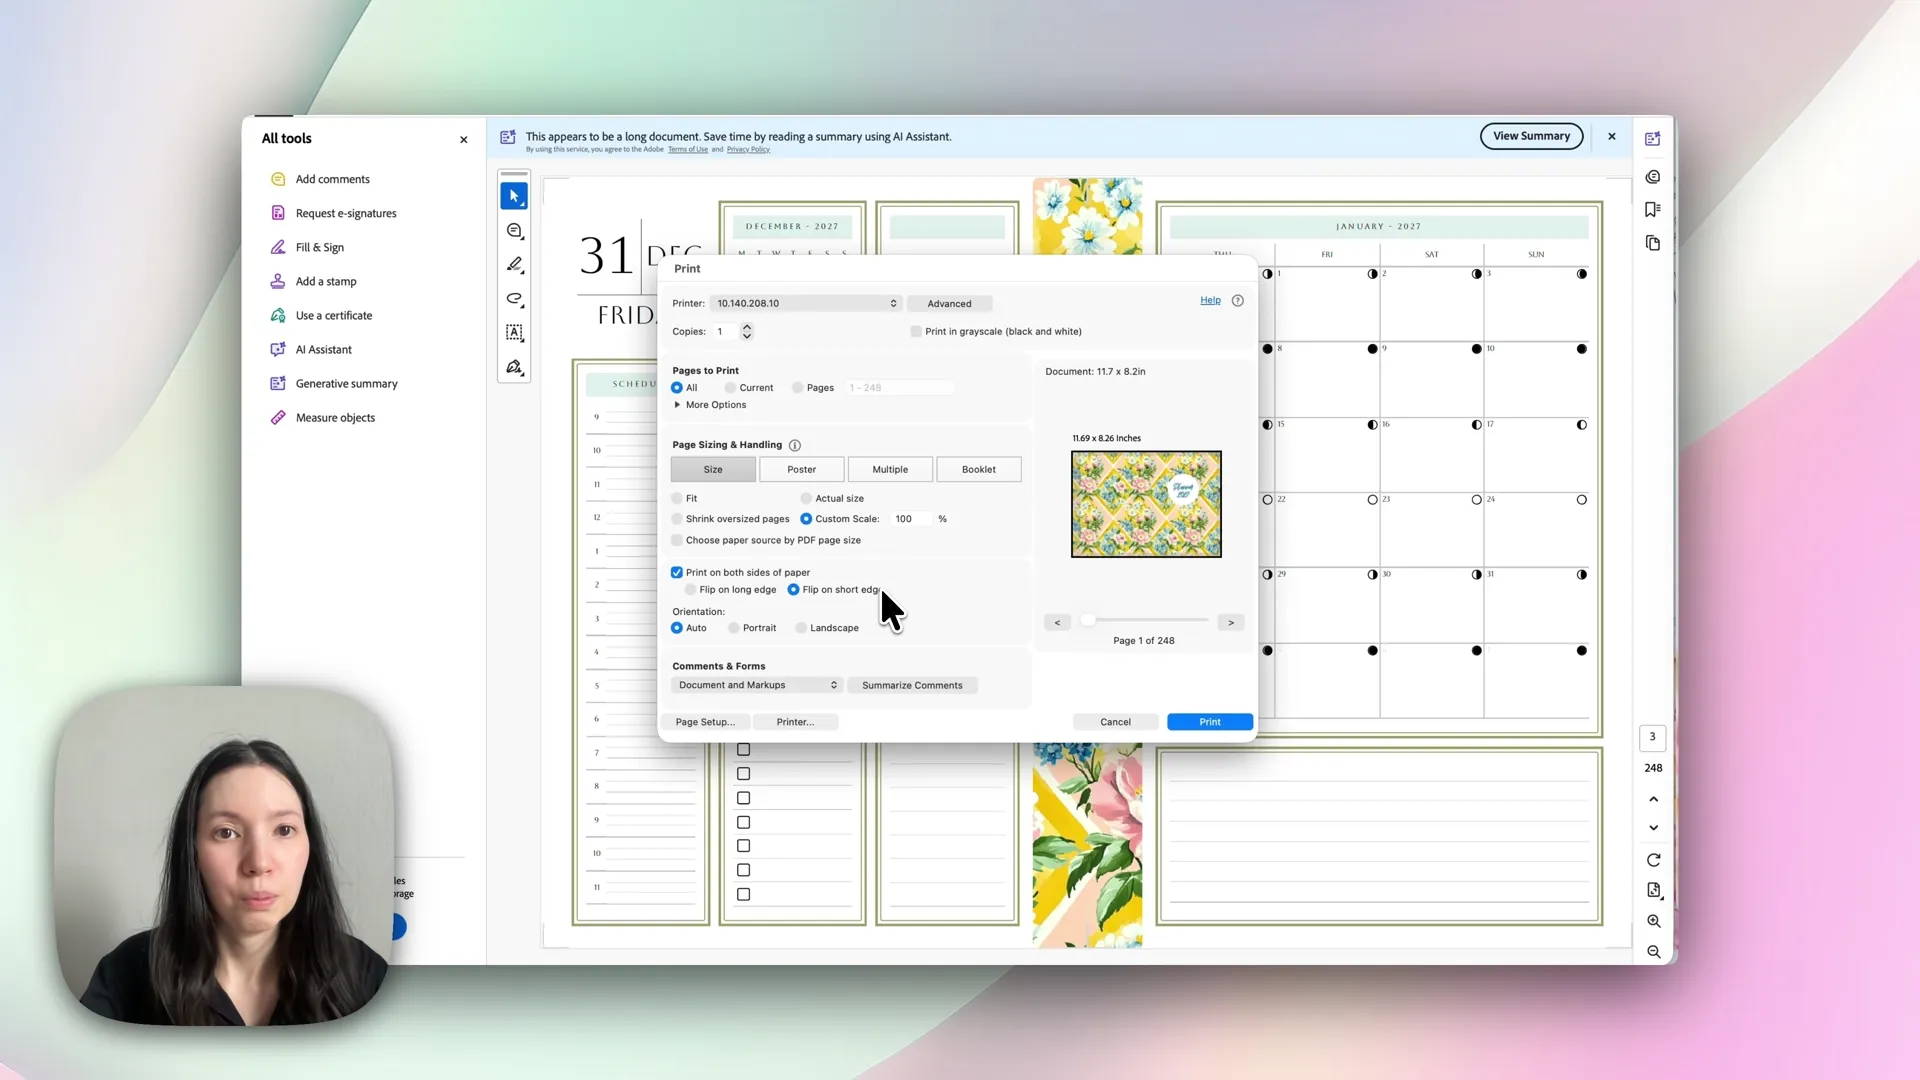
If pages come out upside down, that flip setting is the cause — switch it to the other option.
Use a duplex printer if you possibly can. On a 200 to 300 page planner, manually flipping stacks almost guarantees a misfeed at some point, and a single missed sheet throws the whole planner out of order.
(Photo: printed 2027 spreads coming off the printer. NEEDS ORIGINAL)
Step 10: Trim and bind
Trim each sheet down the middle, hole punch, and insert into your binder.
If you printed on US Letter you'll also need to trim the top, bottom and outer edges to size. A heavy-duty paper cutter is worth it here — it cuts 300 to 400 sheets at a time, turning an afternoon of trimming into a few minutes.
For a bound book rather than a binder, see our planner binding methods guide, which compares rings, discs, spiral, wire and stitched signatures side by side.
(Photo: the trimmed planner block being punched and inserted into a binder. NEEDS ORIGINAL)
Turn the same planner into a digital planner
Here's the part that saves you building twice. Your printable planner can become a hyperlinked digital planner without starting over.
Click Go Digital. A binder menu appears where you can set the spine style and the background colour.
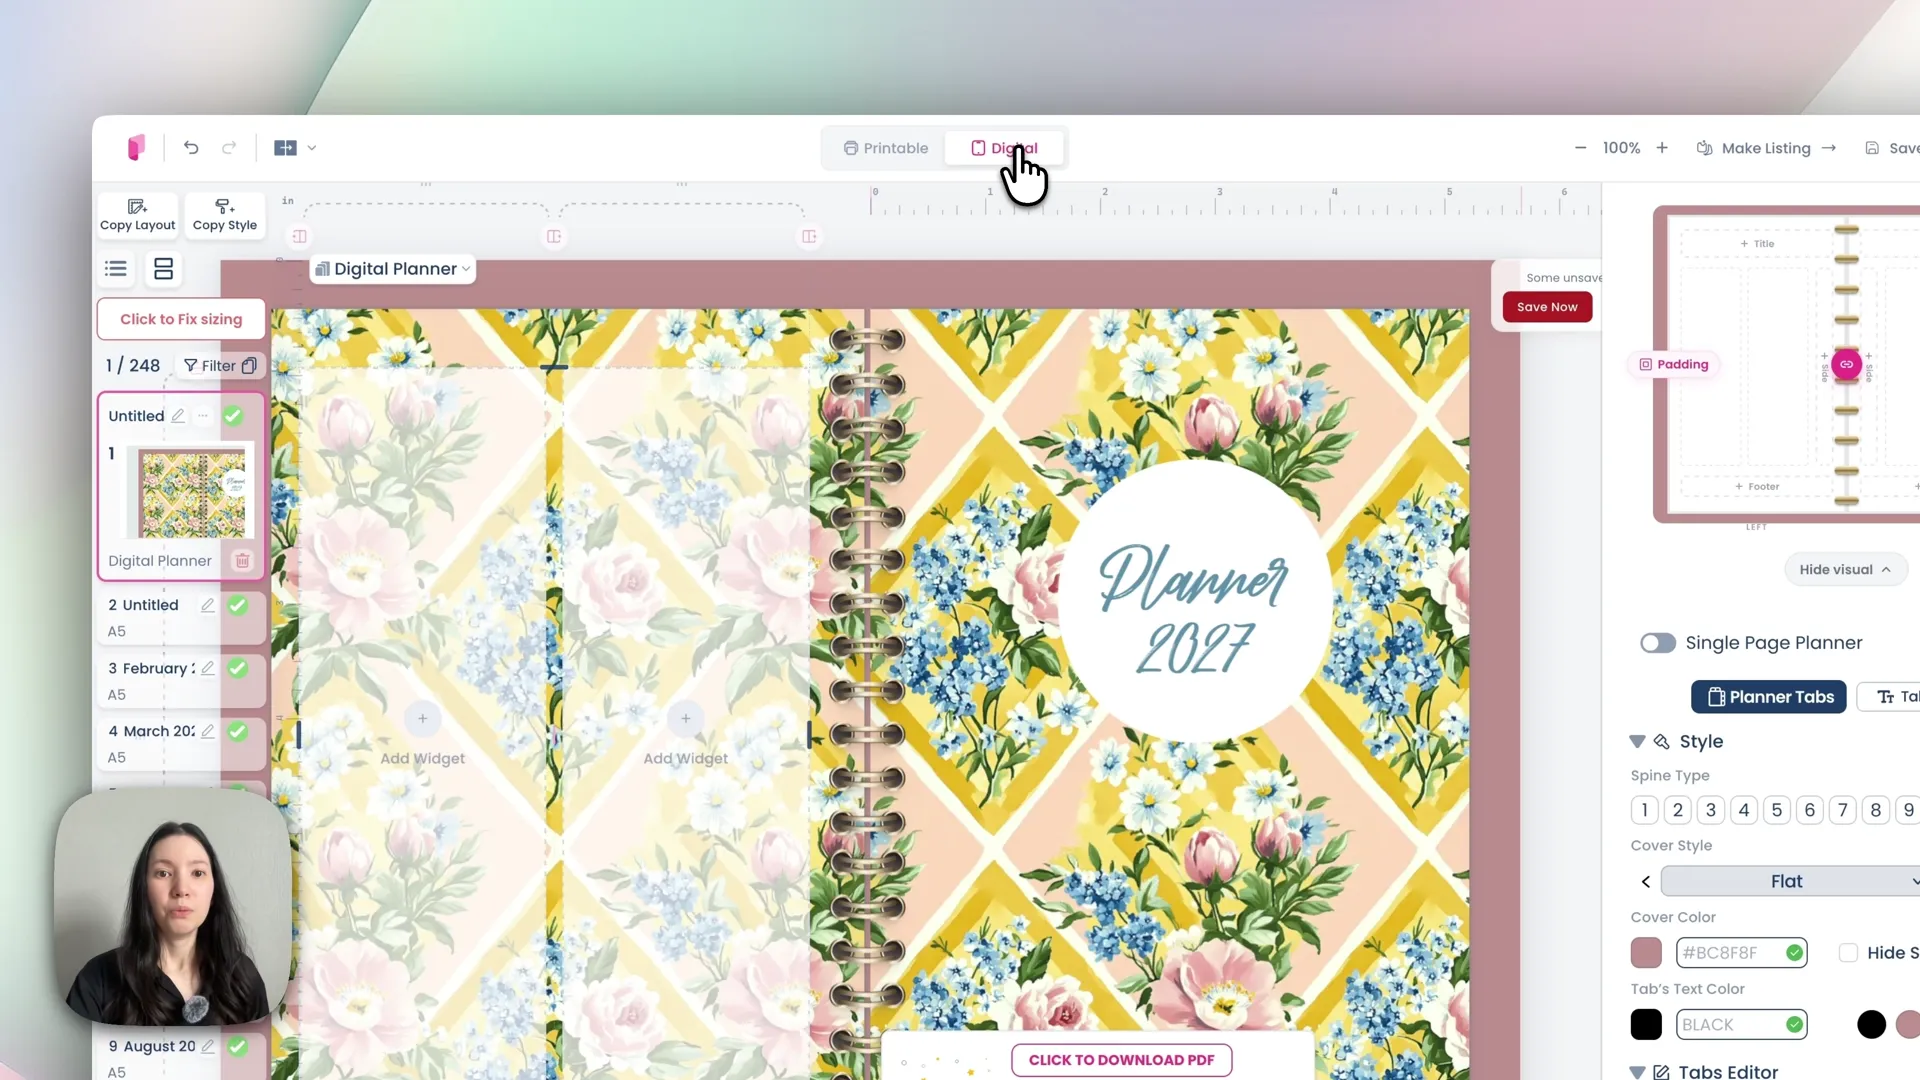
Add tabs — twelve of them, labelled Jan to Jun down one side and Jul to Dec down the other.
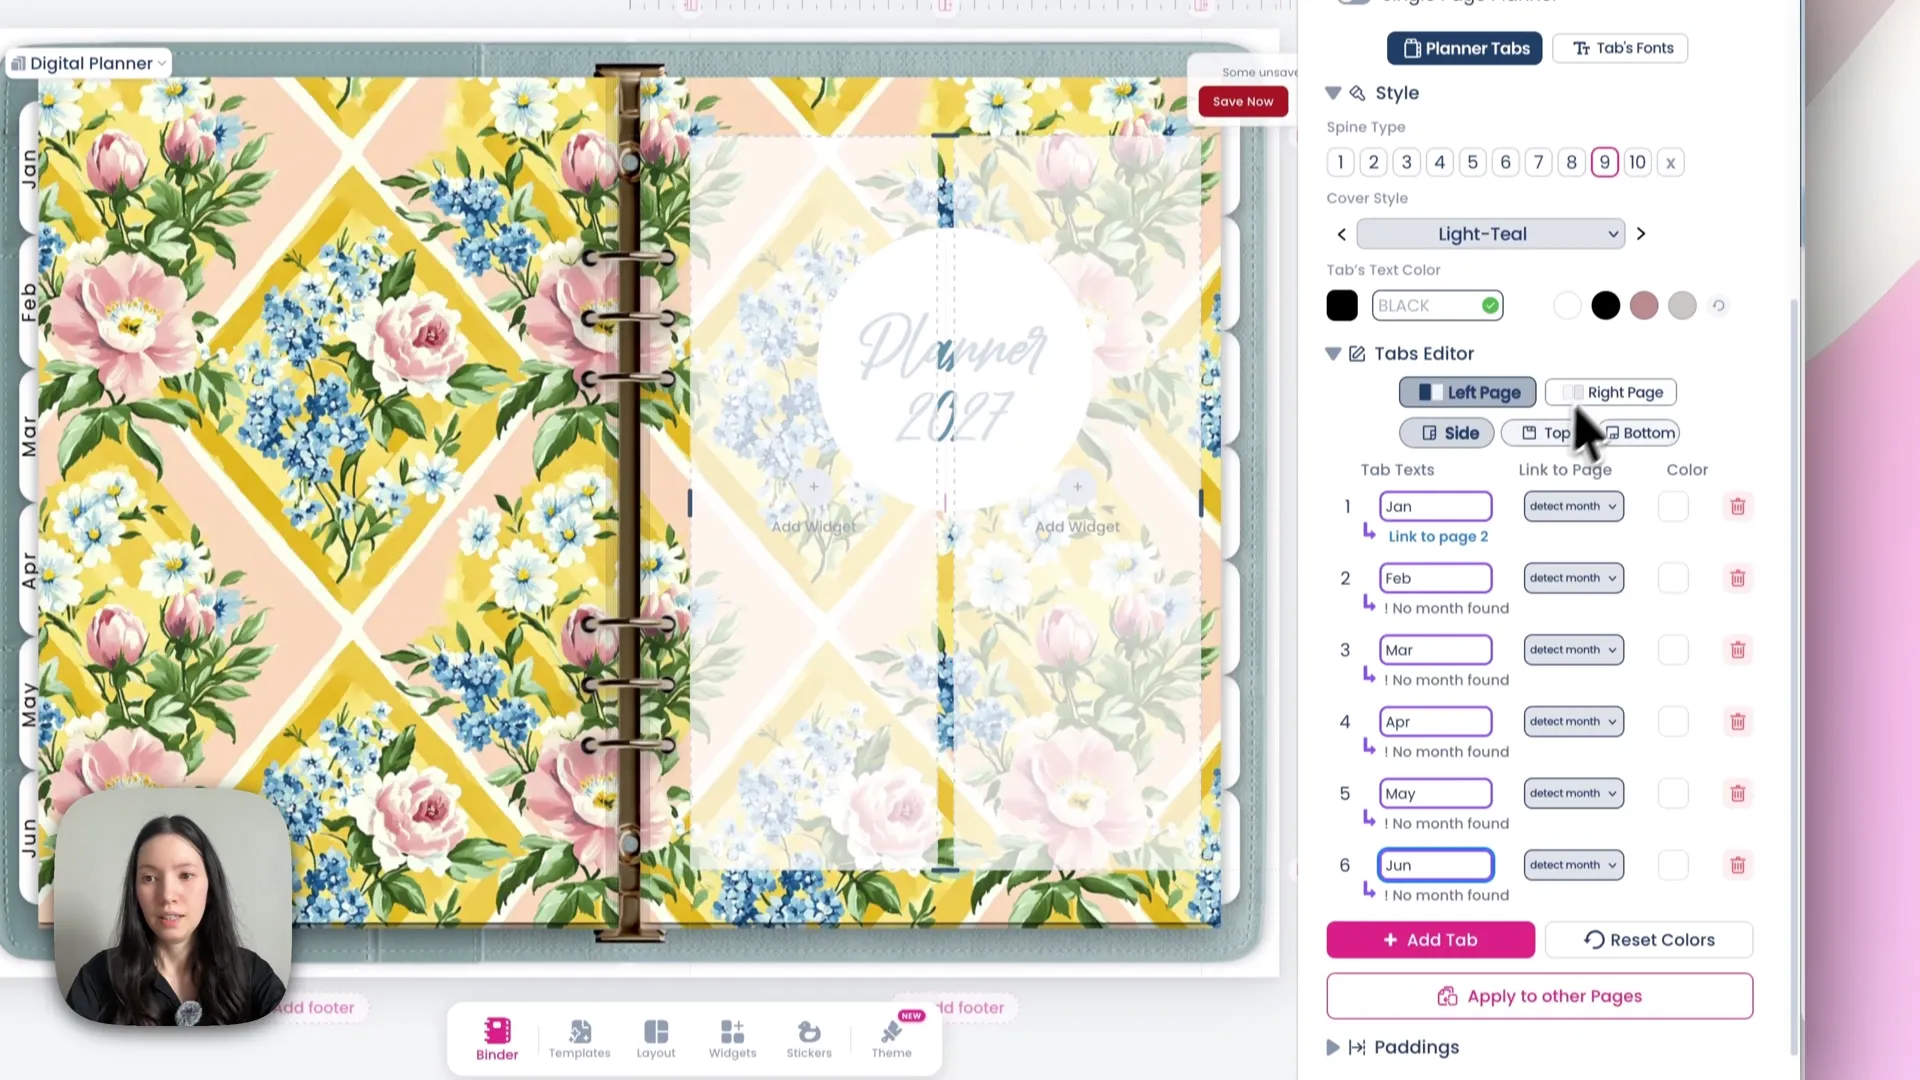
Set the tab font to match your planner, then use apply to other pages, select all pages, and apply style to pages.
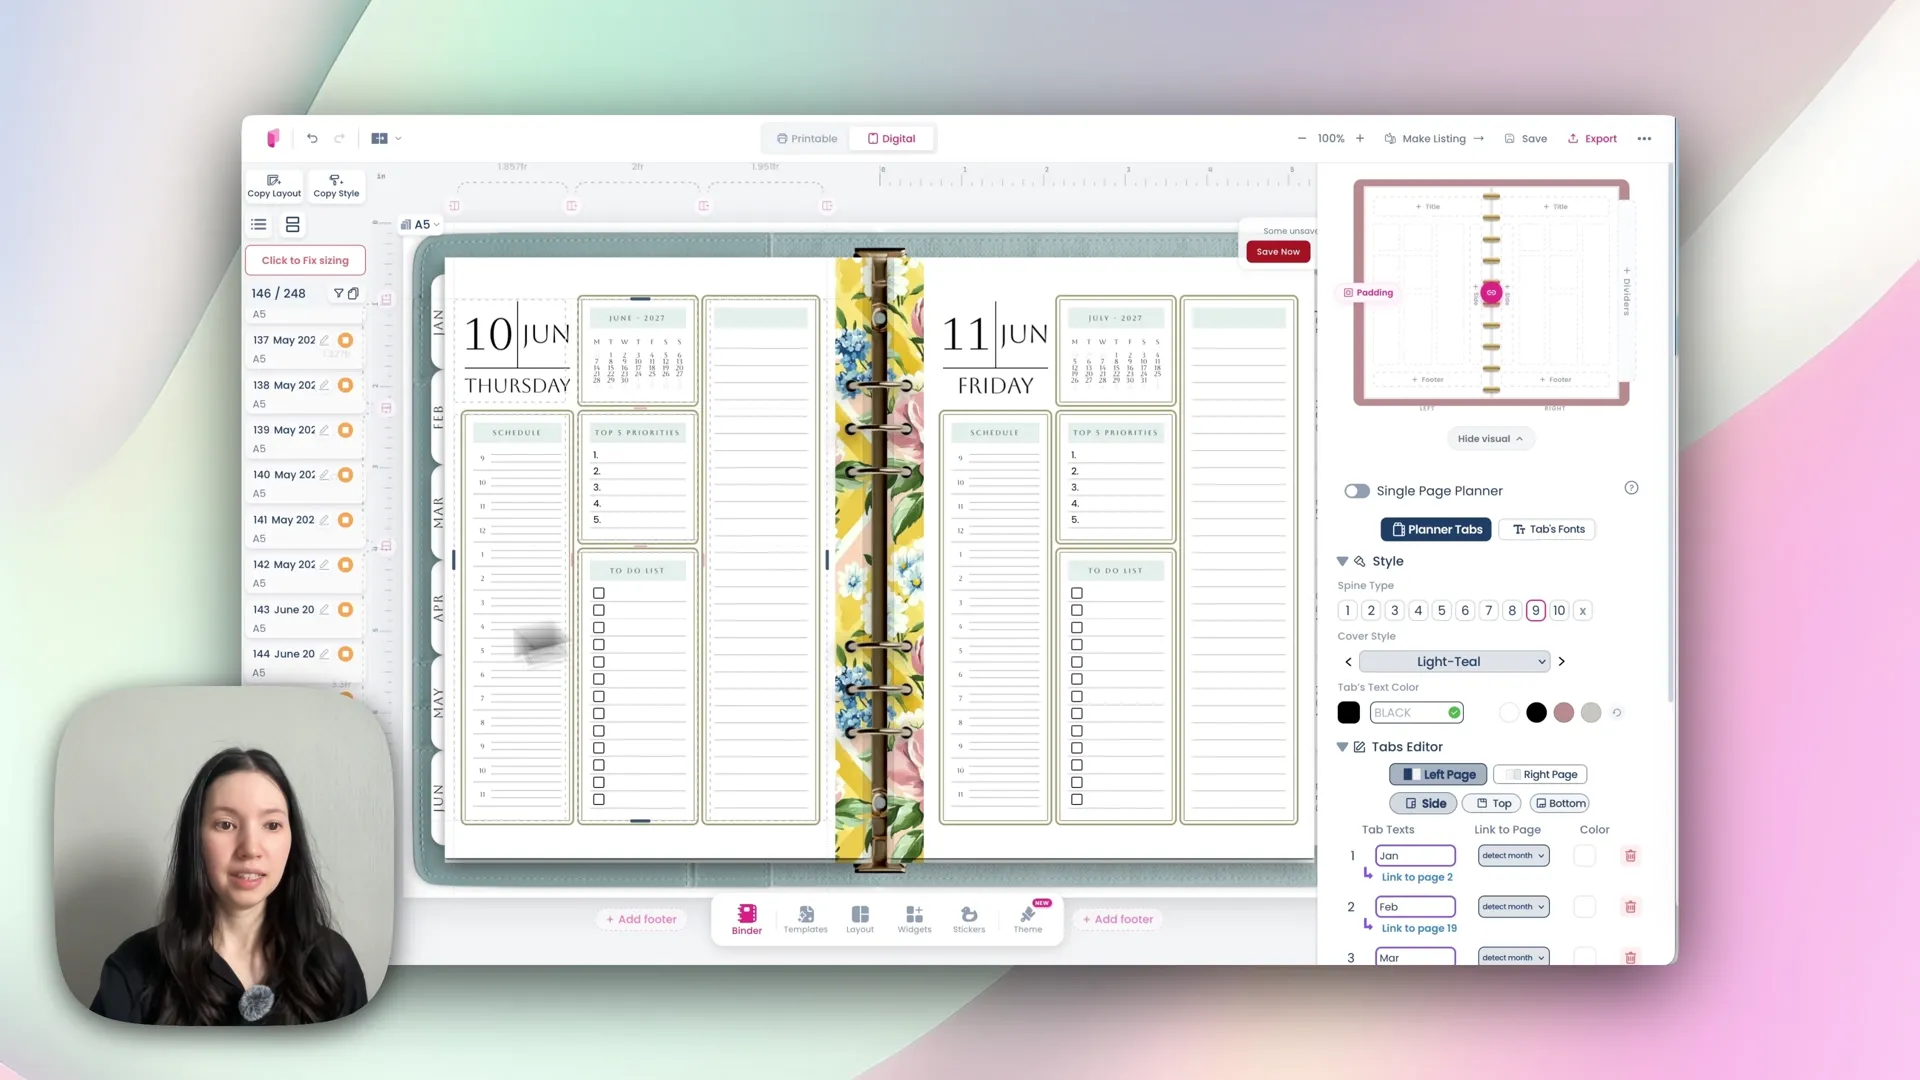
Export it the same way — Export → Digital planner → Export PDF, syncing first if prompted.
The result is fully hyperlinked: tap any date on a monthly calendar and it jumps to that daily page; tap again and it moves to the week that date falls in. That's the same file you built for print, now working as a tablet planner in GoodNotes, Notability or any PDF annotation app.
Take it further
Once you can build a full dated planner, the same skills carry across every other project:
How to Make Your Own Planner: Complete Step-by-Step Guide — the long-form pillar guide
Questions while you're building? Message me on Instagram or Facebook and I'll answer as fast as I can.
Happy Planifying! 💐✨ Jennifer.