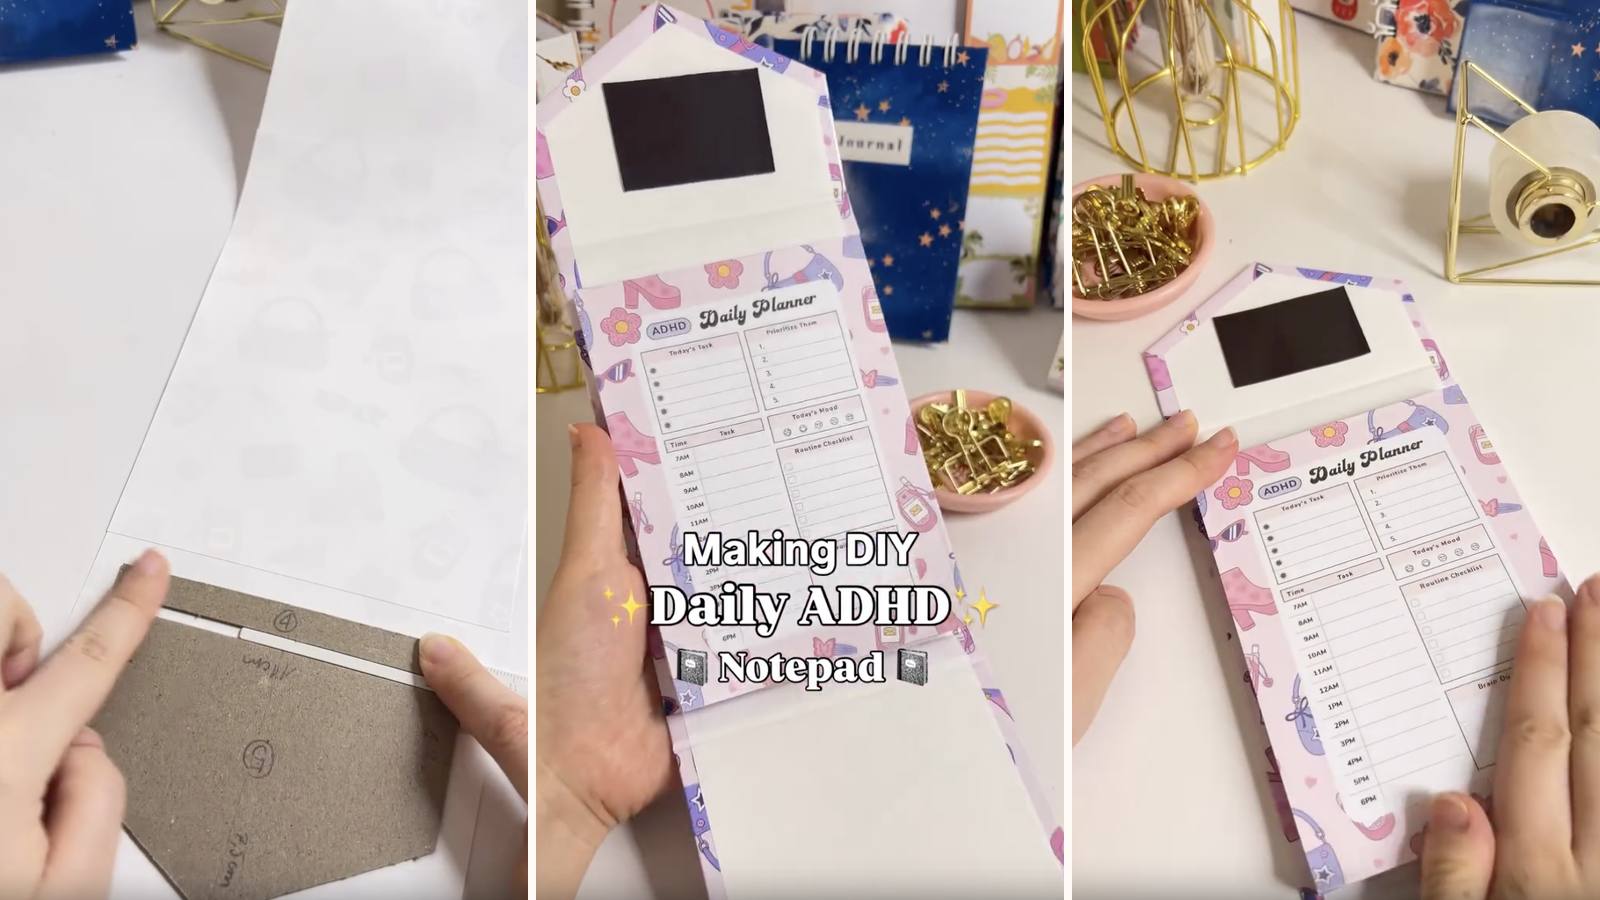
A daily notepad built around one page per day and nothing carried over — a fixed set of sections, the same every morning, so there's no deciding how to lay the day out before you start it. Eighty pages PVA-bound into a folding chipboard cover that closes on a pair of hidden magnets.
These tutorials use Planify Pro, a drag-and-drop tool for designing printable planners and stationery. Building and editing is free — exporting a PDF needs a plan, from $9.99/month.
Get the template
Open it in Planify Pro to change the sections, colours or artwork before printing — or print it exactly as it is.

Export and print
Both exports use the same route: Save/Export → Selected Page → Paper → A4 → Generate PDF — once for the notepad insert, once for the cover.
Print the inserts at 100% from Adobe Acrobat Reader. You need around 80 pages, which is roughly three months of daily use.
What You'll Need
 Paper Paper |
 Chipboard Chipboard |
 Glossy Sticker Paper Glossy Sticker Paper |
 PVA Glue PVA Glue |
 Magnet Sheet Magnet Sheet |
 Guillotine Paper Cutter Guillotine Paper Cutter |
You'll also need binder clips and double-sided tape.
Instructions
1. Print and cut the inserts. Around 80 pages, trimmed to size on the guillotine in even batches.  |
2. Clip the stack and glue the top edge. Knock it square first, clip hard, then work PVA into the edge of the stack rather than across the top of it.  |
3. Dry for 15 minutes. Clips stay on. Eighty pages is a thick stack, so give it the full time before touching it.  |
4. Trim the white edges off the cover designs. Cut back to the printed area on both sheets.  |
5. Join the two cover sheets vertically. The sheet carrying the "Daily ADHD" title goes at the bottom — that's the panel that ends up on the front face when the cover is folded.  |
6. Cut the five chipboard pieces. 1) 15 × 11 cm · 2) 11 × 0.9 cm · 3) 15 × 11 cm · 4) 11 × 1 cm · 5) 11 × 7.5 cm, one side 4.3 cm. The two thin strips are the hinges; piece 5 is the closing flap.  |
7. Lay the chipboard down with 3.8 mm gaps. Peel the cover backing first. Those gaps have to clear the board thickness or the cover won't fold — measure them, don't eye them.  |
8. Trim the corners. Angled cuts so the folded margins meet rather than pile up.  |
9. Fold all the sides in. Long edges first, then the ends, pressing hard along each fold.  |
10. Line the inside. Glossy sticker paper over the folded edges, right across the panels.  |
11. Score the hinge lines. One firm line along each gap, so the cover folds where you decided rather than where the board gives way.  |
12. Cut two squares from the magnet sheet. Same size, cut together so they're identical.  |
13. Check they sit exactly on top of each other. Stack them face to face and leave them that way — this is what stops one going on flipped and repelling the other.  |
14. Stick the first magnet to the cover. On the flap panel, with the second still stuck to it.  |
15. Peel the second magnet's backing and close the cover. Let the closing action place it — that guarantees the two meet exactly, which measuring won't.  |
16. Tape the back of the notepad. Double-sided tape across the whole back, not just the edges.  |
17. Mount the notepad in the cover. Position it clear of the hinges and check the cover still folds shut before you press down.  |
Troubleshooting
The magnets push each other away. One got turned over between cutting and sticking. Keep the pair stacked face to face from the moment you cut them.
The cover won't close over the notepad. The pad is mounted too close to a hinge, or it's thicker than the flap allows. Dry-fit before taping — the tape doesn't reposition.
The cover creases in the wrong place. Score lines skipped, or the 3.8 mm gaps are too tight. Both are fixed before the sticker goes down.
Pages tear rather than lifting. Too much glue on a thick stack. Thin coat, worked into the edge, clips on for the full 15 minutes.
Selling these
Named-purpose stationery finds buyers that generic stationery doesn't. Someone searching for a daily pad with a fixed structure is looking for exactly this, and won't find it among undated notebooks.
Be straightforward in the listing about what it is — a daily notepad with a consistent one-page layout and a magnetic cover. Describe the format rather than making claims about what it will do for anyone.
Eighty pages is about three months, which makes refill packs an obvious follow-on. Say so in the listing; buyers like knowing the thing they're buying doesn't end when the paper does.
See 20 profitable planner niches and DIY notepad design ideas for more.


