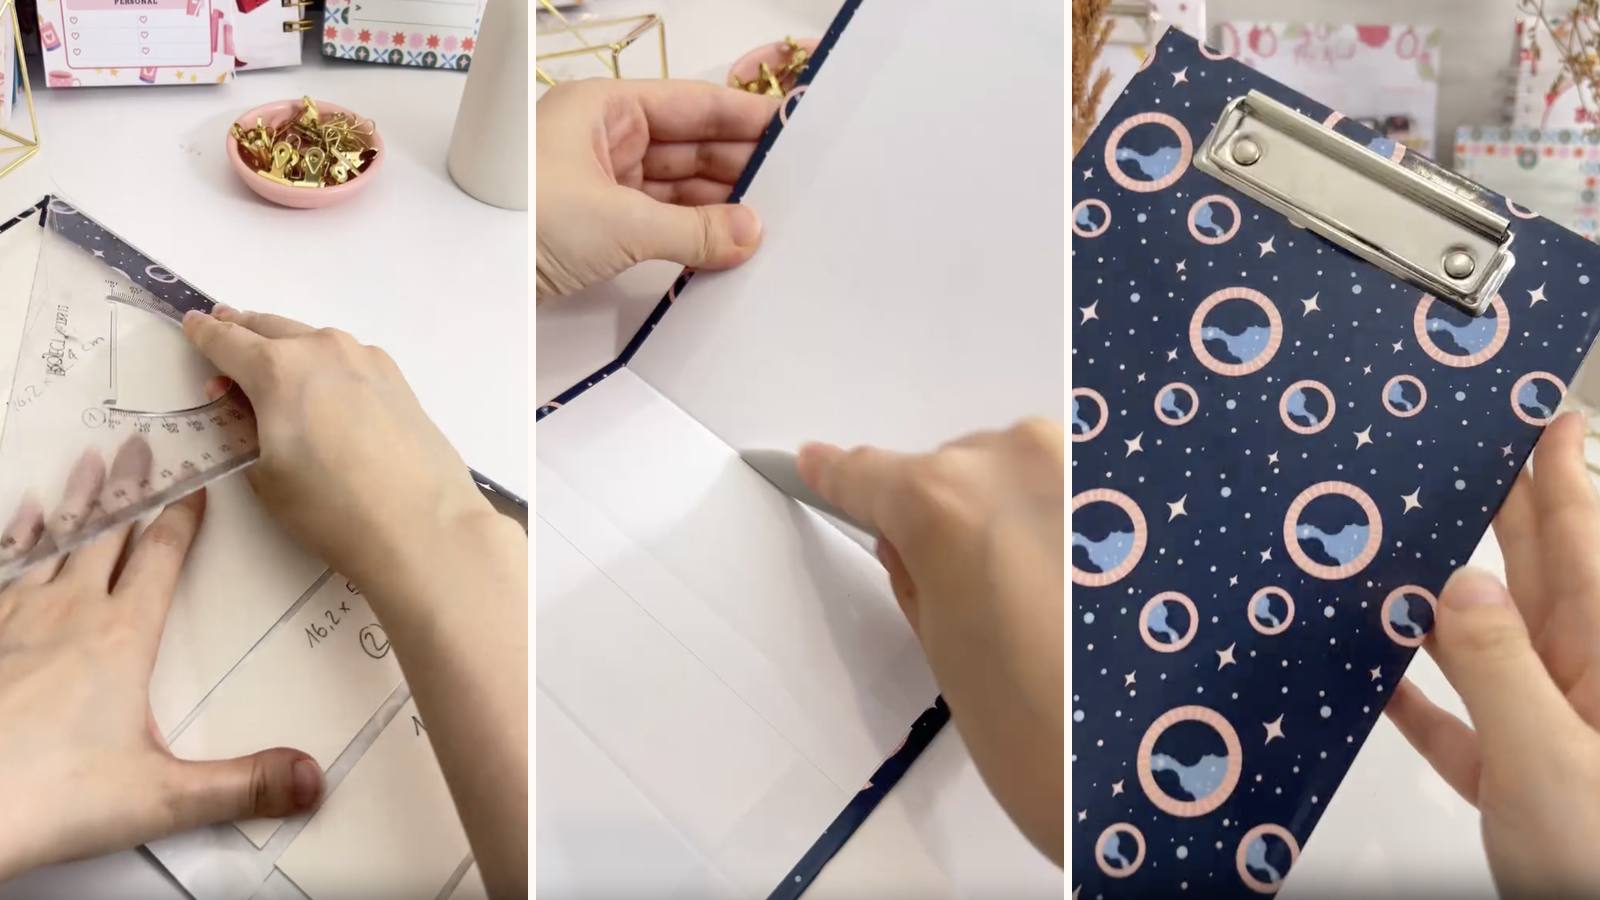
A clipboard that holds itself upright. The chipboard back folds into a triangular stand, so your list sits at eye level on the desk instead of flat under your elbow — and it folds flat again to go in a drawer. A real clipboard clip riveted to the front means you can swap the pages for anything.
These tutorials use Planify Pro, a drag-and-drop tool for designing printable planners and stationery. Building and editing is free — exporting a PDF needs a plan, from $9.99/month.
Get the template
Open it in Planify Pro to change the size, colours or artwork before printing — or print it exactly as it is.

Export and print
In Planify Pro, go to Save/Export → Selected Page → A4, then click Generate PDF and open it in Adobe Acrobat Reader.
Print the cover borderless, at best quality. Borderless matters here because the design has to run right to the edge of the board — a white margin from the printer's unprintable area leaves a pale stripe you can't hide once it's wrapped.
What You'll Need
 Chipboard Chipboard |
 Glossy Sticker Paper Glossy Sticker Paper |
 Screws and Rivets Kit Screws and Rivets Kit |
 Paper Paper |
 PVA Glue PVA Glue |
 Guillotine Paper Cutter Guillotine Paper Cutter |
You'll also need a clipboard clip, a rivet setter (a needle or hole punch will get you through the piercing step), and double-sided tape for the fold at the base.
Instructions
1. Print the cover borderless at best quality. Check the printed sheet against your chipboard before going further — the wrap depends on the design reaching the edge.  |
2. Cut the chipboard panels. Cut them all in one session on the guillotine so the edges are consistent — mismatched panels show up as a stand that rocks.  |
3. Peel the backing off the sticker sheet. One steady pull, then lay it adhesive side up. Sticker paper that has folded back on itself won't come apart cleanly.  |
4. Lay the chipboard panels onto the adhesive. Leave a gap between panels — those gaps become the folds that turn the back into a stand, and they need to clear the board thickness.  |
5. Trim the corners at an angle. Cut each corner off before folding so the margins meet edge to edge instead of bunching up.  |
6. Fold all the sides in. Press each fold down hard along its whole length — a fold that lifts at one end will keep lifting.  |
7. Line the inside with white sticker paper. This covers the folded edges and gives you a clean back rather than a view of the join lines.  |
8. Score the fold lines. Run a firm line along each gap. This is what makes the stand fold in the same place every time instead of creasing at random.  |
9. Tape the bottom end. Double-sided tape along the lower edge — this is the join that closes the triangle and holds the stand's shape under the weight of the board.  |
10. Fold both ends closed. Bring the panels round and press the taped edge home. You should now have a rigid triangular back that stands on its own.  |
11. Mark the clip holes. Hold the clip in position at the top and mark through it. Marking beats measuring here — clip hole spacing varies by brand.  |
12. Pierce the holes. A rivet setter, needle or hole punch all work. Go in straight and keep the hole tight — an oversize hole lets the rivet turn.  |
13. Rivet the clip on. Set both rivets firmly. The clip takes real force every time a page is loaded, so a loose rivet works its way out within a week.  |
Done. Clip in a pad and it stands up on the desk.  |
For the refill pad: the notepad that clips in is an ordinary PVA-bound stack — print your pages, clip them square, brush glue along the top edge and leave it to dry. How to Make Notepads at Home covers that in full. Because it's held by the clip rather than glued in, you just make another when it runs out.
Troubleshooting
The stand won't hold itself up. The bottom join isn't taped firmly, or the fold gaps are too wide, letting the triangle flatten. Press the taped edge down hard and give it a few minutes before loading it.
There's a white line along one edge. The cover printed with a margin instead of borderless. It has to be reprinted — there's no fixing it after wrapping.
The clip is loose or turns. The pierced holes are bigger than the rivets. Move the clip along slightly and pierce fresh holes rather than trying to tighten the existing ones.
The board creases in the wrong place. The score lines were skipped or too shallow. Chipboard folds where it's weakest, so you have to decide that for it.
Selling these
This one sells on function rather than looks, which is unusual for handmade stationery. "Stands up on your desk and folds flat" is a benefit you can put in a listing title, and it competes with plastic desk organisers rather than with other notepads.
The refillable clip is also a genuine repeat-purchase hook — sell the clipboard once and the refill pads after, either as an add-on listing or a bundle of three.
It batches well too. The cutting and wrapping is the slow part, so cut a run of panels in one session, and vary only the printed cover to produce a whole range of designs from the same build.
See 20 profitable planner niches and how to price bundles for more on selling these.
Try these next
- DIY Standing Refillable Notepad — another standing build
- DIY Refillable Notepad — Chicago screw binding
- How to Make Notepads at Home — for the refill pads
- DIY Notepad Design Ideas
- Browse all DIY tutorials


