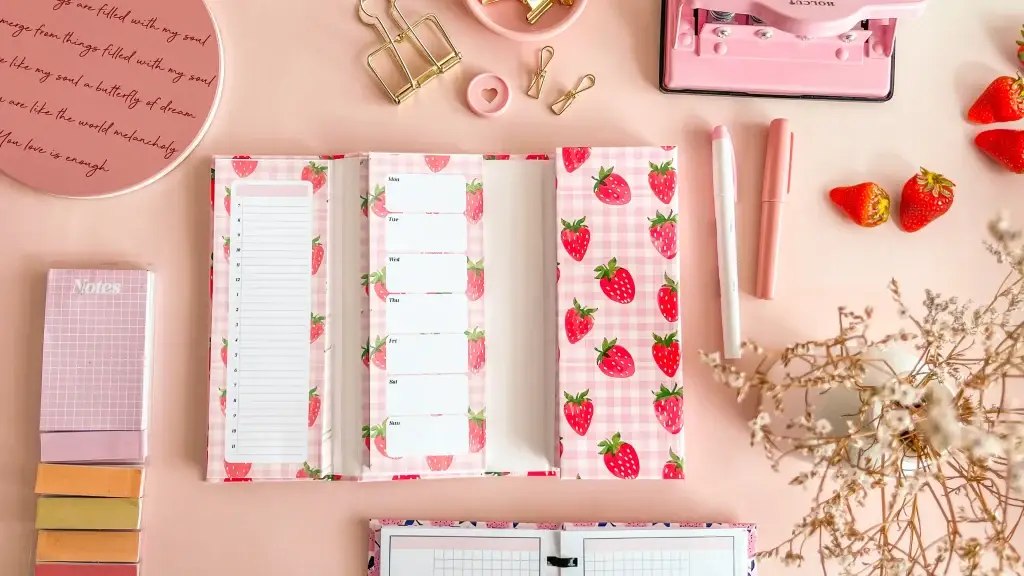
A folding memo notepad is four separate glue-bound pads mounted inside a single rigid cover, so a whole week of lists lives in one object that folds shut like a book. The clever part is the cover — four chipboard panels joined by narrow card hinges, which lets it open flat across a desk and still close tight enough to go in a bag.
These tutorials use Planify Pro, a drag-and-drop tool for designing printable planners and stationery. Building and editing is free — exporting a PDF needs a plan, from $9.99/month.
Get the template
There is no ready-made folding memo notepad in the library yet. Browse the notepad and cover templates at planifypro.com and adapt one — the pages only need to be sized to fit a 7 × 19.3cm panel, and any lined, to-do or day-labelled layout will work.
Export and print
Export the insert pages as a PDF and print them on A4 at actual size, two pages to a sheet. Scale matters here: the finished pads have to match the 7cm-wide cover panels, so anything that shrinks the artwork to fit the printable area will leave you with pads that are too small for the cover you cut.
Export the cover as its own PDF and print it on white glossy sticker paper at 120%. That oversize is deliberate — the sheet has to cover the boards and still have enough surplus to fold over their edges.
What You'll Need
 |  |  |
 | Craft knife and steel ruler |
A foam brush or offcut of card is worth having for spreading the glue — a bristle brush leaves ridges that dry hard.
Instructions
1. Trim the printed insert pages. Cut every sheet down on the guillotine before you glue anything. A stack that is even at the spine bonds along its whole edge; a stack that is a millimetre out only bonds where the sheets happen to touch.  |
2. Sort the pages into separate pads. This build uses several different layouts — lined to-do sheets, day-labelled boxes and a grid page — so keep each design in its own stack rather than shuffling them together.  |
3. Clamp a stack and glue the spine. Sandwich the pad between two flat battens with the spine edge standing just proud, then run PVA along that edge. Clamping matters more than it looks: it stops the sheets fanning apart and keeps the glue on the edge instead of running between the pages.  |
4. Spread it thin, then leave it to set. Work the glue in with a foam brush so it soaks into the edge rather than sitting on top of it. A thick bead dries into a crust that cracks the first time the pad is bent.  |
5. Print the cover onto glossy sticker paper. One sheet covers the entire outside of the notepad, so print it before you cut any board — it lets you check the pattern reaches the edges of the sheet at full size.  |
6. Mark out the cover. Four panels of 7 × 19.3cm (2.8 × 7.55in), with three spacer strips of the same height between them: 1.4cm, then 3.5cm in the middle, then 1.4cm. Leave a 3mm gap between every piece — that gap is the hinge, and without it the cover cannot fold.  |
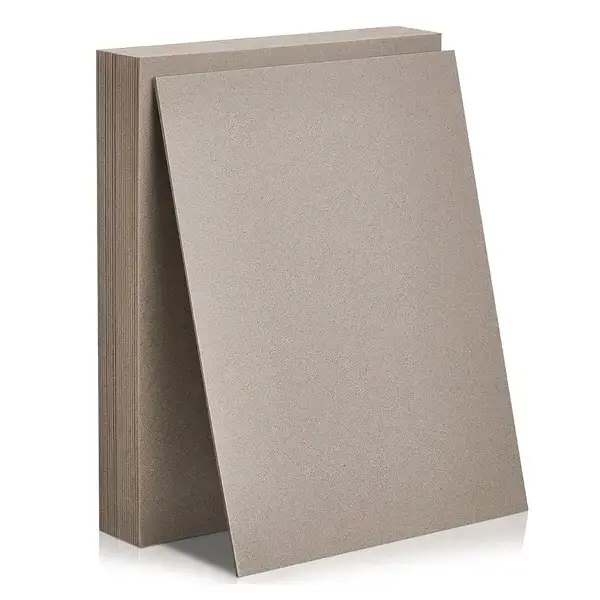
7. Cut the chipboard. Score along a steel ruler with a craft knife and take several light passes rather than one heavy one. 1.2mm board fights back if you force it, and the blade wanders off the ruler and leaves a bevelled edge that shows through the cover.  |
8. Stick the panels to the sticker sheet. Peel the backing and press each piece down in its marked position, keeping the 3mm gaps consistent all the way across. Once a panel is down on adhesive paper it does not come up cleanly, so check the spacing before you press.  |
9. Wrap the edges and fold the hinges. Trim the surplus sticker paper around the outside and fold it over onto the back of the boards, then work each hinge back and forth a few times so it creases exactly on the gap rather than wherever it happens to give.  |
10. Mount the pads inside. Glue each pad onto its own panel, spine edge towards the nearest hinge. Line each one up before the glue grabs — a pad set crooked on a rigid panel cannot be nudged straight afterwards.  |
11. Open it out and check it closes. Flat, the panels give you every pad side by side; folded, the whole thing collapses down to one panel wide. If it will not sit shut, the hinges need working a few more times.  |
That is the notepad finished — several pads and a cover in one object, and the only consumable is the paper. When a pad runs out, glue a fresh block and stick it to the same panel. |
Troubleshooting
The cover will not fold flat. The gaps between the panels are too narrow. 3mm is the working minimum for 1.2mm board — a hinge tighter than the board is thick has nowhere to bend.
The spine cracks and pages fall out. Either the glue went on too thick, or the stack was not trimmed square before gluing. Trim first, then use thin coats and let each one set.
The panels do not line up when the cover is closed. They were cut slightly out of square. Mark all four from the same measurement against a ruler rather than measuring each one from the last one you cut.
The cover print runs short at an edge. The cover is printed at 120% precisely so there is surplus to fold over the board edges. Print it at 100%, or let the printer shrink it to fit, and there is nothing left to wrap with.
Selling these
A folding memo notepad reads as a finished product rather than a craft item, because the rigid cover hides all the glue work. It also solves a real desk problem — several lists at once, visible together, then folded away — which is easier to photograph and describe in a listing than "a notepad".
The cover is where the time goes; the pads are cheap. That makes refill packs the obvious second product: sell the folding cover once, then sell insert blocks that stick onto the same panels. Price the cover to cover your board, sticker paper and cutting time, and treat the refills as the repeat purchase.
Try these next
DIY Folding Notepad Station — the same folding idea as a desktop organiser
DIY Notepad Set — matching pads with custom covers
DIY Stacked Notepad — layered pads bound with PVA
DIY Perforated Notepad — clean tear-off pages
Book Binding Methods Compared — which binding suits which project


