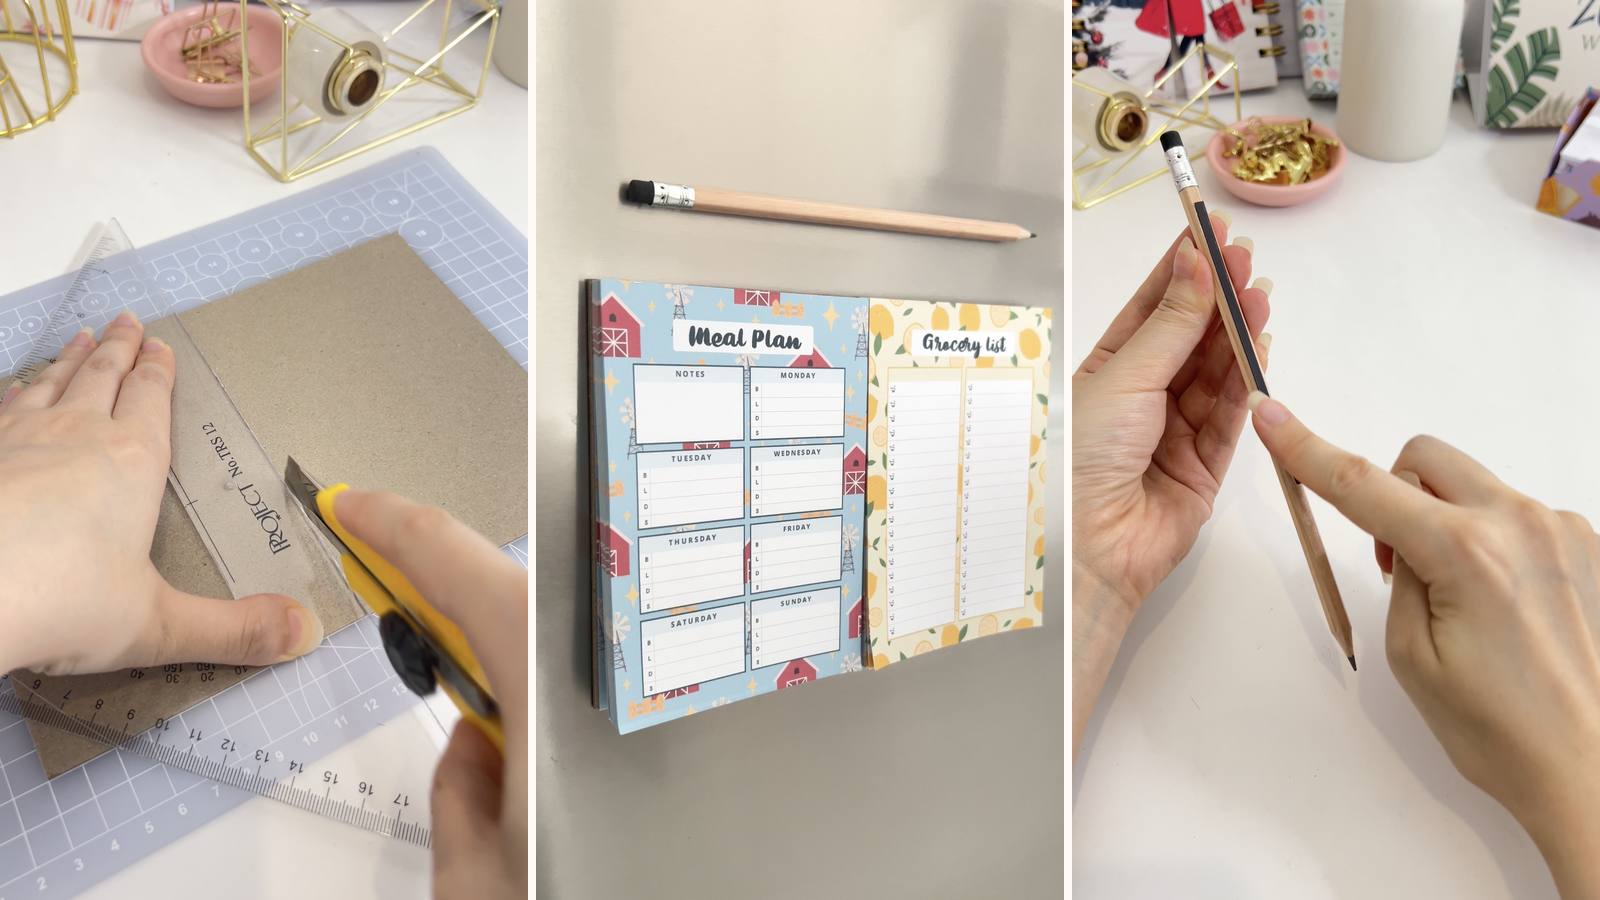
Two PVA-bound pads on one folding chipboard base: a weekly meal planner on one half, a tear-off grocery list on the other, stuck to the fridge with strips of magnetic sheet. Rip the list off and take it to the shop; the meal plan stays on the door.
These tutorials use Planify Pro, a drag-and-drop tool for designing printable planners and stationery. Building and editing is free — exporting a PDF needs a plan, from $9.99/month.
Get the template
Open it in Planify Pro to change the size, colours or artwork before printing — or print it exactly as it is.
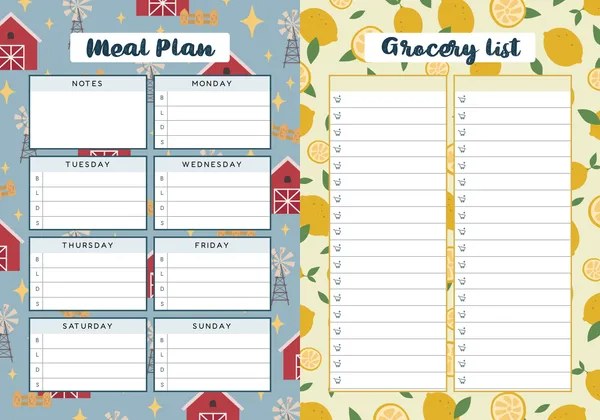
Export and print
In Planify Pro, go to Save/Export → Selected Page → A4, then click Generate PDF and print from Adobe Acrobat Reader at 100%.
Print plenty of each — this is a pad you'll tear pages off weekly, so a thin stack is a false economy. Both sheets print single-sided.
What You'll Need
 Paper Paper |
 Chipboard Chipboard |
 PVA Glue PVA Glue |
 Self-Adhesive Magnet Sheet Self-Adhesive Magnet Sheet |
 Guillotine Paper Cutter Guillotine Paper Cutter |
 Binder Clips Binder Clips |
You'll also need double-sided tape and a craft knife for scoring the fold.
Instructions
1. Print and cut the inserts. Trim both stacks to size on the guillotine. Keep the meal planner and grocery list pages separate from here on — they're bound as two independent pads.  |
2. Clip each stack. Knock the binding edge square against the desk first. A stack that isn't flush glues into a pad whose pages tear off crooked.  |
3. Glue the top edge of each pad. Work the PVA into the edge of the stack rather than laying it on the surface — that's what makes pages lift cleanly instead of tearing.  |
4. Dry for 15 minutes. Both pads, clips on the whole time. Unclipping early is the most common way to ruin the bind.  |
5. Cut an A5 chipboard base. This carries both pads side by side, so cut it square — a base that isn't square makes both pads look crooked on the fridge.  |
6. Score down the middle. Two passes with the craft knife, cutting only part-way through. This is the hinge that lets the pad fold flat against the door.  |
7. Test the fold. It should bend easily and stay in one piece. If it snaps apart you've cut too deep; if it fights you, score once more.  |
8. Tape the backs of the pads. Double-sided tape across the whole back of each. Tape only at the edges and the pad lifts at a corner the first time someone tears a page off in a hurry.  |
9. Mount both pads on the base. One either side of the score line, clear of the hinge itself — a pad taped across the fold stops it folding.  |
10. Cut two magnet strips, 4 × 10 cm. From a self-adhesive magnetic sheet.  |
11. Stick them to the back. One per half, near the outside edges. Putting them out wide stops the pad swinging on the fridge when a page is torn off.  |
12. Optional: magnetise a pencil. A thin strip of magnet along one side and it lives on the fridge next to the pad, which is the difference between the list getting used and not.  |
On the door, both lists visible, and the grocery list tears off to take with you.  |
Troubleshooting
The pad slides down the fridge. Not enough magnet for the weight of two paper stacks. Add a third strip along the bottom edge rather than replacing what's there.
The chipboard snapped when folded. The score went too deep. Two light passes, not one heavy one — you're weakening the board, not cutting it.
It won't fold flat any more. A pad is taped over the hinge. Both pads need to sit clear of the score line.
Pages tear instead of lifting. Too much glue, or it sat on the surface instead of soaking into the edge. Thin, worked in, right across.
Selling these
Kitchen products reach people who don't think of themselves as planner buyers, which makes this one of the better crossover items in a stationery shop. It's a gift people buy for other households.
It also photographs in context extremely well. Shot on an actual fridge with a pencil stuck next to it, the listing image explains the product completely — no description needed.
Sell refill pads alongside it. The base and magnets last for years; the paper doesn't, and that's a repeat purchase built into the design.
See 20 profitable planner niches and easy one-page printables that sell for more product ideas.
Try these next
- DIY Magnetic Fridge Planner — a dry-erase version
- DIY Meal Plan Corner Notepad — for the worktop instead
- How to Make Notepads at Home — the full beginner guide
- DIY Perforated Notepad — cleaner tear-off lines
- Browse all DIY tutorials


