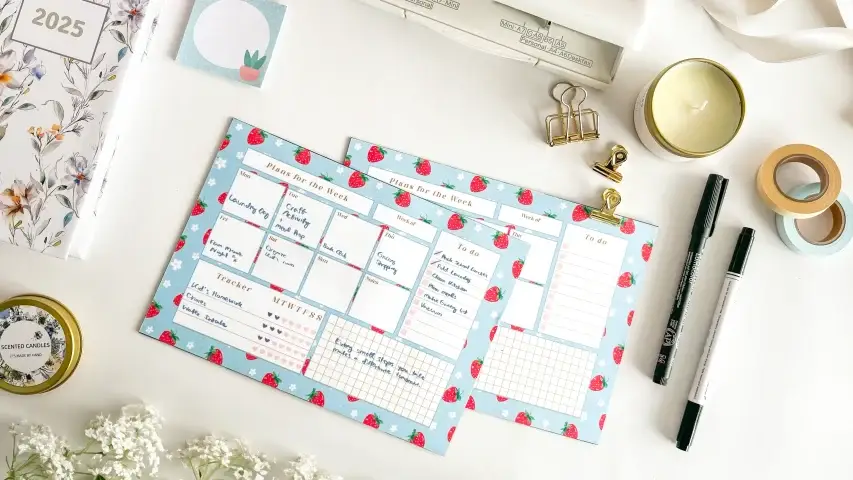
A weekly planner that lives on the fridge door: a printed page with a wipe-clean film over the front and a self-adhesive magnetic sheet on the back, so it holds itself flat on the one surface everybody in the house walks past. Fill the week in with a dry-erase marker, wipe it on Sunday, and the same printed sheet starts again — no reprinting, no tearing pages off.
These tutorials use Planify Pro, a drag-and-drop tool for designing printable planners and stationery. Building and editing is free — exporting a PDF needs a plan, from $9.99/month.
Get the template
There is no official Planify Pro template for this exact planner. Browse the Planify Pro template library for a weekly layout you like — the design can be built or adapted there, then sized to the paper you are printing on.
The design used here is a landscape week: a dated weekly grid down the left, a checklist column on the right and a notes block underneath it. That arrangement matters for a fridge planner — the checklist is the part people actually read in passing, so it wants to sit at eye height on the right rather than buried at the bottom.
Export and print
Export the planner as a PDF at A4 or US Letter — whichever matches the paper you are printing on and the magnetic sheets you have bought. A4 self-adhesive magnet sheets are the common size, so an A4 export saves you trimming twice.
Print at 100% — actual size, not "fit to page". Scaling matters here because everything downstream is cut to the printed sheet: shrink the artwork by a few percent and the trimmed panel no longer matches the A4 magnetic sheet you cut to go behind it. Print the planner page itself on ordinary paper or light card, and if you are printing a cover layer, use transparent sticker paper rated for laser printing and set the printer to its best quality.
What You'll Need
 Self-Adhesive Magnetic Sheets Self-Adhesive Magnetic Sheets |
 Transparent Sticker Paper Transparent Sticker Paper |
 Cardstock or Printer Paper Cardstock or Printer Paper |
 Guillotine Paper Cutter Guillotine Paper Cutter |
Dry-Erase Laminate Sheet | Craft knife, metal ruler and a cutting mat |
Either a dry-erase laminate sheet or transparent sticker paper will do for the wipe-clean layer — the laminate goes over a page you have already printed, the transparent sticker paper is printed on directly. Whichever you use, the surface has to be non-porous or the marker will not wipe off. A guillotine gives the cleanest edge, but the build in the photographs is done with a craft knife against a metal ruler on a cutting mat.
Instructions
1. Peel the wipe-clean film and line it up over the print. Hold it clear of the page until one edge is where you want it — laying the whole sheet down at once is what traps bubbles.  |
2. Lower the film across the page and smooth it down. Work from the edge you anchored towards the far side, pushing air out ahead of your hand rather than pressing the middle first.  |
3. Get the self-adhesive magnetic sheet ready. The pack used here is plain A4 self-adhesive magnet sheet — a flexible magnetic layer with a peel-off adhesive back, so there is no glue and no drying time.  |
4. Trim the covered page to size. Cut against a metal ruler on a cutting mat, one steady pass per edge. Cutting the print and the film together in a single pass keeps the two layers flush instead of leaving a lip of film proud of the paper.  |
5. Cut the magnetic sheet to match. Measure it against the panel you have just trimmed rather than against the original paper size — the trim will have taken a couple of millimetres off.  |
6. Check the panel before you commit the adhesive. Flex it gently: the film should stay put across the whole face, with no corner starting to lift. A corner that lifts now will only lift further once it is on the fridge.  |
7. Peel the backing and stick the magnet to the reverse. Pull back a few centimetres of the white liner, align one edge with the planner, then draw the rest of the liner away as you press the sheet down. The adhesive grabs immediately and does not reposition well.  |
8. Put it on the fridge. It should sit flat against the door with no gap at the corners. Write the week on with a dry-erase marker, wipe it clean at the end, and the same sheet does next week too.  |
Troubleshooting
Bubbles under the film. Lift the sheet back to just past the bubble and lay it down again from that point — pushing a trapped bubble sideways to the edge usually stretches the film and creases it instead.
The marker will not wipe off. Either the pen is a permanent marker rather than a dry-erase one, or it has been written straight onto paper that the film does not actually cover. Check the whole writing area is behind the wipe-clean layer.
A corner of the film lifts. The edge was cut after the film was already loose there, or the film stopped short of the paper edge. Trim a millimetre off that edge so the print and the film end on the same line.
It slides down the door or falls off. Fridge doors are not all magnetic — many stainless steel fronts are not. If the door does take a magnet elsewhere, the usual cause is the magnetic sheet being noticeably smaller than the planner, so the unsupported paper edges hold it off the surface.
The trimmed panel came out smaller than the magnetic sheet. The printer scaled the page. Reprint at 100% and check the printed width with a ruler before cutting anything.
Selling these
A fridge planner is an easy product to explain in one photograph, which is most of the battle on a marketplace listing. It also solves a shared household problem rather than a personal one, so it sells to people who would never buy a planner for themselves.
It bundles well. A magnetic weekly planner, a matching magnetic shopping list and a dry-erase marker make an obvious kitchen set, and the marker costs very little to add while making the product feel finished rather than like a printed sheet.
If you are selling the made item rather than the template, price for the assembly as well as the materials — the magnetic sheet is the expensive part, and laminating and trimming take real minutes per unit. Selling the printable file instead removes the postage problem entirely, since a magnet-backed sheet is awkward and costly to ship.
Try these next
- DIY Magnetic Fridge Notepad — the tear-off version of the same idea
- DIY Chore Checklist Flipcards — more laminated, wipe-clean, reusable printables
- DIY Weekly Planner with Magnetic Closure — magnets used to shut a book instead
- DIY ADHD Notepad — a daily pad with a magnetic folding cover
- How to Make Notepads at Home
- Browse all DIY tutorials


