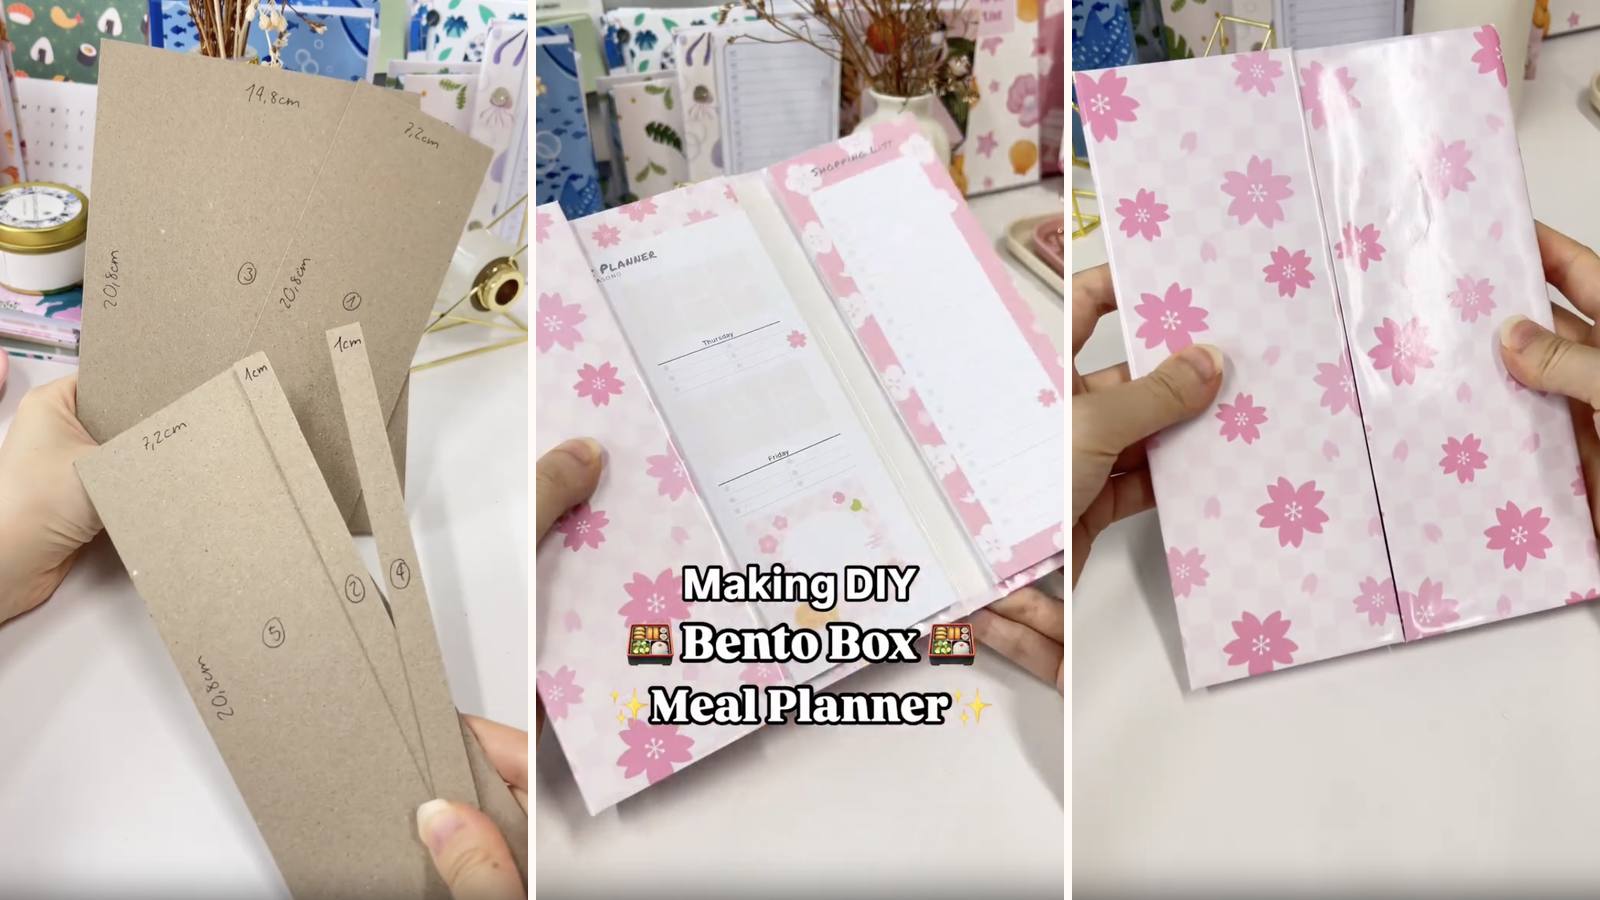
Several small notepads laid out like the compartments of a bento box, each one its own PVA-bound pad in a five-panel folding cover. One section per category — meals, shopping, brainstorm — instead of everything squeezed onto one sheet. It folds flat to store and opens wide on the counter.
These tutorials use Planify Pro, a drag-and-drop tool for designing printable planners and stationery. Building and editing is free — exporting a PDF needs a plan, from $9.99/month.
Get the template
There are two files here — the Bento Box Planner DIY and the Bento Box Planner DIY cover. Open either in Planify Pro to change the compartments, colours or artwork before printing, or print them exactly as they are.
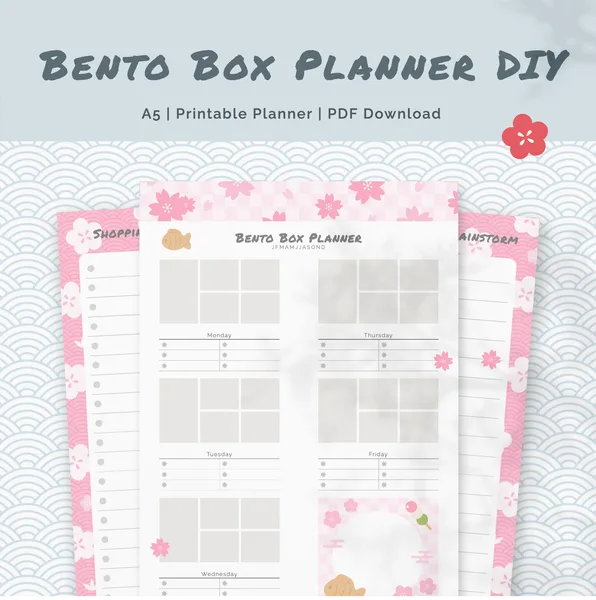

Export and print
Go to Save/Export → Selected Page → Paper → A4 or US Letter, then Generate PDF and print at 100% from Adobe Acrobat Reader.
The pads are different sizes, so print enough sheets that every compartment gets a decent stack — a bento layout with one thin pad among thick ones looks unfinished.
What You'll Need
 Paper 80gsm Paper 80gsm |
 Chipboard Chipboard |
 Glossy Sticker Paper Glossy Sticker Paper |
 PVA Glue PVA Glue |
 Guillotine Paper Cutter Guillotine Paper Cutter |
 Binder Clips Binder Clips |
You'll also want double-sided tape and a sponge — a sponge spreads glue into a stack edge better than a brush.
Instructions
1. Print and cut all the sections to size. The shopping list and brainstorm sheets also get trimmed in half — that's what gives you the smaller compartments.  |
2. Clip each stack and glue the top edge. A thin layer, spread with the sponge. Do all the pads in one session — they all need the same drying time anyway.  |
3. Dry for 15 minutes. Clips on. Small pads dry fast on the surface and stay soft underneath, so don't cut this short.  |
4. Print two cover designs. On white glossy sticker paper — the base is longer than one sheet.  |
5. Overlap them into one long cover. Join them so the seam falls where a hinge will be — it disappears in the fold.  |
6. Cut five chipboard pieces. 1) 7.2 × 20.8 · 2) 1 × 20.8 · 3) 14.8 × 20.8 · 4) 1 × 20.8 · 5) 7.2 × 20.8 cm. The two 1 cm strips are hinges; the wide middle panel carries the main pads.  |
7. Lay them down with 3–4 mm gaps. Wider than you'd think, because these hinges have to fold over the thickness of mounted notepads rather than bare board.  |
8. Trim the corners at 45°. All of them, before folding.  |
9. Fold the sides in. Press firmly along the whole length of this long base.  |
10. Line the inside. Glossy sticker paper over the folded edges. This is the surface the pads mount to, so keep it flat and bubble-free.  |
11. Score the folds. One firm line at each gap so the base folds where you decided.  |
12. Tape the backs of all the pads. Double-sided tape across each whole back.  |
13. Mount the pads in their compartments. Lay all of them out unpressed first and check the base still folds shut — the tape gives you one attempt each.  |
Open on the counter, folded flat in a drawer.  |
Troubleshooting
It won't fold flat with the pads on. The 3–4 mm gaps are too tight for the pad thickness, or a pad is sitting over a hinge. Both are decided before anything is stuck down — dry-fit everything first.
One pad's pages come off in clumps. Small stacks are easy to under-glue because the edge area is tiny. Thin coat, but right across.
The cover seam shows. The two sheets were joined mid-panel. Move the overlap so it lands on a hinge gap.
The compartments look uneven. The pads are different thicknesses. Print the same number of sheets for each section, adjusting for size rather than eyeballing the stacks.
Selling these
This is a gift product more than a stationery product. It's visually unusual, it explains itself in a photo, and it sits in kitchens rather than desks — all of which reaches a buyer who wasn't shopping for a notepad.
The bento layout is also endlessly re-themeable from the same chipboard cuts: meal planning, household admin, a kids' station, a work triage board. Same build, different printed sections, different listings.
It's bulkier to post than anything else in the library, so check shipping before pricing — the folded thickness with pads on is what matters, not the flat size.
See 20 profitable planner niches and how to price bundles for more.
Try these next
- DIY Folding Notepad Station — a desk version of the same idea
- DIY Meal Planner Notepad
- DIY Magnetic Fridge Notepad
- DIY Meal Plan Corner Notepad
- Browse all DIY tutorials


