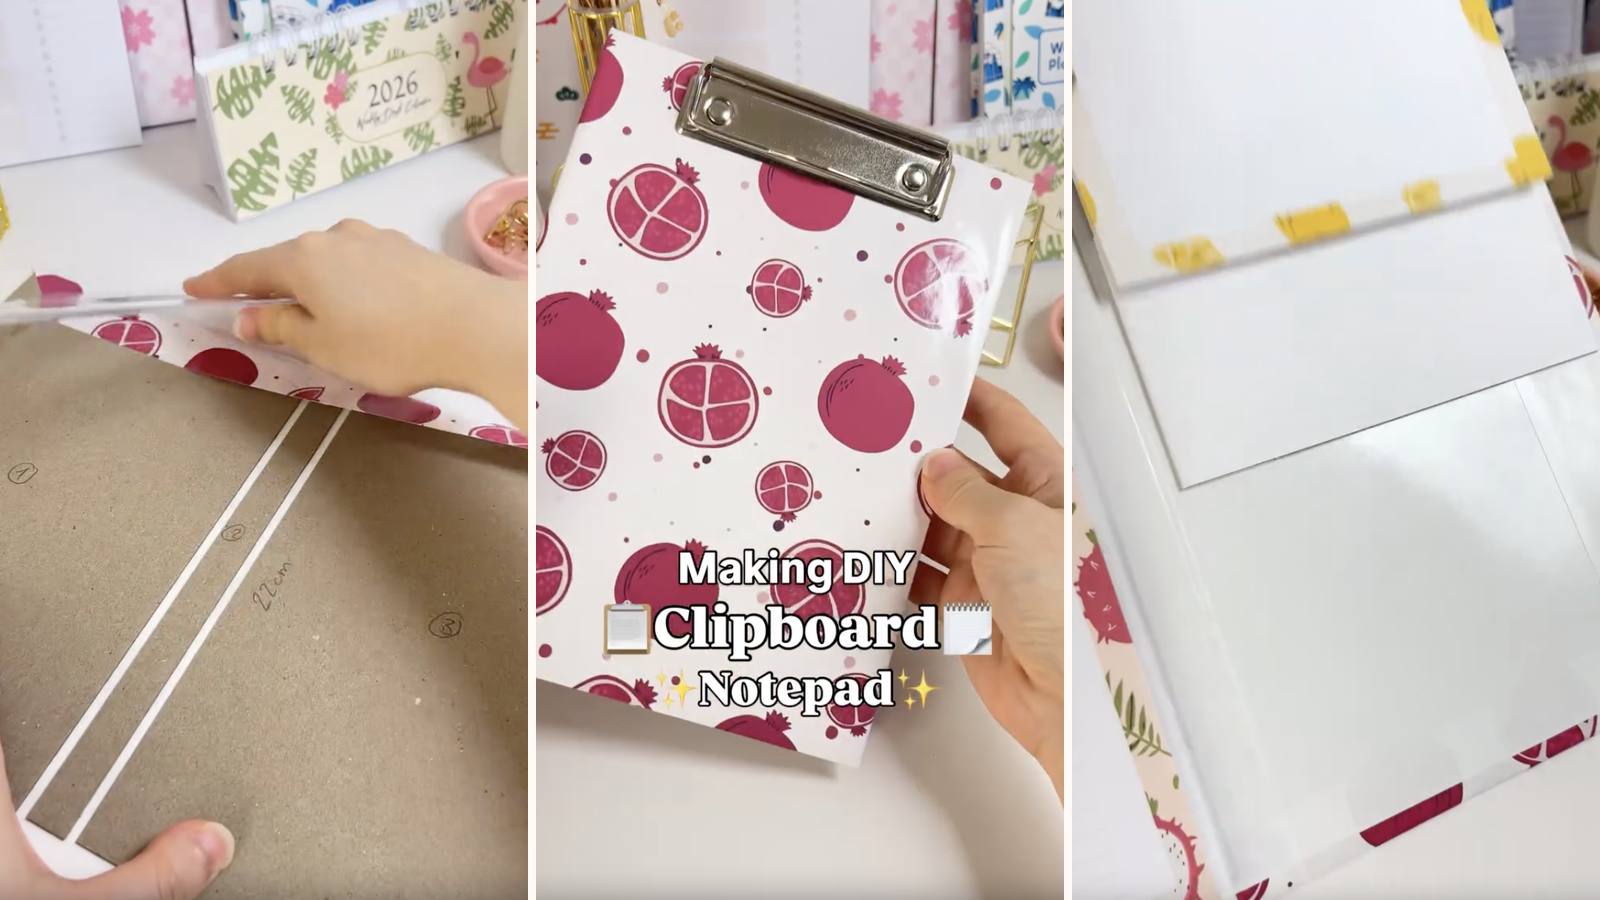
A folding cover with a proper clipboard clip on the outside and a refillable notepad on the inside. Loose paper, receipts and reference sheets go under the clip; writing happens on the pad. The clever part is the holder — two strips of cardstock taped in, so a finished pad slides out and a fresh one slides in without rebuilding anything.
These tutorials use Planify Pro, a drag-and-drop tool for designing printable planners and stationery. Building and editing is free — exporting a PDF needs a plan, from $9.99/month.
Design the pages
There's no marketplace listing for this one, so build the two designs yourself in Planify Pro: a notepad page (lined, dotted, to-do, whatever you'll actually use) and a cover design. Make the cover artwork edge to edge — the sides get folded round the chipboard, so anything near the border disappears.
Export and print
Both are the same route: Save/Export → Selected Page → Paper → A4 → Generate PDF.
Print the notepad pages at 100% — 60 pages per pad. Print two copies of the cover at 130% scale on white glossy sticker paper; the finished cover is wider than A4, so you'll be joining two sheets.
What You'll Need
 Chipboard Chipboard |
 Paper and Cardstock Paper and Cardstock |
 Glossy Sticker Paper Glossy Sticker Paper |
 PVA Glue PVA Glue |
 Hole Puncher Hole Puncher |
 Guillotine Paper Cutter Guillotine Paper Cutter |
You'll also need clipboard clips, double-sided tape, and an eyelet or grommet press to fix the clip down.
Instructions
1. Print and trim the notepad pages. 60 pages per pad. Make two while you're at it — the whole point of the build is having a spare ready.  |
2. Glue the top edge and dry 15 minutes. Clip the stack square first, then work PVA into the edge. Clips stay on for the full time.  |
3. Print two covers at 130% on sticker paper. You need both — one sheet isn't wide enough for a three-panel cover.  |
4. Trim the white edges, join the sheets, peel the backing. Overlap them down the middle so they read as one continuous piece, then take the backing off ready for the chipboard.  |
5. Cut three chipboard pieces. 1) 15.8 × 22 cm · 2) 1.5 × 22 cm · 3) 15.8 × 22 cm. The narrow one is the spine between the two panels.  |
6. Lay them onto the cover. Leave a gap either side of the spine strip — that clearance is what lets the cover close over the thickness of a pad.  |
7. Fold the sides in. Trim the corners at an angle first, then press every margin down along its full length.  |
8. Line the inside. Glossy sticker paper over the folded edges — this is also the surface the refill holder will be taped to, so keep it smooth.  |
9. Score the folds. A firm line each side of the spine strip so the cover hinges cleanly instead of cracking.  |
10. Mark where the clip goes. On the front panel. Hold the clip in place and mark through its holes — spacing varies between clips, so don't measure.  |
11. Punch two holes. On the marks, straight through. Keep them tight to the clip's fixings — a loose hole lets the clip rock.  |
12. Fit the clip with an eyelet press. Set both eyelets firmly. This joint takes force every time paper is loaded, so it's worth doing properly rather than with pliers.  |
13. Cut two cardstock strips. Any size, as long as they're wider than the notepad and about 7 cm tall. Slide them between the pad's backing board and its pages.  |
14. Turn the notepad over. The overhanging cardstock should stick out on both sides.  |
15. Fold the overhang in and tape it. Double-sided tape on the folded cardstock. You're building a sleeve around the pad, not sticking the pad down.  |
16. Press the whole thing into the cover. The tape bonds the cardstock to the inside face while the pad sits inside it.  |
17. Slide the notepad out. The cardstock stays behind as a holder. That's the refill mechanism — every future pad just slides into it.  |
Troubleshooting
The pad won't slide back into the holder. The cardstock was taped while wrapped too tightly. Build the sleeve around the actual pad, and don't pull the cardstock taut before taping.
The clip rocks or pulls loose. The punched holes are bigger than the eyelets. Move the clip slightly and punch fresh holes rather than trying to pack out the old ones.
The cover won't close over the pad. The gaps either side of the spine strip are too narrow for the pad's thickness. Set those gaps with the pad in hand, before the sticker goes down.
The two cover sheets show a visible join. Overlap them so the seam falls on the spine strip rather than the middle of a panel — it disappears in the fold.
Selling these
Two functions in one object is an easy listing to write: a clipboard for loose paper and a notepad for writing, in something that closes and goes in a bag. That's a specific problem, and specific beats pretty in search.
The refill holder is the commercial detail. Sell the clipboard once, then sell 60-page refill pads forever — and say so in the listing, because "refillable" is what justifies the price against a plastic clipboard.
The eyelet press is the only real barrier to batching this one. Once you have it, the per-unit work is the same as any wrapped-chipboard project.
See 20 profitable planner niches and how to price bundles for more.
Try these next
- DIY Standing Clipboard — a standing version
- DIY Clipboard Notebook — wire-bound with a clip
- How to Make Notepads at Home — for the refill pads
- DIY Custom Notepad — the quick PVA method
- Browse all DIY tutorials


