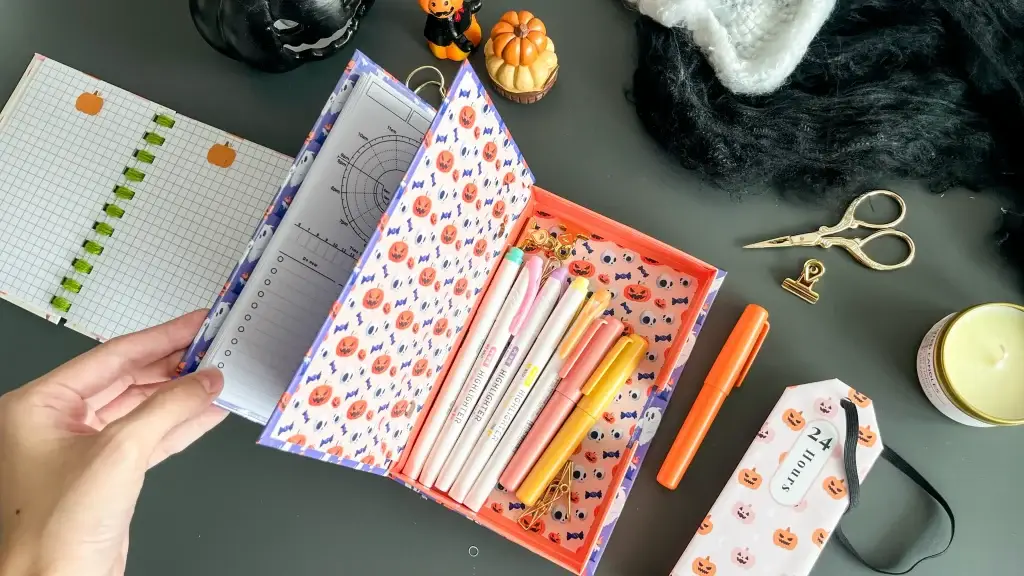
A planner box is a lidded chipboard case: a personal-size planner rides on rings inside the lid, and everything that goes with it — pens, sticker sheets, memo pads — sits in the tray underneath. The whole thing is 1.2mm chipboard and printed sticker paper, so re-skinning it for a new season costs nothing but a fresh set of sheets.
These tutorials use Planify Pro, a drag-and-drop tool for designing printable planners and stationery. Building and editing is free — exporting a PDF needs a plan, from $9.99/month.
Get the template
There is no ready-made planner box design in the library — the box itself is chipboard, and only the inserts and the cover sheets are printed. Start from any personal-size daily layout plus a plain page for the cover art in the Planify Pro template library, and adapt it to the panel sizes in Step 1 below.
Export and print
Export the inserts as a PDF and print them on A4 paper with double-sided printing turned on, then trim them down to personal size.
Export the cover artwork as a separate PDF and print it onto white glossy sticker paper at 120% scale. The enlargement is the point: the cover sheets need to come out slightly larger than the personal-size pages so there is enough sticker paper standing past each edge to fold around the chipboard. Print at that scale and nothing else — a printer left on "fit to page" or "shrink oversized pages" will pull the sheet in by a few percent, and the wrap will finish short of the board.
What You'll Need
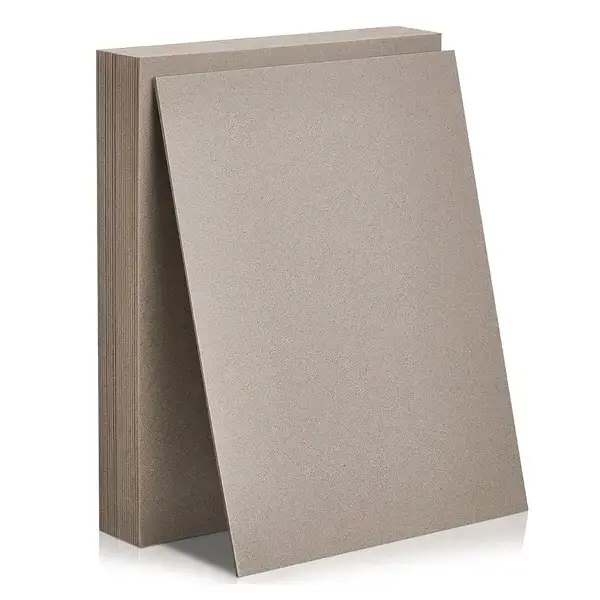 Chipboard 1.2mm Chipboard 1.2mm |
 White Glossy Sticker Paper White Glossy Sticker Paper |
 Cardstock for the Inserts Cardstock for the Inserts |
 Guillotine Paper Cutter Guillotine Paper Cutter |
Hole Puncher |
Plus a set of binder rings with screw posts in A6 or personal size, a craft knife and a metal ruler — chipboard this thick blunts scissors and cuts crooked with them — a cutting mat, and a needle.
A note on the chipboard: 1.2mm is what the measurements here assume. Thinner board makes a box that flexes when you lift it by the lid; much thicker and the wall strips stop taking a clean fold at the corners.
Instructions
1. Cut the chipboard to size. Three panels — front at 10.4 × 18.3cm, middle and bottom both at 12.2 × 18.3cm — plus five wall strips 2.5cm tall, measuring 7cm, 10.7cm, 17.1cm, 10.7cm and 7cm.  |
2. Pencil the measurements onto each piece as you cut it. The front panel is only 1.8cm narrower than the other two, and once eight grey offcuts are loose on the desk they are impossible to tell apart.  |
3. Wrap the first panel and trim the corners. Peel the backing, lay the board centrally on the sticker sheet, then fold each edge over onto the back. Cut the excess off each corner at an angle first, or four layers of paper pile up and the corner will never sit flat.  |
4. Repeat for the second panel. A second sheet, wrapped exactly the same way. Press from the middle outwards as you lay the board down so no air is trapped under it.  |
5. Do the third panel with the sticker on the outside. This one becomes the bottom of the box, so the printed face goes on the outer surface rather than being folded away behind the board.  |
6. Check the printed face before you commit. Once glossy sticker paper is down on chipboard it does not come up again without tearing, so hold the sheet against the board and confirm the pattern sits the way you want it.  |
7. You should end up with two finishes. One panel wrapped from behind, so the pattern shows only as a border around bare chipboard, and one covered face-on. The bordered one reads as a frame; the covered one is the outside of the box.  |
8. Mark out the wall strips. Set the lengths out along one long strip of chipboard rather than cutting five separate pieces — measuring from a single edge keeps them all exactly 2.5cm tall.  |
9. Cut the strips and check them against the panels. Hold each one along the edge it will sit on before you cover it. A wall a couple of millimetres too long pushes the corner open, and there is no fixing it once the sticker strip is wrapped over the joint.  |
10. Cut the orange sticker paper into 5cm strips. Double the height of the walls, so there is 2.5cm of paper left over to fold in on the far side. Work backing-side up against a metal ruler.  |
11. Keep the blade against the ruler for the whole length. One steady pass gives a clean edge; a wandering cut shows up as a wavy line down the side of the finished box.  |
12. Join the strips end to end. An A4 sheet is not long enough to reach round the box, so butt two strips together into one long piece before you start wrapping — a join made now hides at a corner, a join made mid-wrap lands wherever it lands.  |
13. Stand the panels on the strip and wrap. Lay the long orange strip sticky-side up on the desk, stand the boards on it in position, and run it round the outside — it holds the walls to the panels and covers the joints in one pass.  |
14. Build the walls up around the panel. Each covered strip goes on its own edge, orange side out. Check the box still sits square on the desk before the next strip goes down.  |
15. Make the hinge from another orange strip. One strip bridging the back wall and the lid panel is the whole hinge. Leave a small gap between the two boards before you press it down — with them butted tight, the strip has nothing to bend around and the lid will not close flat. |
16. Fold the white flaps in. Every strip was cut wider than the 2.5cm walls, so a margin stands proud along each edge. Fold it over onto the inside faces. This is what turns loose walls into a rigid frame. |
17. Drop the bottom panel in and line the inside. Set the third panel into the frame with its orange face showing, then run another piece of orange sticker paper round the inside so no raw chipboard edge is left exposed. |
18. Punch two ring holes in the middle panel. Punch the bare chipboard first, then stick the middle cover sheet down over the top and push a needle through from behind to find each hole again. Piercing the sticker rather than punching through it stops the printed face tearing around the ring. |
19. Fit the rings and load the planner. Push the ring posts through and close them with their screws from the back. Punch the cover page and the printed inserts to match, and clip the stack on. |
That is the box finished. The lid carries the planner on its rings, the tray underneath takes pens, sticker sheets and memo pads, and a new set of printed sheets re-skins the whole thing for the next season. |
Troubleshooting
The printed cover comes out too small for the board. The printer scaled it. Reprint at 120% with page scaling switched off, and put a ruler across the sheet before you peel anything.
The sticker paper bubbles or wrinkles as you wrap. Peel the backing away a few centimetres at a time and press outwards from the middle as you go, instead of stripping the whole sheet and dropping the board on.
The corners bulk up and refuse to lie flat. Too much paper is meeting at each one. Cut the corner off at an angle before folding the two flaps down, so they meet rather than overlap.
The rings do not line up with the holes in the inserts. Punch a single insert first and use it as the template for the rest of the stack and for the cover page, rather than measuring each one.
Selling these
A planner box sells on the same logic as a gift set: it is the container everything else goes in, so it makes the rest of your range look like a collection rather than a shelf of separate items.
It bundles better than almost anything else you can make. A box, a set of personal-size inserts, a sticker sheet and a memo pad is one listing at one price, and the box is the part that justifies it — buyers see an object, not a stack of paper.
Seasonal skins are where the repeat business is. The build never changes; only the printed sheets do. One box design carries a Halloween run, a Christmas run and a spring run with no new tooling and no new measurements.
Price for the assembly time as well as the materials. The chipboard and sticker paper come to very little, but wrapping and squaring a box carefully is the better part of an evening the first few times.
See 20 profitable planner niches and easy templates that sell for more product ideas.
Try these next
- DIY Tarot Planner Box — a deeper glued chipboard box, built around a card deck
- How to Make Your Own Planner Book — the ring planner that lives in the lid
- DIY Refillable Notepad — chipboard covers held on screw posts
- DIY Hardbound Planner — the same wrapping technique on a hard cover
- Book Binding Methods Compared
- Browse all DIY tutorials


