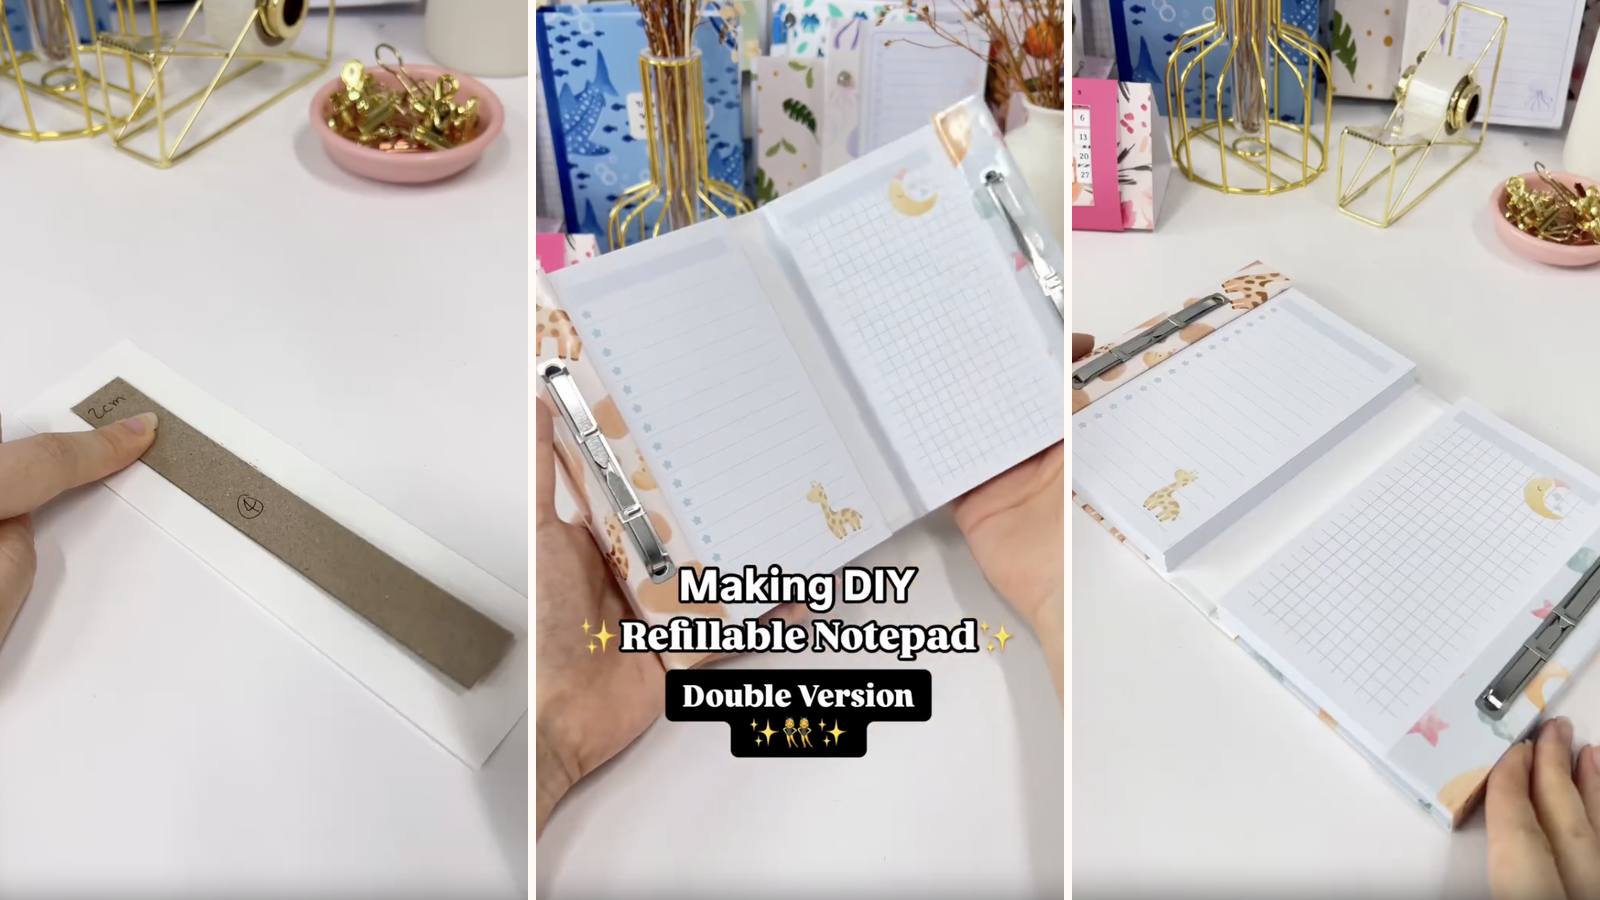
Two refillable notepads joined down the middle by a chipboard hinge, so the whole thing opens like a book with a pad on each side. Each section binds on its own pair of fasteners — undo one side, swap the pages, leave the other alone.
These tutorials use Planify Pro, a drag-and-drop tool for designing printable planners and stationery. Building and editing is free — exporting a PDF needs a plan, from $9.99/month.
Get the template
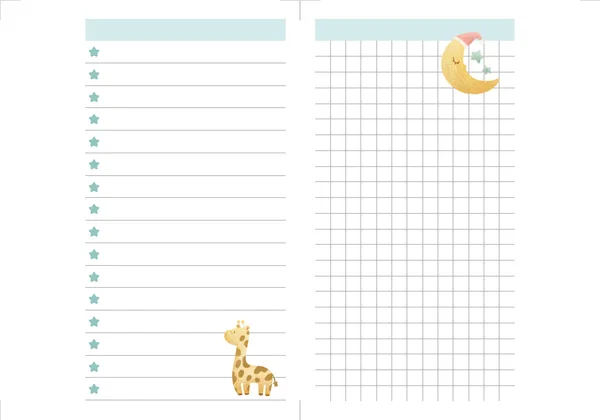
There are two files here — the Nursery Refillable Notepad DIY Cover and the Nursery Refillable Notepad DIY. Open either in Planify Pro to change the size, colours or artwork before printing, or print them exactly as they are.

Export and print
Covers: Save/Export → Selected Page → Paper → A5 → Generate PDF, printed on white glossy sticker paper.
Inserts: Save/Export → Selected Page → Paper → A4 → Generate PDF, printed on 80gsm paper at 100%.
The two sections can use completely different insert designs — that's rather the point.
What You'll Need
 Chipboard Chipboard |
 Paper 80gsm Paper 80gsm |
 Glossy Sticker Paper Glossy Sticker Paper |
 Fasteners Fasteners |
 Hole Punch Tool Hole Punch Tool |
 Guillotine Paper Cutter Guillotine Paper Cutter |
You'll also need double-sided tape for joining the two covers to the hinge panel.
Instructions
1. Print and cut both sets of inserts. Keep the two sets separate from here on.  |
2. Punch the inserts. Small batches, every one registered to the same edge. Keep one punched sheet as your template.  |
3. Print the cover templates. Two cover sheets on glossy sticker paper.  |
4. Trim the white edges off. Back to the printed area on both.  |
5. Cut seven chipboard pieces. 1) 2.3 × 15.2 · 2) 1 × 15.2 · 3) 10.7 × 15.2 · 4) 2 × 15.2 · 5) 10.7 × 15.2 · 6) 1 × 15.2 · 7) 2.3 × 15.2 cm. Pieces 1 and 7 are the fastener flaps, 2 and 6 are hinges, 3 and 5 the panels, and 4 is the central spine.  |
6. Lay pieces 1–3 on one cover, 5–7 on the other. In mirror order, so the two halves end up as a matched pair rather than two identical pieces.  |
7. Trim the excess sticker paper. Leave enough margin all round to fold over.  |
8. Trim the corners at 45°. Every corner, before any folding.  |
9. Fold the sides in. Press each margin down along its full length.  |
Both cover halves should look like this — three pieces each, wrapped as one unit.  |
10. Line the insides. White sticker paper over the folded edges on both covers.  |
11. Wrap the spine piece separately. Chipboard 4 onto its own piece of white sticker paper.  |
12. Fold only the top and bottom edges. Not the sides — the side overhangs stay loose, and they're what bond to each cover.  |
This is what the spine piece should look like — wrapped, with a free flap either side.  |
13. Tape the insides of both covers. Double-sided tape where the spine flaps will land.  |
14. Stick the first flap to the left cover. Line the spine up square before pressing — this join sets how the two halves sit relative to each other.  |
15. Stick the second flap to the right cover. Check the whole thing folds shut before you commit.  |
Both halves are now joined by the spine and hinge as one piece.  |
16. Line the insides again. Two more pieces of glossy sticker paper to cover the taped joins.  |
17. Score the covers. Along each hinge gap — there are four of them, and every one needs a line or the board cracks where it wants to.  |
18. Mark the fastener holes. Hold a punched insert in position on each flap and mark through it.  |
19. Punch the holes. A standard hole punch, on the marks.  |
A leather punch works too, but it isn't recommended — it tends to tear the sticker paper on the far side as it goes through.  |
20. Take two fasteners. One pair per section.  |
21. Push them through the cover, then load the pages. Cover first, then the whole insert stack — all of it, since adding pages later means undoing the section.  |
22. Fold the flap over. The narrow 2.3 cm piece closes over the top of the stack.  |
23. Close the fasteners. Snug, not forced.  |
24. Repeat on the other side. Same sequence, second set of inserts.  |
Two independent pads in one folding cover.  |
Troubleshooting
The two halves don't line up when closed. The spine flaps were taped on at a slight angle. Lay both covers flat and square against a straight edge before pressing the spine down.
The sticker paper tore around a hole. That's the leather punch. Use a standard hole punch — it shears rather than pushing through.
The cover won't fold shut. One of the four hinge gaps is too narrow, or a score line was missed. Count them: two per side.
The pages pull out of the fastener. The flap isn't closing over the stack properly, usually because the section is overfilled. Take a few sheets out.
Selling these
This is the most involved refillable build in the library, and the finished object looks it. Seven chipboard pieces and two independent binding points read as craftsmanship in a photograph.
Sell it on the pairing rather than the mechanism — "work and personal", "meals and shopping", "notes and to-do". Nobody searches for fastener binding; they search for the thing it does.
And the refill packs are the ongoing sale. Two sections means two pads to replace, which doubles the follow-on from a single customer.
See 20 profitable planner niches and how to price bundles for more.


