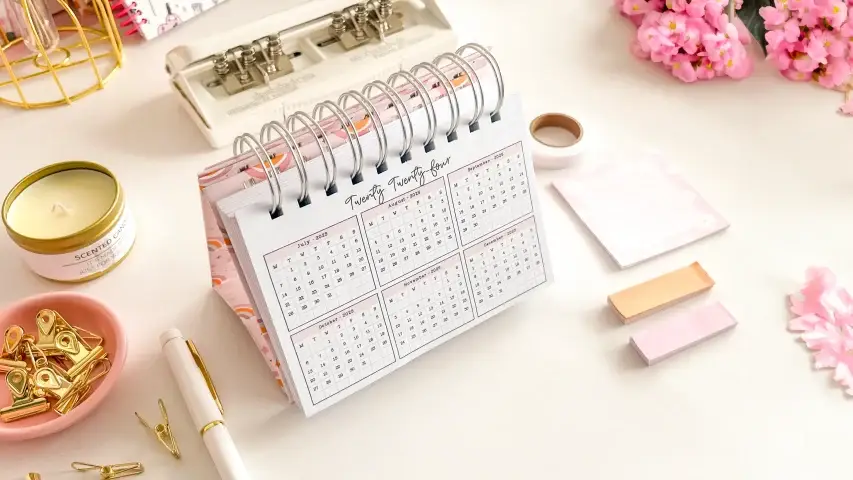
A daily desk planner is a small top-bound pad — A6 landscape, a page for each day — that lives open beside the keyboard instead of being carried around. The clever part is the back cover: four sheets of chipboard stacked into one slab, so the pad stays rigid enough to write on wherever it happens to be sitting and holds its shape through a full year of pages.
These tutorials use Planify Pro, a drag-and-drop tool for designing printable planners and stationery. Building and editing is free — exporting a PDF needs a plan, from $9.99/month.
Get the template
Open it in Planify Pro to change the size, dates, colours or layout before printing — or print it exactly as it is.
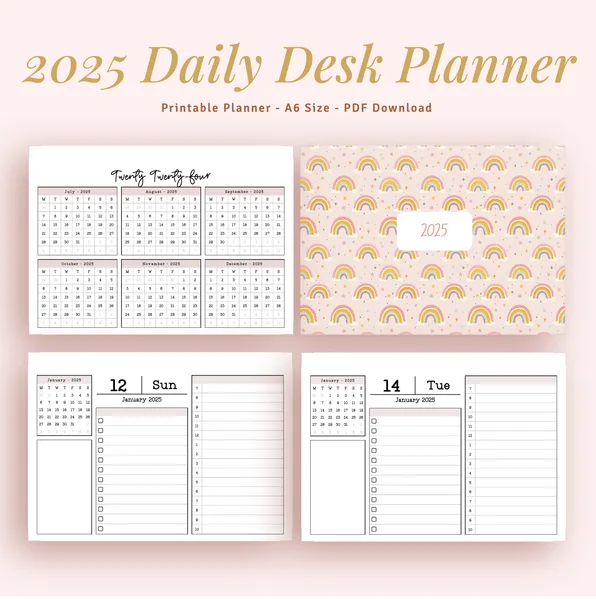
Export and print
Export the planner as a PDF at A4 or US Letter. A6 landscape pages sit more than one to a sheet, so what you want out of the export is a page order that leaves the days running in sequence once the sheets are cut apart and the stack is collated. Check that order in the PDF before you print — getting it wrong on a 186-page planner is a lot of paper to reprint.
Print at 100% — actual size, with any "fit to page" or "shrink to printable area" scaling switched off. Scaling matters more here than on a single-sheet project, because both the trim to A6 and the punch position are measured off the printed page: a page that came out 97% of size will trim short and punch too close to the edge.
Print double-sided, and run one test sheet before the whole year. Check that the reverse side lands the right way up relative to the top edge — that top edge is where the wire goes, so an upside-down back means every second day reads the wrong way in the finished pad.
What You'll Need
 |  |  |
 |  |  |
Plus a bone folder for the cover edges, and a sheet or two of plain white sticker paper to line the inside faces.
A note on the wire. The original build used a wire between 20mm and 30mm in diameter. Match it to the finished thickness of the stack — inserts plus one front board plus the four-board back — and size up rather than down if you are between two.
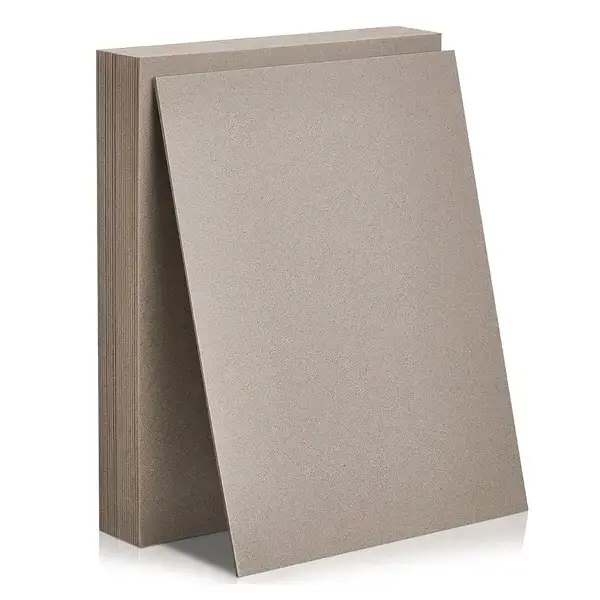
A note on the chipboard. Five pieces, all cut to the same footprint as the trimmed inserts: one for the front, four stacked for the back. The four-layer back is what makes this a desk planner rather than a notepad, so do not be tempted to save a board.
Instructions
1. Print the day pages double-sided. Test one sheet first and check the second side sits the right way up before committing the rest of the ream.  |
2. Trim the sheets down to A6. Cut a few at a time rather than the whole pile — a deep stack shifts under the blade and the pages stop matching each other.  |
3. Punch the holes along the top edge. This planner binds at the top, so the holes run along the long edge of the landscape page. Punch in small batches against the same stop, or the holes will wander by a millimetre or two across the stack and the wire will not thread.  |
4. Cut five pieces of chipboard. Four for the back, one for the front, all cut to the same footprint as the trimmed inserts so nothing overhangs.  |
5. Keep the four back boards together as one unit. They are covered and punched as a single slab, not as four separate covers — that stack is the rigid base the finished planner is written on.  |
6. Overlap two sheets of sticker paper in the middle. One sheet on its own is not wide enough to wrap a board and still leave a turn-in on every side, and an overlapped join in the middle is hidden once the board sits on top.  |
7. Peel the backing and set the boards down on the adhesive. Line them up before they touch — sticker paper grabs on contact, and lifting a board to reposition it usually takes the printed surface with it.  |
8. Trim the excess and fold the sides in. Leave enough overhang to turn round onto the back of the board; trim the corners off first so the folded edges meet flat instead of bunching.  |
9. Cut white sticker paper for the inside faces. Slightly smaller than the board, so it covers the folded-in turn-ins without running over the finished outside edge.  |
10. Apply the white lining to the inside. Lay one edge down first and smooth across, rather than dropping the whole sheet on at once — that is how bubbles get trapped.  |
11. Work the edges with a bone folder. Running the folder along every fold pushes the adhesive down into the corner and gives a crisp edge instead of a soft rounded one — this is most of the difference between a homemade cover and a bought one.  |
12. Repeat the whole sequence for the front cover. Same steps on the single board: wrap, trim, fold, line, burnish. Do both covers in one session so the sticker paper comes from the same sheet and matches.  |
13. Punch the front cover. Hold it against the same stop you used for the inserts so the holes land in the same place — a cover punched even slightly off will bind stiffly and stop the pages turning cleanly.  |
14. Punch the stacked back cover. Four boards is far more than a punch will take in one bite, so go through it on its own and take it slowly.  |
15. Thread the wire through everything and close it. Front cover, inserts and back cover all onto the same wire, in order, before it goes into the machine — once the loops are squeezed shut they do not open again.  |
16. Close the rings and flip the back cover round. The thick back swings behind the pad and becomes its base, and the finished planner sits open on the desk at one page a day.  |
Troubleshooting
The wire will not thread through every sheet. The holes have drifted. Punching a whole year of inserts is a long job and it is easy to stop registering each batch against the same stop halfway through — repunching the offending sheets is quicker than fighting the wire.
Bubbles or creases under the sticker paper. The sheet went down flat all at once. Peel it back if it is still fresh, then relay it from one edge, smoothing as you go. On the covers, the bone folder will pull most small ripples out towards the turn-in.
The pages are trimmed unevenly. Too many sheets under the blade at once. A guillotine pushes the middle of a deep stack sideways as it cuts, so the top sheet and the bottom sheet end up different sizes.
Every second page prints upside down. A double-sided flip setting, not the file. Change the flip edge on the test sheet and reprint one page before running the rest.
The finished pad rocks on the desk. Usually a turn-in that has bunched at one corner of the back cover, leaving a lump under the board. Open the lining, trim the doubled-up flap back, and relay it.
Selling these
A dated desk planner is one of the easier handmade items to sell, because the buyer knows exactly when it becomes useless to you and useful to them. Listings go out in the autumn for the year ahead, and the format itself does the explaining — nobody needs a description to understand a page-a-day pad that stands on a desk.
It bundles well too. The same covered-board technique makes a matching notepad or a pen tray wrap, and a desk set built from one sheet of sticker paper reads as a collection rather than three separate products.
On price: the materials are cheap, but the build is not fast — punching and covering a page-a-day planner takes real time, and a lot of it is unskippable. Price for the hours, not for the board, and consider selling the printable template alongside the finished object for people who would rather bind their own.
More on this in 20 profitable planner niches and planner bundles that boost sales.
Try these next
DIY Weekly Planner: Wire-Bound with Magnetic Closure — the weekly companion to this one
DIY Hardbound Planner: 30-Month Hard Cover Planner Book — same covers, hardbound instead
DIY Bill Planner: 12-Month Bill Organizer with Wire Binding — another wire-bound build


